Quick Summary: Optimizing Your Rig for Speed
To maintain creative flow while using a smartphone cage, follow these three ergonomic "golden rules":
- The 60% Sweet Spot: Keep all critical touch controls (Record, Focus) within the central 60% of the screen's long edge.
- The One-Second Rule: You should be able to hit "Record" blindly within one second of reaching.
- The Lever Principle: Heavy accessories belong close to the handle. Doubling the distance of a light from your grip doubles the strain on your wrist, regardless of the light's weight.
The Ergonomics of Reach: Defining the 'Sweet Spot'
In solo content creation, the difference between a successful take and a missed moment often comes down to a fraction of a second. We often see a recurring frustration in the workshop: a beautifully rigged cage that becomes a liability because a cold shoe adapter or a microphone cable obstructs the screen. When your thumb has to contort around a light to hit the record button, you aren't just losing comfort—you are losing creative control.
The 60% Rule and the Thumb-Arc
In mobile UI design, the "thumb-arc" describes the natural sweep of a user's thumb. However, an industrial cage constrains this movement. Based on our testing with various rig configurations, we have identified a critical "Sweet Spot" for touch interaction:
- Zone: A rectangle covering approximately the central 60% of the screen's longer edge.
- Constraint: For a standard smartphone, this equates to roughly 36mm–40mm of reliable vertical reach.
- Clearance: Maintain a minimum of 5mm clearance around physical power and volume buttons to allow for tactile thumb-pad actuation without "pinching" the device.
The "One-Second Blind Reach" Test
We use this simple heuristic to validate every new build. If you can't pass this, your layout is costing you shots:
- Setup: Assemble your full rig (mics, lights, cables).
- Action: Close your eyes and hold the rig in your natural shooting grip.
- Goal: Attempt to locate and "press" the record button.
- Pass/Fail: Your thumb should find the target within one second. If you hit a cable or an accessory first, move the obstruction.
While mobile UI standards focus on dexterity, industrial standards like ISO 1222:2010 and safety protocols like ISO 13857:2019 remind us that control placement is fundamentally about "reach envelopes." In a rigged environment, we must balance thumb access with structural stability.
Biomechanical Analysis: Why Weight is Only Half the Story
One of the most common misconceptions is that "lighter is always better." While reducing mass helps, the distribution of that mass—the leverage—is what determines how quickly your wrist will fatigue.
The Wrist Torque Calculation
To understand the physical cost of a rig, we use a basic biomechanical formula: Torque ($\tau$) = Mass ($m$) $\times$ Gravity ($g$) $\times$ Lever Arm ($L$)
Note: Gravity ($g$) is a constant 9.81 $m/s^2$. The Lever Arm ($L$) is the horizontal distance from your wrist to the rig's Center of Gravity (CoG).
Consider a 2.8kg cinema-style phone rig where the CoG is 0.35m away from the wrist. This generates approximately $9.61 N\cdot m$ of torque. For many users, this load represents 60-80% of their Maximum Voluntary Contraction (MVC)—the maximum force a muscle can generate. Holding this for even a few minutes leads to muscle tremors that ruin shot stability.
Scenario Modeling: The Petite Creator Challenge
We modeled a scenario for a creator with smaller hands (approx. 155cm height) to see how standard rigs perform.
Biomechanical Benchmarks (Heuristics):
- Wrist MVC: We use 7.5 N·m as a conservative baseline for female wrist strength (based on standard anthropometric datasets; individual results vary).
- Fatigue Threshold: Generally accepted as 15% of MVC for sustained, static loading without rapid fatigue.
The Calculation Chain: For a 0.8kg handheld rig with a 0.15m lever arm:
- Force: $0.8 kg \times 9.81 m/s^2 = 7.85 N$
- Torque: $7.85 N \times 0.15 m = 1.18 N\cdot m$
- Comparison: The 15% Fatigue Threshold is $7.5 \times 0.15 = 1.13 N\cdot m$.
| Parameter | Value | Unit | Rationale |
|---|---|---|---|
| Rig Mass | 0.8 | kg | Phone + Cage + Small Mic + Light |
| Lever Arm (CoG) | 0.15 | m | Distance from grip to center of gravity |
| Wrist MVC Limit | 7.5 | N·m | Estimated average female strength baseline |
| Fatigue Threshold | 1.13 | N·m | 15% of MVC (sustained load limit) |
| Resulting Torque | 1.18 | N·m | Exceeds sustained fatigue limit |
Conclusion: For this persona, the torque (1.18) exceeds the sustainable limit (1.13). We recommend keeping the CoG distance under 0.14m to maintain a sustainable workflow.
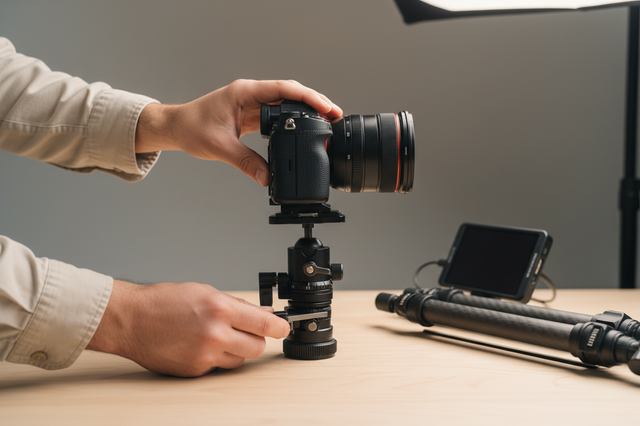
Strategic Accessory Placement: Solving the 'Cluttered Cage' Problem
The placement of your handle is the foundation of your ergonomic system. In our experience, handle mounting is about functional separation rather than just handedness.
- The Stabilizer (Non-dominant hand): Better suited for "brute force" stabilization.
- The Operator (Dominant hand): Possesses higher fine motor skills for screen taps and focus pulls.
Pro Tip: Mount your primary handle on the side opposite your dominant hand. If you are right-handed, mount the handle on the left. This frees your right thumb to access the 60% sweet spot without compromising the rig's stability.
The "Zero-Play" Interface
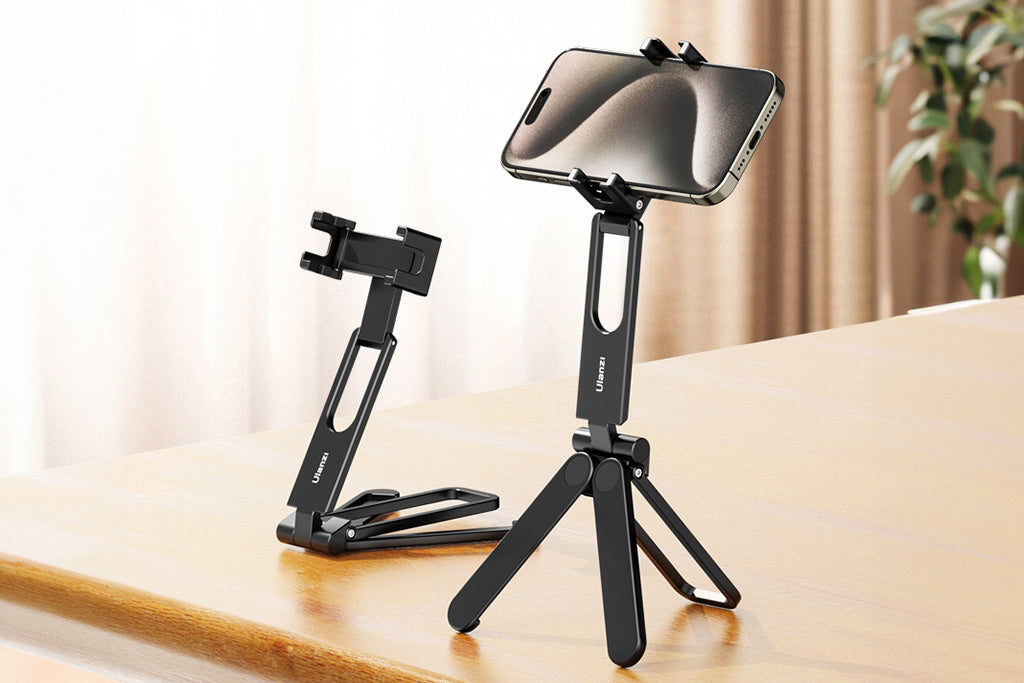
When selecting mounting interfaces, prioritize rigidity. Interfaces like the Arca-Swiss Dovetail standard are essential for preventing the "micro-wobble" common in plastic components. We recommend precision-machined Aluminum Alloy (6061 or 7075). While carbon fiber is great for tripods, aluminum’s machining tolerances provide a "zero-play" connection that ensures the rig doesn't shift when you tap the screen.
Managing the "Thermal Bridge"
Aluminum acts as a thermal bridge. In extreme cold, it conducts heat away from your camera and battery. Expert Tip: Attach your metal plates and cages indoors before shooting. This minimizes "metal-to-skin" shock and can slightly extend battery life by reducing the initial rate of cooling.
Workflow ROI: The Hidden Cost of Inefficient Rigging
As noted in The 2026 Creator Infrastructure Report, efficiency drives the shift toward "ready-to-shoot" toolchains.
The Annual Efficiency Gain:
- Traditional Thread Mounting (1/4"-20): ~40 seconds per swap.
- Quick-Release Modularity: ~3 seconds per swap.
If a professional creator performs 60 swaps per shoot across 80 shoots per year, moving to a quick-release system saves approximately 49 hours annually. At a professional rate of $120/hr, this represents a value of over $5,900.
Pre-Shoot Safety & Compliance Checklist
To ensure your system is as reliable as it is ergonomic, perform this tactile and audible check before every "Action" call:
- [ ] Audible "Click": Did you hear the lock engage when sliding the accessory into the mount?
- [ ] The "Tug Test": Physically pull on the accessory to ensure the locking pin is fully seated.
- [ ] Visual Confirmation: Check the locking indicator (often a silver/orange pin) to confirm the secondary lock is active.
- [ ] Strain Relief: Are heavy HDMI or USB-C cables secured? A swinging cable creates unwanted torque that can loosen mounts over time.
- [ ] Battery Logistics: If traveling by air, ensure all external batteries comply with IATA Lithium Battery Guidance.
Method & Assumptions (Modeling Transparency)
The data presented is derived from deterministic biomechanical modeling based on ISO 11228-3 standards.
- Key Constants: Gravity ($g$) = 9.81 $m/s^2$.
- Boundary Conditions: Assumes a horizontal arm position (worst-case torque). It does not account for dynamic forces during rapid movement.
- Human Factors: MVC limits (7.5 N·m) are estimates for a 5th percentile female demographic. Male users typically have higher MVC limits (9-12 N·m), which may shift the fatigue risk from "Moderate" to "Low" for the same payload.
Disclaimer: This article is for informational purposes only and does not constitute professional medical or safety advice. Ergonomic needs vary; users with pre-existing musculoskeletal conditions should consult a physiotherapist. Always refer to equipment manuals for official load ratings.