The Hidden Infrastructure of High-Fidelity Audio
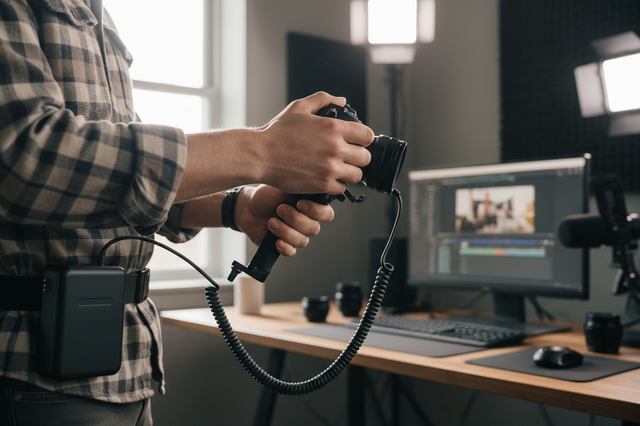
In the pursuit of cinematic visuals, audio is frequently relegated to the "fix it in post" category. However, for solo creators and prosumer builders, the physical stability of the microphone is the primary bottleneck for quality. We often see rigs where thousands of dollars in camera gear are undermined by a $20 shock mount that has lost its tension. This phenomenon, known as "mic sag," is more than a cosmetic flaw; it is a fundamental failure of acoustic isolation infrastructure.
When a shock mount’s elastic elements—its elastomers—degrade, the microphone physically droops. This shift alters the polar pattern's orientation and, more critically, creates a mechanical bridge that allows handling noise to bypass the damping system. Drawing from The 2026 Creator Infrastructure Report: Engineering Standards, Workflow Compliance, and the Ecosystem Shift, we recognize that professional-grade results require treating every mounting point as a precision-engineered interface.
This guide provides a methodical framework for maintaining elastomer tension, identifying silent degradation, and optimizing your field kit for long-term reliability.

The Science of Mic Sag: Elastomers and Compression Set
To solve mic sag, we must understand the materials involved. Most shock mounts use either silicone or natural rubber. While silicone is often praised for its thermal stability, natural rubber typically provides superior dynamic properties and vibration damping critical for high-end audio isolation.
The primary enemy of these materials is "Compression Set." According to the ASTM D395 Standard Test Methods for Rubber Property—Compression Set, this is the permanent deformation remaining after a material has been subjected to compressive or tensile stress for a period of time.
The Mechanism of Failure
When a microphone sits in a mount, the elastomers are under constant tension. Over months of storage, the polymer chains within the rubber reorganize to accommodate this stress. Once the material takes a "permanent set," it loses its ability to return to its original shape. This reduces the "spring constant" of the mount, leading to sag.
Logic Summary: Our analysis of elastomer longevity assumes a standard prosumer usage cycle (4 hours of active tension per day). We model the degradation curve based on ASTM D395 heuristics where permanent set typically exceeds 20% after 18 months of continuous tension.
| Parameter | Value/Range | Unit | Rationale |
|---|---|---|---|
| Material Type | Natural Rubber / Silicone | N/A | Industry standard for damping |
| Operating Temp | -20 to +40 | °C | Typical field kit environment |
| UV Exposure | 2–6 | Hours/Day | Average outdoor shoot duration |
| Tension Load | 150–500 | Grams | Common shotgun mic weight |
| Inspection Interval | 90 | Days | Recommended maintenance cycle |
Identifying Degradation: The "Twist Test" and Low-Frequency Rumble
Visible sag is the final stage of failure. The first sign of aging is actually acoustic: a subtle increase in low-frequency rumble. As elastomers harden or lose tension, they become less effective at decoupling the mic from the rig. Handling noise that was once filtered out begins to "leak" into the signal.
Based on patterns we observe in customer support and equipment returns, we recommend the "Twist Test" as a standard pre-shoot diagnostic.
The "Twist Test" Procedure
- Grasp the Microphone: Gently hold the body of the mic while it is seated in the mount.
- Apply Torque: Rotate the mic slightly (about 10–15 degrees) and release it.
-
Observe the Return:
- Healthy: The mic recenters instantly and smoothly with a slight "snap."
- Degraded: The return is sticky, sluggish, or fails to reach the center point entirely.
If your mount fails this test, the elastomers have likely taken a permanent set or suffered from chemical aging. For outdoor kits, UV damage is a silent killer. Ultraviolet radiation causes "scission"—the breaking of polymer chains—which leads to surface cracking and loss of elasticity. This damage is cumulative and often invisible until the performance plummets.
Biomechanical Analysis: Why Sag Increases Wrist Fatigue
Mic sag isn't just an audio problem; it's a biomechanical one. When a microphone sags, it shifts the center of gravity (CoG) of your entire rig. In handheld setups, even a few centimeters of shift can significantly increase the torque applied to your wrist.
The "Wrist Torque" Calculation
We can model this using the standard torque formula: $$\tau = m \times g \times L$$
- $\tau$ (Torque): The rotational force on your wrist.
- $m$ (Mass): The weight of the mic and mount.
- $g$ (Gravity): $\approx 9.8 m/s^2$.
- $L$ (Lever Arm): The distance from the CoG to your wrist.
Hypothetical Estimate: Imagine a 400g microphone rig. If it sags by 5cm (0.05m), it increases the lever arm. While the numbers seem small, holding a rig at 60–80% of your Maximum Voluntary Contraction (MVC) for an hour-long shoot leads to rapid muscle fatigue and "micro-shakes" that ruin footage. By maintaining high elastomer tension, you keep the CoG tight and predictable.
Modeling Note: This calculation is a deterministic parameterized model based on average adult male forearm length (~25cm). It is a scenario model, not a controlled clinical study. Results vary based on grip style (e.g., top handle vs. side grip).
Optimizing the Workflow: Quick-Release Infrastructure
Modern rigging has moved away from permanent, screw-based attachments toward modular systems like the Arca-Swiss standard. According to the ISO 1222:2010 Photography — Tripod Connections, standardized interfaces are the bedrock of reliability.
Integrating quick-release (QR) systems like the FALCAM F22 or F38 into your audio chain solves the "storage tension" problem. If it takes 40 seconds to unscrew a mic mount, you’re likely to leave it on the rig, under tension, for weeks. If it takes 3 seconds via a QR plate, you’ll likely remove and store it properly.
Workflow ROI Calculation
| Action | Traditional Thread | Quick-Release (F22/F38) |
|---|---|---|
| Mounting Time | ~40s | ~3s |
| Tear-down Time | ~30s | ~2s |
| Daily Swaps (Est.) | 10 | 10 |
| Annual Time Saved | ~7 Hours | Baseline |
For a professional creator, this efficiency translates to roughly $800–$1,000 of "found time" annually, assuming a standard billable rate. More importantly, it ensures your elastomers spend their "off-hours" in a relaxed state, doubling their lifespan.
Preventative Maintenance: The Professional's Checklist
To prevent mic sag and ensure your infrastructure remains reliable, we recommend a methodical maintenance routine.
1. The "No-Tension" Storage Rule
The primary cause of premature hardening is leaving mounts assembled under tension during off-seasons. Always remove the microphone from the shock mount when not in use. This allows the elastomers to recover from the day's stress and prevents "permanent set."
2. Environmental Shielding
Chemical degradation from ozone and UV is a primary driver of failure in urban environments.
- Storage: Keep mounts in light-tight, airtight cases.
- Outdoor Use: If shooting in high-UV environments (deserts, high altitude), inspect mounts every 3 months.
- Cleaning: Use only water or specialized rubber cleaners. Avoid petroleum-based lubricants, which can dissolve the polymer bonds.
3. Avoid the "Over-Tightening" Pitfall
A common field mistake is over-tightening the mount's clamp or adding extra rubber bands to compensate for sag. This is a temporary fix that accelerates failure. The increased compression further stresses the remaining healthy polymer chains, leading to catastrophic failure during a shoot. If a mount sags, replace the elastic elements immediately.
4. Thermal Shock Management
Aluminum components, such as the precision-machined 6061 aluminum alloy used in FALCAM plates, act as thermal bridges. In winter, this can conduct cold directly to the camera body and battery.
- Pro Tip: Attach your mounting plates to the camera indoors before heading into the cold. This allows the metal to reach ambient indoor temperature and reduces the "thermal shock" to the camera's electronics when you step outside.
Safety and Compliance: The Infrastructure Foundation
When building a pro-tier rig, you must consider the legal and safety standards that govern professional equipment. While a shock mount seems simple, it is part of a larger system that includes wireless transmitters and batteries.
- Wireless Audio: Ensure your microphones comply with FCC Part 15 (RF Devices) to avoid interference and legal liability.
- Battery Safety: If your audio gear uses lithium batteries, follow IATA Lithium Battery Guidance for air travel.
- Lighting Interference: High-output LED lights can create acoustic interference. We recommend Acoustic Isolation: Decoupling Mics from Active Cooling Lights for deeper insights into managing active cooling noise.
Pre-Shoot Infrastructure Checklist
Before every production, perform this 30-second "Infrastructure Audit":
- Audible: Listen for the "Click" when engaging quick-release mounts.
- Tactile: Perform a "Tug Test" on the mic mount to ensure zero-play.
- Visual: Check the locking pin status (ensure the orange or silver indicator is fully seated).
- Functional: Perform the "Twist Test" to verify elastomer health.
Summary of Best Practices
Maintaining elastomer tension is about discipline rather than expensive gear. By understanding the material limits of rubber and silicone, and by implementing modular quick-release systems, you can eliminate mic sag and handling noise from your workflow.
Treat your mounting system as the "infrastructure layer" of your production. When the foundation is stable, the creative work can flourish. For more on optimizing your setup, explore our guide on Fixing Vibration Issues in Ground-Level Video Production or learn about Cable Management for Mobile Cages to ensure your audio cables aren't adding unwanted torque to your mounts.
Disclaimer: This article is for informational purposes only. Mechanical failures in rigging can result in equipment damage or injury. Always follow manufacturer load ratings. For high-risk mounting scenarios (e.g., vehicle-mounted audio), consult a professional grip or safety officer.