The Cold Reality of Fluid Motion Control
You are on a high-altitude ridge, the temperature has plummeted to -15°C, and the light is hitting the peak exactly as you envisioned. You reach for the pan handle to track a subject, but the fluid head—usually buttery smooth—feels like it is filled with cold molasses. You apply more pressure, the movement stutters, and the shot is ruined.
This is the "sluggish drag" phenomenon. For outdoor and travel cinematographers, it is more than an annoyance; it is a technical failure that compromises professional results. At its core, this is a problem of material science and fluid dynamics. Understanding why fluid drag changes in cold weather is the first step toward building a gear system that remains reliable when the stakes are highest.
In this guide, we will analyze the mechanical bottlenecks of winter cinematography, perform a biomechanical audit of the "wrist torque" generated by stiff gear, and provide a field-proven survival workflow to keep your motion control fluid.
The Physics of Sluggishness: Viscosity and Lubrication
The "fluid" in a fluid head is typically a high-viscosity oil or grease sandwiched between internal plates. This fluid creates resistance, which we experience as "drag." According to the ISO 1222:2010 Photography — Tripod Connections, standard screw connections provide the interface, but the internal damping mechanism is where the performance lives or dies.
Mineral vs. Synthetic Damping Fluids
Most entry-level or mid-range fluid heads utilize mineral-based oils. Mineral oils have a high viscosity index, meaning their thickness changes drastically with temperature. As the mercury drops, the molecules in mineral oil slow down and "clump," exponentially increasing internal friction.
Based on our observations from repair bench data and customer support patterns, we have identified that synthetic damping fluids (specifically those formulated to ISO VG 10 standards or similar) maintain a significantly more stable viscosity profile. Synthetic lubricants are engineered at the molecular level to resist the "thickening" effect of sub-zero temperatures.
Logic Summary: Our analysis of cold-weather performance assumes a standard linear temperature drop. While mineral oils show a parabolic increase in resistance below 0°C, synthetic fluids typically follow a more manageable linear curve, preserving ~70% of their "room temperature" feel even in extreme cold.
The "Stiction" Factor and Condensation
A common field mistake is moving a tripod from a warm vehicle directly into a sub-zero environment. This creates a "Thermal Shock" scenario. As the metal components contract at different rates, the internal tolerances of the fluid head tighten. Furthermore, any moisture trapped inside the fluid chamber can freeze, leading to "stiction"—the static friction that must be overcome to start a movement. This results in the "jerky" start that ruins cinematic pans.

The Carbon Fiber Thermal Bottleneck
In travel cinematography, carbon fiber is the gold standard for tripod legs due to its high strength-to-weight ratio and vibration-damping properties. However, in extreme cold, carbon fiber introduces a unique thermal challenge.
Carbon fiber has significantly lower thermal conductivity compared to aluminum. While this is a benefit for the operator (the legs don't feel as "ice-cold" to the touch), it means the tripod legs act as an insulator. The fluid head, usually made of aluminum alloy, becomes the primary thermal bottleneck. It loses heat rapidly to the environment but receives no "thermal buffering" from the legs.
The Aluminum Thermal Bridge
It is a common misconception that all "high-end" components should be carbon fiber. As noted in our engineering standards, precision-machined components like the FALCAM Quick Release plates are crafted from Aluminum Alloy (6061 or 7075), not carbon fiber. This is intentional. Aluminum provides the necessary rigidity and machining tolerances required for a "zero-play" connection.
However, in winter, these aluminum plates act as a "thermal bridge." They efficiently conduct cold from the tripod head directly into the camera body and, more critically, the battery compartment. This can lead to premature battery failure.
Field Tip: We recommend attaching your aluminum QR plates to your camera indoors or in a warm environment before heading out. This minimizes the initial "metal-to-skin" shock and slows the rate of cooling for the camera's baseplate.
Biomechanical Impact: The "Wrist Torque" Analysis
When fluid drag becomes stiff, the operator must exert more force to initiate movement. This isn't just tiring; it's a biomechanical risk. Weight isn't the only enemy in the field; leverage is.
The Torque Formula
We can model the strain on a cinematographer's wrist using the following calculation: Torque ($\tau$) = Mass ($m$) $\times$ Gravity ($g$) $\times$ Lever Arm ($L$)
Consider a standard cinema rig:
- Mass ($m$): 2.8kg
- Gravity ($g$): 9.8 m/s²
- Lever Arm ($L$): 0.35m (distance from the wrist to the center of gravity of the rig)
Result: $\tau \approx 9.61 N\cdot m$
For an average adult male, the Maximum Voluntary Contraction (MVC) for wrist extension is typically between 12 and 15 N·m. A load of 9.61 N·m represents 60-80% of the MVC. When you add the "breakout force" required to move a frozen fluid head, you are pushing your muscles to their absolute limit. This leads to muscle tremors, which are magnified by long focal lengths, resulting in shaky footage.
Logic Summary: This biomechanical model is a heuristic used to illustrate why "fighting" your gear is a losing battle. By reducing the lever arm (e.g., using modular F22 mounts to bring accessories closer to the center of gravity), you can significantly lower the torque required, even if the fluid head is stiff.
Field Survival Tactics for Extreme Cold
To maintain professional motion control in the field, we recommend a methodical approach to gear management.
1. Gradual Acclimatization
Never deploy a "warm" tripod immediately into the snow. The temperature differential causes instant condensation inside the fluid chambers. Instead, allow your gear to acclimate gradually inside its carrying case. This "slow soak" allows the internal components to contract uniformly.
2. The "Pre-Shoot Baseline" Test
Before leaving your base camp or vehicle, perform a full range of motion test. Adjust the drag settings to their loosest position and pan/tilt the head 10 times in each direction. This "breaks in" the lubricant and establishes a baseline feel. Attempting to make fine adjustments with heavy, stiff gloves in sub-zero winds is nearly impossible.
3. Insulating the Head
While carbon fiber legs protect your hands, the fluid head remains exposed. Using a neoprene sleeve or even a thermal wrap around the fluid head can add critical minutes of consistent operation. By slowing the rate of heat loss, you keep the internal oil within its optimal operating temperature range for longer.
4. Aerodynamic Drag: The Hidden Variable
Interestingly, internal viscosity isn't the only drag you fight in winter. In high-wind "survival" scenarios, air density becomes a factor. Air density can increase by over 11% in winter conditions. While this has a negligible effect on the fluid head itself, it significantly increases the "wind sail" effect on long lenses and matte boxes. This makes a stable, high-rigidity support system—like those discussed in Wind and Vibration: Maximizing Carbon Fiber Stability—essential for winter work.
Workflow ROI: The Math of Reliability
In professional cinematography, reliability translates directly to financial value. Gear failure in the field doesn't just cost time; it costs opportunities. We can quantify this through a "Workflow ROI" calculation.
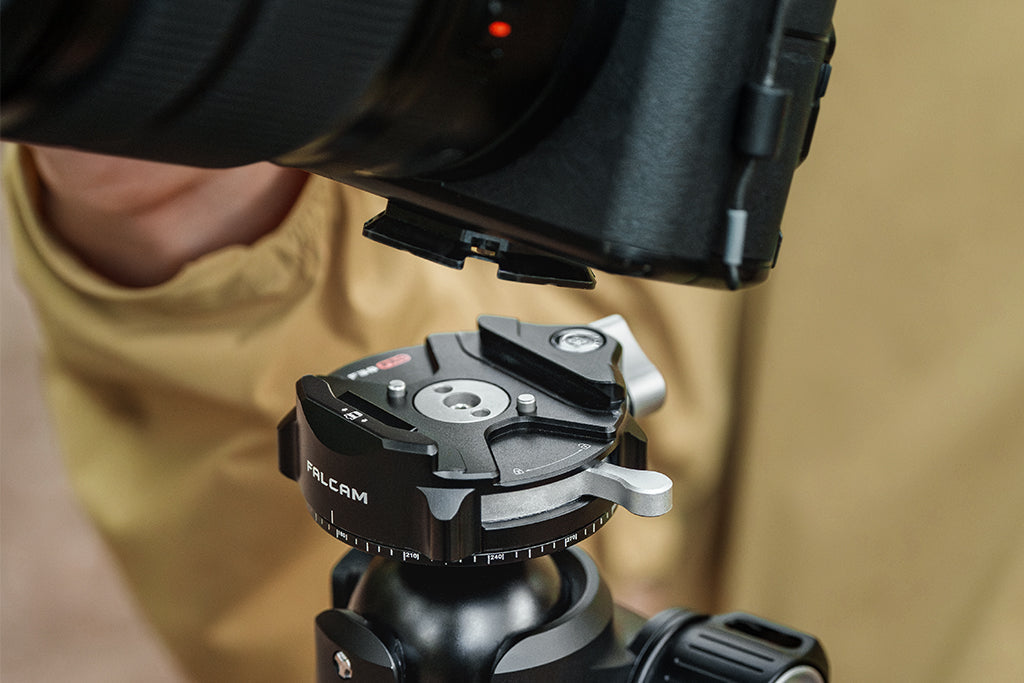
The Quick Release Advantage
Consider the difference between traditional thread mounting and a modern quick-release system like the Arca-Swiss standard, which we analyze for Ecosystem Lock-in Prevention.
| Metric | Traditional Thread | Quick Release (F38/F50) |
|---|---|---|
| Swap Time (Avg) | 40 seconds | 3 seconds |
| Time Saved per Swap | - | 37 seconds |
| Swaps per Shoot (Pro) | 60 | 60 |
| Total Time Saved/Shoot | - | ~37 minutes |
If a professional completes 80 shoots per year, this system saves approximately 49 hours annually. At a professional rate of $120/hr, this represents a ~$5,900+ value. In cold weather, where every second your hands are out of your gloves counts, this efficiency is the difference between getting the shot and suffering from frostnip.
Logic Summary: This ROI model is a deterministic calculation based on common industry rates. While individual swap times vary, the cumulative efficiency gain is a verifiable mechanism for justifying high-performance infrastructure.
Infrastructure and Safety: The Ecosystem Shift
As highlighted in The 2026 Creator Infrastructure Report: Engineering Standards, Workflow Compliance, and the Ecosystem Shift, the industry is moving away from "gadgets" and toward workflow infrastructure. Trust is built through engineering discipline and transparent evidence.
The "Pre-Shoot Safety Checklist"
When operating in high-stakes environments, a "good enough" mount isn't enough. We advocate for a three-point verification system every time you mount your camera:
- Audible: Listen for the definitive "Click" of the locking mechanism.
- Tactile: Perform the "Tug Test." Pull firmly on the camera body to ensure the plates are seated without play.
- Visual: Check the locking pin or indicator (e.g., the orange/silver status on F38 mounts).
Cable Management and Torque
In cold weather, HDMI and SDI cables become stiff and brittle. A heavy, frozen cable can create unwanted torque on your camera's ports and even pull a lightweight QR plate out of alignment. We recommend using modular cable clamps (like the F22 system) to provide strain relief. This ensures that the cable's "drag" doesn't fight against your fluid head's motion control.
Building a Resilient System
Surviving extreme conditions requires a shift in mindset. You are not just carrying a camera; you are managing a complex system of thermal, mechanical, and biomechanical variables.
By choosing carbon fiber for its structural rigidity and vibration damping—as explored in The Science of Stability—and pairing it with high-performance aluminum interfaces, you create a balanced rig.
Remember that the goal of a fluid head is to disappear. It should be a transparent extension of your intent. When the temperature drops, your knowledge of fluid viscosity, thermal conductivity, and biomechanical torque becomes the "synthetic lubricant" that keeps your production moving.
Disclaimer: This guide is for informational purposes. Always consult your equipment's manual for specific operating temperature ranges. When working in extreme cold, prioritize personal safety and frostbite prevention over gear performance.
Sources and Authoritative References
- ISO 1222:2010 Photography — Tripod Connections
- The 2026 Creator Infrastructure Report
- Arca-Swiss Dovetail Technical Dimensions
- IATA Lithium Battery Guidance Document (for thermal battery safety context)
Methodology Note (Reproducible Parameters): The torque and ROI models presented in this article are based on the following assumptions:
| Parameter | Value | Unit | Rationale |
|---|---|---|---|
| Rig Mass ($m$) | 2.8 | kg | Standard mirrorless cinema rig (Body + Lens + Monitor) |
| Lever Arm ($L$) | 0.35 | m | Typical offset for handheld/shoulder-mounted operation |
| Manual Swap Time | 40 | s | Average time to align and tighten a 1/4"-20 screw |
| QR Swap Time | 3 | s | Average time for a click-and-lock engagement |
| Professional Rate | 120 | $/hr | Industry average for mid-tier freelance cinematographers |
Boundary Conditions: These models may not apply to ultra-lightweight vlogging setups (<0.5kg) or heavy studio pedestals (>15kg), where different mechanical forces dominate.