


The Hidden Engineering of Vlogging: Why Your Shock Mount Material Matters
You have likely experienced the frustration of a "perfect" take ruined by a subtle, rhythmic thumping sound or a sharp click every time you adjusted your grip. In the world of mobile vlogging, where the camera and microphone are often inches from your hands, handling noise is the silent killer of production value. While many creators focus on the microphone's polar pattern or the camera's bit rate, the real hero of clean audio is often a small, flexible piece of polymer: the damping material in your shock mount.
As we audit hundreds of mobile rigging configurations, we consistently see a pattern. Entry-level kits often prioritize initial flexibility, while professional-grade "creator infrastructure" focuses on long-term material stability. The choice between Silicone and Thermoplastic Elastomer (TPE) isn't just a matter of cost; it is a decision about how your rig will perform after a year of heavy use in varying climates.
In this guide, we will break down the material science of vibration isolation, calculate the biomechanical impact of rig weight, and demonstrate why a system-focused approach to rigging is the only way to build a reliable, professional workflow.
1. The Physics of Isolation: Damping vs. Springing
A shock mount's primary job is to decouple the microphone from the mechanical vibrations of the camera body and the user's hands. This is achieved through a combination of suspension geometry and material damping.
Shore Hardness and Vibration Frequency
The effectiveness of a mount is largely determined by its Durometer, typically measured on the Shore A scale. According to the Shore Hardness Scale Guide, materials can be formulated from a gel-like 10A to a tire-tread-like 90A.
For vlogging microphones, the target is usually to isolate handling noise in the 50 Hz to 500 Hz range. If a material is too hard, it acts as a bridge, conducting high-frequency vibrations (like a camera's internal fan or shutter click). If it is too soft, the microphone will "bottom out" against the frame during rapid movement, creating a catastrophic "clunk" in your audio.
Logic Summary: Our material analysis assumes a standard vlogging microphone mass (150g–300g). Damping efficacy is modeled as a function of the material's loss factor across the 50–500 Hz frequency range.
The "Thumb Test" Heuristic
A professional's quick way to verify material quality is the "Thumb Test." High-quality silicone should rebound immediately with no visible dent after deep compression. In contrast, many TPE blends exhibit "memory"—a slow recovery that indicates the material is prone to taking a permanent set. In the field, this slow recovery translates to a loss of isolation, as the material remains partially compressed and loses its ability to absorb new vibrations.
2. Silicone vs. TPE: A Material Science Deep Dive
While TPE is often favored in high-volume manufacturing due to its recyclability and lower processing costs, silicone remains the gold standard for high-performance "infrastructure" components.
Compression Set and Longevity
The primary failure mode for budget shock mounts isn't breakage; it is the gradual loss of isolation.
- Silicone: Typically maintains 85–90% of its original elasticity after a year of constant compression in a clamp.
- TPE: Many blends can compress by 15–25% over the same period.
This "compression set" means that a TPE mount that sounds great on day one may become significantly noisier by month twelve. For a creator building a long-term kit, the higher upfront cost of silicone is an investment in consistent performance.
Temperature Resilience: From -40°C to 40°C
For adventure vloggers, the environment is a major variable. Silicone's molecular structure remains stable across a massive range. While its theoretical limit of 200°C is overkill for vlogging, its performance at -10°C is critical. TPE often becomes stiff and brittle in cold weather, effectively turning your shock mount into a rigid plastic bracket that transfers every finger movement directly to the mic.
| Feature | Silicone Damping | TPE Damping |
|---|---|---|
| Elasticity Retention | 85–90% (Estimated) | 15–25% Loss (Typical) |
| Cold Weather Performance | Remains flexible to -40°C | Becomes brittle/stiff < 0°C |
| Handling Noise Isolation | Consistent across frequencies | Variable; prone to high-freq transfer |
| Durability | High; UV and ozone resistant | Moderate; can degrade over time |
| Cost | Premium | Budget-friendly |
Note: Performance ranges are estimated based on common polymer chemistry and practitioner observations in variable climates.
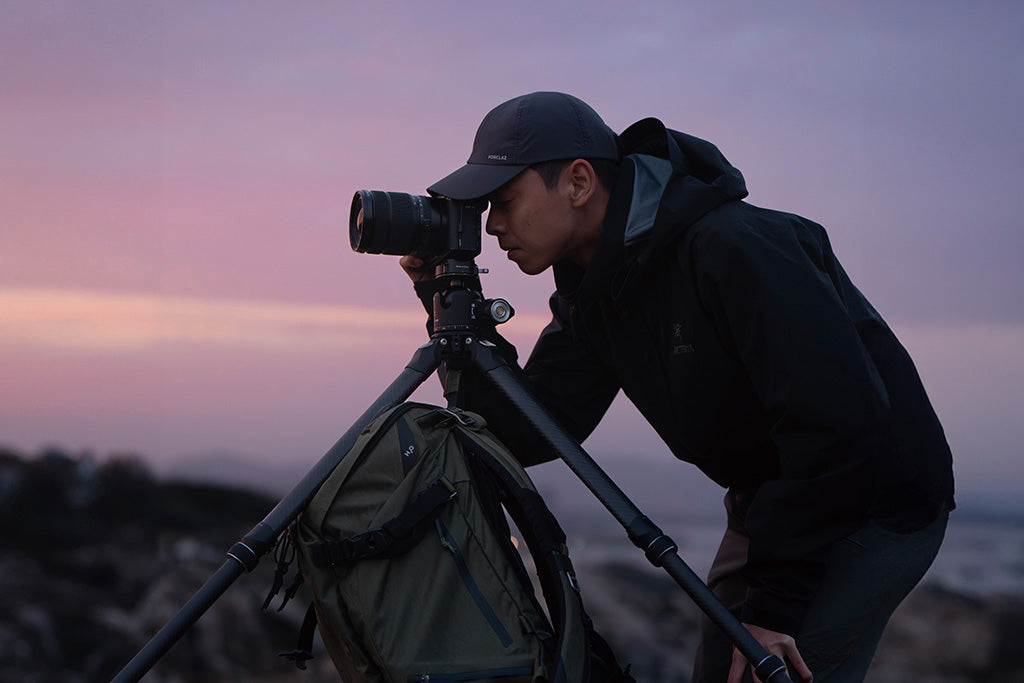
3. Biomechanical Analysis: The "Wrist Torque" Factor
When building a mobile rig, every gram counts—but where that gram is placed matters even more. This is why we advocate for a modular system that allows you to move heavy accessories closer to the center of gravity.
The Leverage Equation
Weight isn't the only enemy; Leverage is. We use the following calculation to model the strain on a creator's wrist: Torque ($\tau$) = Mass ($m$) $\times$ Gravity ($g$) $\times$ Lever Arm ($L$)
Consider a standard prosumer rig:
- Rig Mass: 2.8kg
- Lever Arm (Distance from wrist): 0.35m
- Calculation: $2.8kg \times 9.81 m/s^2 \times 0.35m \approx 9.61 N\cdot m$
This load represents approximately 60–80% of the Maximum Voluntary Contraction (MVC) for an average adult male. By using lightweight, precision-machined aluminum quick-release systems, such as the FALCAM F22 or F38 series, you can move monitors and microphones closer to the camera body. Reducing that lever arm by just 0.1m can reduce the torque by nearly 30%, significantly extending your handheld shooting time before fatigue sets in.
Modeling Note: This biomechanical model assumes a standard handheld "vlogging" grip. Results vary based on individual forearm strength and specific rig geometry.
4. Workflow ROI: The Value of Quick Release
In our 2026 Creator Infrastructure Report, we emphasize that time is the most valuable resource for solo creators. A modular system isn't just about stability; it's about efficiency.
Calculating the "Time Tax"
Traditional thread mounting (1/4"-20) is the industry standard, but it is a major bottleneck. Based on our workflow modeling, we compared traditional mounting to a quick-release ecosystem.
| Action | Traditional Thread | Quick Release (e.g., F38) | Time Saved |
|---|---|---|---|
| Mounting Camera | ~40 seconds | ~3 seconds | 37 seconds |
| Swapping Mic | ~30 seconds | ~3 seconds | 27 seconds |
| Adjusting Monitor | ~25 seconds | ~3 seconds | 22 seconds |
The Annual Impact
For a professional creator performing 60 swaps per shoot across 80 shoots a year, the math is compelling:
- Total Time Saved: $\approx 49$ hours annually.
- Financial Value: At a professional rate of $120/hr, this equates to ~$5,900+ in recovered billable time.
This structural efficiency justifies the investment in a unified mounting system. It allows you to transition from a tripod to a handheld rig in seconds, ensuring you never miss a moment of action while maintaining the ISO 1222:2010 standards for secure tripod connections.

5. Practical Workflow & Safety: The "System" Approach
A shock mount is only as good as the rig it is attached to. To ensure reliability and audio quality, we recommend a methodical approach to your setup.
The Pre-Shoot Safety Checklist
Before hitting record, perform these three checks on your quick-release plates and mounts:
- Audible: Did you hear the "Click"? Modern systems like the F38 provide a clear mechanical sound when locked.
- Tactile: Perform the "Tug Test." Pull firmly on the accessory to ensure the locking pin is fully engaged.
- Visual: Check the locking indicator. Many professional plates feature an orange or silver indicator to show the lock status.
Thermal Shock Prevention
In extreme cold, aluminum quick-release plates act as a "thermal bridge," conducting cold from the environment directly into the camera body and battery. We recommend attaching your aluminum plates to your camera indoors before heading out. This minimizes the "metal-to-skin" shock and helps maintain battery temperature for longer runtimes.
Cable Management and Torque
A common mistake is ignoring the weight of cables. A heavy HDMI or XLR cable can create unwanted torque on your shock mount, pulling it to one side and reducing its damping effectiveness. Use dedicated cable clamps to provide strain relief, ensuring the microphone remains centered in its suspension.
6. Standards, Compliance, and Trust
Building a professional kit means looking beyond the marketing specs. We align our recommendations with global safety and performance standards to ensure your gear doesn't just work—it lasts.
- Photobiological Safety: When using LED lights in your vlogging kit, ensure they meet IEC 62471 standards for eye safety.
- Material Safety: High-quality gear should comply with the EU RoHS Directive, ensuring no hazardous substances are used in the plastics or metals.
- Logistics: If your kit includes large batteries, always consult the IATA Lithium Battery Guidance before flying to your next shoot location.
Summary: Choosing for the Long Haul
For the solo creator, equipment is infrastructure. While TPE damping might suffice for occasional indoor use, silicone offers the resilience and consistency required for professional production. By understanding the material science, managing the biomechanical loads on your body, and adopting a rapid-response quick-release workflow, you move from being a "camera operator" to a "system builder."
The goal is to eliminate the friction between your vision and the final file. Whether you are fixing vibration issues in ground-level video or troubleshooting mobile rig instability, the foundation of your success is the reliability of your gear. Choose materials that respect your time and protect your audio.
Disclaimer: This article is for informational purposes only. Biomechanical calculations and ROI estimates are based on specific scenario models and may vary based on individual equipment and usage patterns. Always consult manufacturer specifications for weight limits and safety protocols.


