The Hidden Enemy: Understanding Micro-Vibration in Mobile Rigs
You have invested in a high-end smartphone or a compact mirrorless camera. You have balanced your gimbal to perfection. Yet, when you review the footage on a large monitor, a nervous jitter remains. This is the hallmark of micro-instability—a phenomenon where the cumulative "play" across multiple connection points creates a high-frequency vibration that software stabilization often struggles to resolve.
For mobile journalists and solo travelers, speed is the primary objective. We often sacrifice structural rigidity for the sake of modularity and weight. However, an ultra-portable rig is only as strong as its weakest joint. Experienced field shooters know that the most common source of instability isn't a catastrophic component failure; it is the micro-movement found in quick-release plates, loose cold shoes, and over-extended articulating arms.
This guide provides a methodical framework for identifying, troubleshooting, and eliminating mechanical instability in your mobile ecosystem. By understanding the physics of your gear and adopting a systematic maintenance routine, you can ensure that your rig remains mission-ready, even in the most demanding environments.
The Diagnostic Hierarchy: Categorizing Instability
Not all "shake" is created equal. To solve the problem efficiently, we categorize instability into three distinct tiers. Addressing them in the wrong order—such as trying to fix material vibration before securing a loose plate—leads to wasted time and suboptimal results.
1. Macro-Wobble (Mechanical Play)
This is the most frequent culprit. It occurs when a physical joint is not fully seated or when a locking mechanism has developed "slop."
- The Symptom: Visible movement when the camera is gently nudged.
- The Fix: Inspecting quick-release interfaces and ensuring all mounting screws are torqued correctly.
2. Balance-Induced Sway (Center of Gravity Issues)
This happens when the weight distribution of the rig is top-heavy or asymmetrical, causing the tripod or gimbal to "hunt" for stability.
- The Symptom: A slow, rhythmic oscillation, especially in wind.
- The Fix: Lowering the center of gravity and aligning the camera’s optical axis with the tripod’s central column.
3. High-Frequency Jitter (Material Transmission)
This occurs when the environment (e.g., a vibrating floor, wind, or a moving vehicle) transmits energy through the rig materials.
- The Symptom: A "shimmer" in the fine details of the image.
- The Fix: Switching to materials with higher damping capacities, such as carbon fiber composites.
Logic Summary: This hierarchy is based on common patterns observed in equipment troubleshooting and field feedback. We prioritize mechanical joints because they represent the "low-hanging fruit" of stability—fixing a loose screw is faster and cheaper than replacing a tripod.
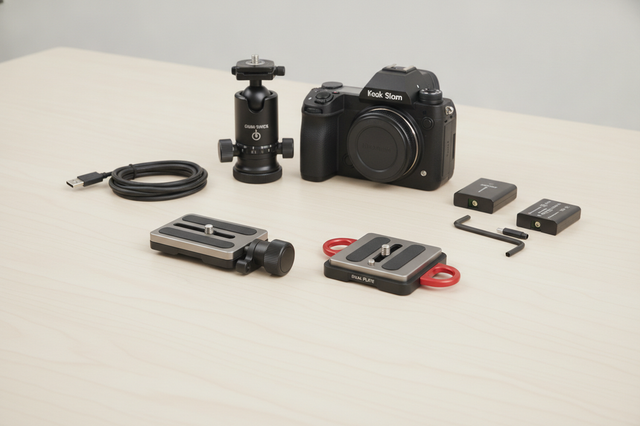
The Quick-Release Interface: Solving the "Slop" Problem
The Arca-Swiss standard is the backbone of modern modular rigging, providing a dovetail interface that allows for rapid swaps. However, as noted in technical analyses of the Arca-Swiss camera mount system, variations in manufacturing tolerances can lead to "slop."
The Lever vs. Screw Mechanism
Conventional wisdom often praises lever-actuated quick-release plates for their speed. However, our observations from long-term equipment use suggest that lever systems are more prone to developing mechanical play over time. The internal cams and mating surfaces wear down, and unlike a screw-knob clamp, they offer limited adjustability to compensate for this wear.
For mission-critical scenarios where stability is more important than a two-second speed advantage, a screw-knob clamp is often a more reliable choice. It allows you to apply precise pressure regardless of minor deviations in plate width.
The "Firm + Quarter Turn" Heuristic
A common mistake among risk-averse travelers is over-tightening locking knobs. Excessive torque can deform aluminum plate interfaces or strip threads, leading to permanent instability.
- The Rule of Thumb: Tighten the knob until you meet firm resistance, then add exactly one-quarter turn.
- Why this works: This provides enough clamping force to engage the friction surfaces without exceeding the elastic limit of the aluminum alloy (typically 6061-T6).
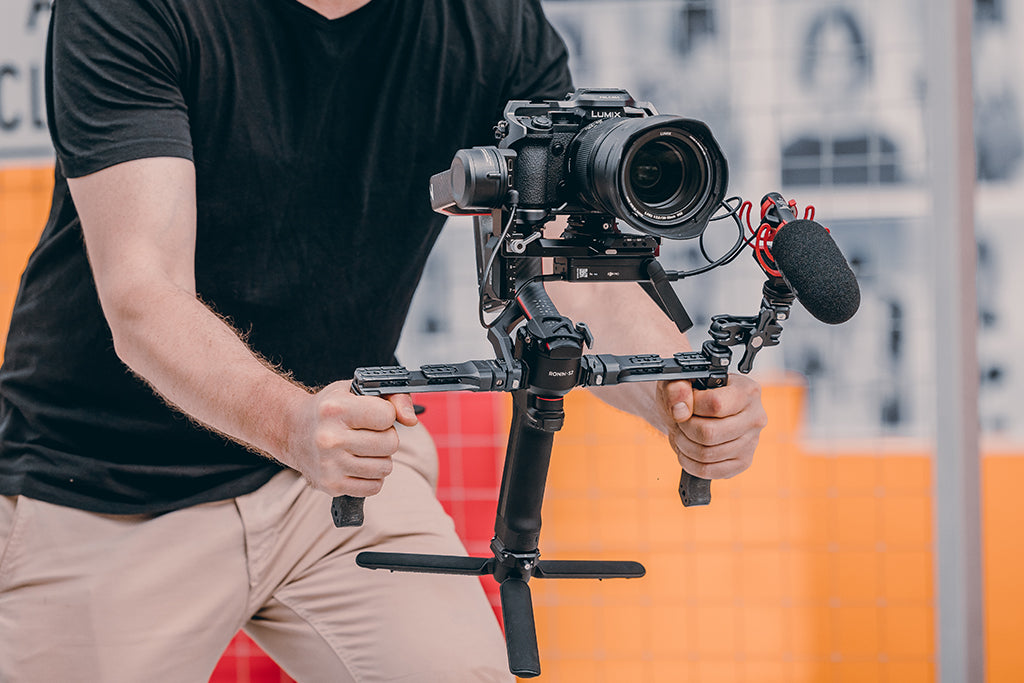
Biomechanical Analysis: The Math of "Wrist Torque"
For solo creators, the rig is often handheld for hours. Instability here isn't just a visual problem; it's a physical one. We must consider the "Wrist Torque" generated by our equipment.
The Leverage Formula
The strain on your wrist and the resulting "hand shake" can be modeled using the torque formula: $$\tau = m \times g \times L$$
- $\tau$ (Torque): The rotational force at the wrist.
- $m$ (Mass): The total weight of the rig.
- $g$ (Gravity): $\approx 9.81 m/s^2$.
- $L$ (Lever Arm): The distance from the wrist to the rig's center of mass.
Scenario Modeling: Imagine a mirrorless rig weighing 2.8kg. If you mount a heavy monitor or microphone on an articulating arm that extends 0.35m away from your grip, you generate approximately 9.61 N·m of torque.
| Parameter | Value | Unit | Rationale |
|---|---|---|---|
| Rig Mass ($m$) | 2.8 | kg | Standard mirrorless + cage + lens |
| Distance ($L$) | 0.35 | m | Extended articulating arm |
| Resulting Torque | ~9.6 | N·m | Calculated via $\tau = m \times g \times L$ |
| MVC % | 60–80% | % | Est. % of Maximum Voluntary Contraction |
Modeling Note: This is a deterministic scenario model based on standard biomechanical heuristics. For an average adult, this load represents a significant portion of their Maximum Voluntary Contraction (MVC). When muscles operate at high MVC percentages, they experience "physiological tremor"—the primary cause of handheld shake. By using modular quick-release points to keep accessories closer to the handle (reducing $L$), you can drop the torque by 50% or more, instantly smoothing your footage.
Material Science: Aluminum vs. Carbon Fiber
When shooting on vibrating surfaces—such as a bridge with traffic or a windy rooftop—the material of your support system matters.
According to research on the vibration damping capacity of composites vs. aluminum, aluminum is a highly elastic material with poor inherent damping. It tends to transmit and even amplify high-frequency vibrations. In contrast, carbon fiber composites have a complex internal structure that dissipates kinetic energy as microscopic amounts of heat.
The "Thermal Bridge" Gotcha: Aluminum quick-release plates and cages act as thermal bridges. In extreme cold, they conduct heat away from the camera body and batteries with high efficiency.
- Pro Tip: If you are shooting in sub-zero temperatures, attach your aluminum plates to the camera indoors first. This allows the interface to reach ambient room temperature, slowing the rate of battery cooling once you step outside. This is a critical step for adhering to IATA battery safety guidelines regarding temperature-induced voltage drops.
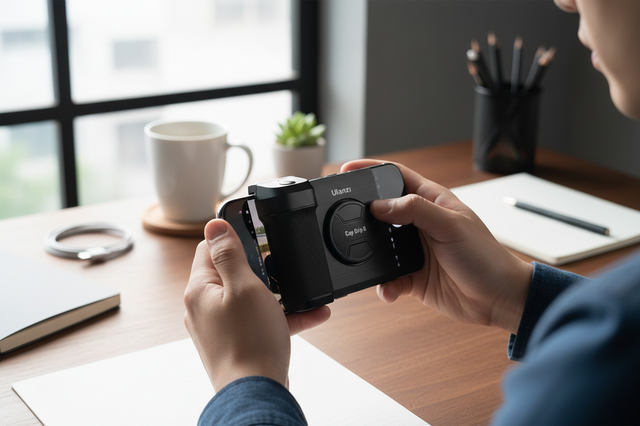
The Workflow ROI: Why Speed Equals Value
For a mobile journalist, the transition from "travel mode" to "shooting mode" is where time is lost. A modular quick-release ecosystem isn't just about stability; it’s a financial investment in efficiency.
The Calculation:
- Traditional Thread Mounting: ~40 seconds per device swap (unscrewing, aligning, re-screwing).
- Modern Quick Release: ~3 seconds per swap (click and lock).
- Time Saved: 37 seconds per swap.
If a solo creator performs 60 swaps per shoot (switching between tripod, gimbal, and handheld) and works 80 shoots per year: $$37s \times 60 \text{ swaps} \times 80 \text{ shoots} = 177,600s \approx 49 \text{ hours saved annually.}$$
At a professional rate of $120/hr, this efficiency translates to over $5,800 of recovered time per year. This "Workflow ROI" justifies the cost of transitioning to a unified quick-release ecology.
Maintenance and Prevention: The "Click" Protocol
To prevent the "macro-wobble" mentioned earlier, you must implement a rigorous pre-shoot safety checklist. Mechanical failure in load-bearing components is usually preceded by a tactile or audible warning.
1. The Audible "Click"
Modern quick-release systems are designed with spring-loaded safety pins. When sliding a plate into a clamp, listen for a distinct metallic click. This indicates the safety lock has engaged. If you don't hear it, the plate is likely misaligned.
2. The "Tug Test"
Immediately after locking any joint, perform a "Pull-Test." Apply moderate force in the opposite direction of the mount. If there is any movement, the friction lock is insufficient.
3. Thread Care (Anti-Cross-Threading)
In low-light conditions, cross-threading a 1/4"-20 screw is a common "gotcha."
- The Best Practice: Place the screw in the hole and turn it counter-clockwise until you feel a slight "click." This indicates the threads have aligned. Only then should you begin tightening clockwise.
4. Transport Tension
When packing your gear, always partially loosen major clamps and ball head locks. Maintaining maximum tension on locking mechanisms during the vibrations of air travel or bumpy car rides can lead to "flat spots" on internal bearings or permanent deformation of the clamp. Re-tighten only once you arrive on location.
Logistics and "Visual Weight"
For solo travelers, the "Visual Weight" of your rig can be as important as its actual mass. Large, industrial-looking cinema plates often attract unwanted attention from airline gate agents or security personnel.
Compact, modular systems have a lower visual profile. By breaking your rig down into smaller components using quick-release mounts, you can often fit high-performance gear into standard "personal item" bags. This reduces the risk of being forced to gate-check expensive equipment, which is a major concern for those navigating airport security with a MoJo rig.
Mission-Critical Safety Checklist
Before your next shoot, run through this systematic check to ensure your rig is stable and secure:
- Check Thread Integrity: Ensure no screws are "spinning" or showing signs of aluminum shavings (a sign of stripped threads).
- Verify Locking Pins: Ensure the orange or silver safety indicators on your quick-release mounts are fully visible.
- Cable Strain Relief: Use cable clamps for HDMI or USB-C leads. A heavy cable can create enough torque to slowly loosen a 1/4" mounting screw over time.
- Battery Compliance: Ensure all external power banks are carried in your cabin baggage, following the FAA Interactive Guide to Shipping Lithium Batteries.
- Clean the Interfaces: Use a microfiber cloth to remove dust or grit from the Arca-Swiss dovetail surfaces. Even a single grain of sand can prevent a plate from seating flush, creating micro-vibration.
Summary of Stability Heuristics
| Issue | Practical Heuristic / Rule |
|---|---|
| Tightening | Firm resistance + 1/4 turn (No more). |
| Threading | Counter-clockwise until "click," then tighten. |
| Vibration | Use Carbon Fiber for high-frequency damping. |
| Leverage | Keep heavy accessories close to the grip (Reduce $L$). |
| Packing | Loosen locks slightly during transit. |
Eliminating shake is not about finding one "magic" piece of gear. It is about building a disciplined system where every joint is verified, every material is chosen for its damping properties, and every workflow is optimized for speed without compromising safety. By treating your rig as a precision instrument rather than a collection of accessories, you ensure that your focus remains on the story, not the equipment.
Disclaimer: This article is for informational purposes only. When rigging heavy or expensive equipment, always refer to the manufacturer's specific load ratings and safety instructions. The author and publisher are not responsible for equipment damage or personal injury resulting from improper assembly or use of third-party accessories.