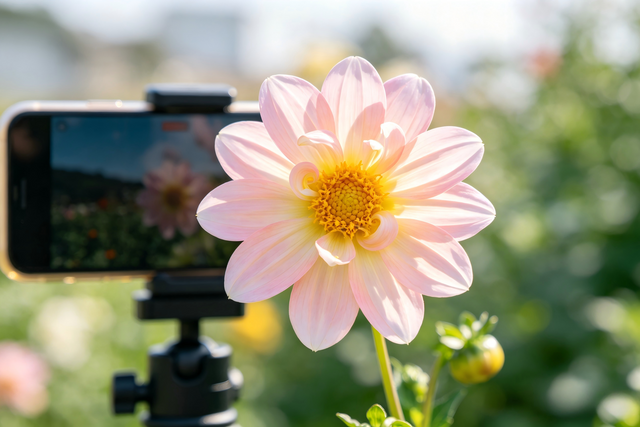
Moving your flash away from your camera creates better depth and professional-looking shadows. You might think you need expensive light stands for this, but your camera tripod is a great substitute. It works perfectly for portraits, product shots, or small home studios.
The main goal is keeping your gear safe and steady. With a simple adapter and a few quick checks, you can securely mount your flash and start shooting without any risk of equipment damage.
Know Your Gear: Flash, Tripod, and Mounting Points
Take a moment to look over the different parts of your lighting kit before you begin. There are specific connection spots on each piece of equipment that must match up for safety.
Types of Flashes You Might Use
Most beginners start with on-camera speedlights. These have a "hot shoe" foot at the bottom with metal pins. You might also use compact flashes or small strobes. These larger lights sometimes have a built-in hole for a screw, but smaller speedlights always need a separate holder to stay on a tripod.

Tripod Basics
Most tripods have a standard 1/4" screw on the top plate. This is the same size as the hole on the bottom of your camera. Some professional tripod heads use a larger 3/8" screw. If your tripod screw does not fit your flash bracket, you can find small metal adapters to change the size.

Essential Mounting Accessories
You cannot slide a flash directly onto a tripod screw. You need a "cold shoe" adapter. This is a small metal or plastic bracket that holds the flash foot tightly.
Another great option is an umbrella bracket. These brackets have a cold shoe on top and a hole for an umbrella, and they screw directly onto your tripod plate.
Step-by-Step: Safely Mounting a Flash on a Tripod
Setting up your gear the right way prevents accidents. Follow these steps to make sure your flash stays exactly where you put it throughout your entire photo shoot.
Step 1: Prepare the Tripod
Start by pulling the tripod legs out and making sure they are locked. Set the legs wide so the base is stable. If you are on uneven ground, adjust each leg so the top of the tripod is level. If your tripod uses a quick-release plate, take it off the head and hold it in your hand. Attach the plate to your flash bracket or cold shoe adapter first, rather than trying to screw the whole tripod into the flash.

Step 2: Attach the Flash Bracket or Cold Shoe
Screw your cold shoe or umbrella bracket onto the tripod plate. Make sure it is tight. If the bracket feels wobbly, the flash will shake later. Once the bracket is on the plate, click the plate back into the tripod head. Lock the tripod head handle so the bracket does not flop over.
Step 3: Slide the Flash into the Cold Shoe
Turn your flash power off before you touch it. This prevents the flash from firing in your eyes or causing an electrical surge if you touch the pins. Slide the flash foot into the cold shoe slot. Push it all the way in until it stops. Use the locking lever or the screw ring on the flash to tighten it. Give it a small tug to make sure it cannot slide back out.
Step 4: Adjust Angle and Height
Now you can aim the light. Use the tilt joint on your bracket or the ball head on your tripod to point the flash at your subject. Keep the weight of the flash centered. If the flash leans too far to one side, it might pull the whole tripod over. Always keep the heavy parts directly over one of the tripod legs for better balance.
Step 5: Final Safety Check
Before you start taking pictures, do a quick test. Gently tap the tripod leg and watch the flash. If it shakes a lot or feels loose, tighten the knobs. Check the tripod head, the plate, and the cold shoe lock. If everything stays still, you are ready to shoot.

Safety Tips: Avoid Drops, Wobbles, and Damage
Keeping your gear safe is the most important part of being a photographer. A falling flash can break its glass tube or snap the mounting foot, which is expensive to fix.
Stability and Balance
Gravity is your enemy when putting heavy gear on a tall stand.
- Keep the tripod at a lower height if you are using a heavy flash or a large softbox.
- Avoid extending the center column of the tripod all the way up, as this makes the setup top-heavy.
- If you are working outside where it is windy, hang a camera bag or a sandbag from the center hook of the tripod to add weight.
Protecting Your Flash and Tripod
- Never try to force the 1/4" tripod screw into the bottom of a flash that does not have a threaded hole. You will ruin the plastic.
- Always use the proper adapter. When tightening plastic knobs on your brackets, use firm pressure but do not use all your strength. Overtightening can crack the plastic.
- If you need to move the tripod to a new spot, turn off the flash and hold the flash head with one hand while carrying the tripod with the other.
Working in Small or Busy Spaces
- In a small home studio or a busy event, people can easily trip over tripod legs. Try to tuck the tripod into a corner or behind furniture.
- If you are in a dark room or a public space, put a piece of bright gaffer tape on the legs. This helps people see the tripod so they do not kick it by accident.
Triggering the Flash Once It's on the Tripod
Once the flash is away from your camera, you need a way to tell it when to fire. There are a few different ways to send this signal wirelessly.
Wireless Radio Trigger Options
Radio triggers are the most reliable choice. You slide a transmitter onto your camera and a receiver onto the flash (or use the built-in receiver if your flash has one). Radio waves can go through walls and do not need a clear line of sight. This lets you hide the flash behind objects for creative lighting.
Optical and On-Camera Triggering
Some flashes have a "slave mode." This means they see the light from another flash and fire instantly. You can use the small flash built into your camera to trigger the flash on the tripod. This works well indoors, but it can be difficult to use outdoors in bright sunlight because the flash might not "see" the signal.
Simple Recommended Starting Settings
When you first start, keep your flash power at a low or middle setting, like 1/16 or 1/32 power. This saves battery life and prevents the flash from getting too hot. Focus on getting the position of the tripod right before you worry about high-power lighting. Once the light looks good, you can slowly turn the power up if the photo is too dark.
Common Beginner Mistakes and How to Avoid Them
Learning from mistakes helps you become a better photographer faster.
- One common mistake is trying to balance a flash on a tripod without a cold shoe. Some people try to use tape or string, but this almost always ends with the flash falling on the floor. Always spend a few dollars on a metal cold shoe adapter.
- Another mistake is leaving the tripod head loose. If you do not lock the ball head, the weight of the flash will cause it to droop down slowly, ruining your framing.
- Many beginners extend the center column of their tripod to get more height. While this works for cameras, a flash with an umbrella attached acts like a sail in the wind. A high center column makes the tripod very unstable. Keep the column low and use the leg extensions instead.
- Finally, watch out for sync cables. If you use a cord to connect your camera to the flash, someone walking by could snag the cord and pull the whole setup over. wireless triggers are much safer.
Improve Your Lighting Using a Tripod
You can create amazing light without buying piles of new gear. A tripod provides a solid, steady base for your flash and lets you try different angles with ease. Just remember to use a proper cold shoe bracket and always check the balance of your setup. Making these safety steps a habit keeps your equipment safe from accidental drops. It is a simple, smart way to take better photos today.
FAQs about Mounting a Flash on a Tripod Safely
Q1: Can I screw my flash directly onto the tripod without any adapter?
No. Most flashes do not have a screw hole on the bottom. They have a flat foot made to slide into a shoe. If you try to force a screw into it, you will break the flash. You must use a cold shoe adapter or a flash bracket.
Q2: Is a tripod as safe as a dedicated light stand for my flash?
Yes, for most small flashes. A tripod is often heavier and has a wider base than a cheap light stand, which makes it very stable. However, light stands can go much higher than a standard tripod. As long as you keep the weight centered, a tripod is very safe.
Q3: What type of adapter do I need to mount my flash on a tripod?
You need a "cold shoe to 1/4-20 adapter." You can also get an "S-type bracket" or an "umbrella bracket." These accessories have a female thread on the bottom that matches the screw on your tripod.
Q4: How do I stop my tripod with flash from tipping over?
Keep the legs as wide as possible. Do not use the center column for height unless you have to. If the flash is leaning forward, make sure one of the tripod legs is pointing in that same direction to catch the weight. Adding a weight to the center of the tripod also helps.