There are incredible photo chances when you travel by yourself, but it can be hard to get great pictures of yourself without someone behind the camera. The truth is that traveling by yourself gives you more time and freedom to play around with lighting, angles, and composition. You can get photos that are just as good as those a trip companion could take for you if you know how to use some smart tricks and bring the right lightweight gear.
Choose the Right Equipment for Self-Photography
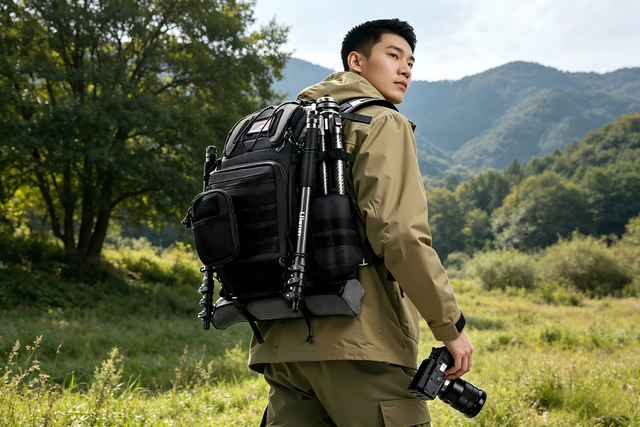
Getting good solo photos starts with having the right gear. You don't need expensive equipment, but a few key items make a huge difference in your results.
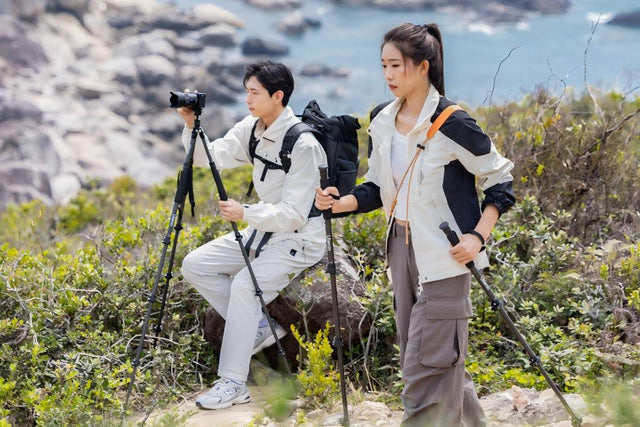
Compact Tripod or Flexible Stand

A sturdy tripod is your best friend for solo photography. Look for portable tripods for travel that fold small enough to fit in your backpack but extend high enough for eye-level shots. Models with flexible legs can wrap around railings, tree branches, or rocks, giving you more options in places where regular tripods won't work.
Bluetooth Remote Shutter
This small device connects wirelessly to your phone or camera. You can trigger the shutter from 30 feet away, so you don't have to rush back into position before the timer goes off. Most remotes are tiny enough to clip onto your keychain.
Selfie Stick with Remote

While tripods give you stability, a selfie stick offers quick flexibility for casual shots. Pick one with a built-in Bluetooth remote that extends at least three feet for better angles.
Smartphone with Timer & Burst Mode
Your smartphone includes powerful features at no extra cost:
- Timer function gives you 5-10 seconds to get into position
- Burst mode takes multiple photos in a row
- Portrait mode adds professional-looking blur to backgrounds
- Grid overlay helps you frame shots properly
Additional Helpful Accessories
- Lightweight Phone Clamp – Clips onto railings, posts, or furniture (2-4 oz)
- Mini tripods for travelers – Perfect for tabletop shots and low angles (4-8 oz)
- Action Camera – Great for adventure activities and wide shots (4-6 oz)
- 360° Camera – Lets you choose your framing after taking the photo (5-7 oz)
Finding the best travel tripod means choosing one that balances weight, stability, and size. Most solo photographers prefer models under two pounds that still reach eye level.
Master Simple Techniques That Make Solo Shooting Easy
Good technique matters more than expensive gear. These simple methods will help you take better solo photos every time.
Use the Self-Timer Effectively
Set your self-timer to 10 seconds so you have enough time to walk into the frame and relax before the photo snaps. Always take a test shot first to check your framing and lighting. Most cameras let you adjust the timer length, so try different settings to see what works best for you.
Capture Natural Moments with Burst Mode
Don't just stand still and smile. Turn on burst mode and walk naturally through the frame while your camera takes multiple photos in a row. This gives you dozens of shots to choose from later, showing different expressions and movements. These photos look much more real than frozen poses.
Try the Video Frame Grab Method
Switch your camera to video mode and record yourself moving through a scene for 10-15 seconds. Walk around, look at things, or just move naturally. Later, go through the video and save still frames from the best moments. This trick captures genuine expressions that are hard to get with regular photos.
Choose the Right Camera Height
- Eye level works best for portraits and balanced shots.
- Chest level flatters full-body photos and keeps proportions natural.
- Waist level creates casual, relaxed images.
- Ground level makes landscapes look dramatic but avoid this for portraits.
- Mini tripods for travelers are perfect for shooting from tables or low walls, while regular tripods handle eye-level shots better.
Pre-Frame Before You Shoot
Set up your tripod and take a test photo of the empty scene first. Check that the background looks good and the lighting works. Make any needed changes to the camera angle or position before you step into the frame. This saves time and gives better results. Using a quick release system can also make attaching and detaching your camera from the tripod much faster.
Keep Taking More Shots
Don't expect your first photo to be perfect. Professional photographers take dozens of shots to get one great image. Give yourself the same chance by taking many photos from each setup. The more you shoot, the better your odds of capturing something amazing.
Frame Your Shots Like a Professional Photographer

Good composition turns ordinary snapshots into photos people want to see. These simple rules will make your solo travel photos look much better right away.
Follow the Rule of Thirds
Imagine dividing your photo into a 3x3 grid with nine equal boxes. Place yourself along one of those lines instead of right in the center. This off-center positioning makes photos more interesting and dynamic. Most phone cameras have a grid overlay you can turn on to help with this.
Use Leading Lines to Draw Attention
Roads, paths, fence lines, rivers, and building edges naturally guide the viewer's eye through your photo. Position yourself where these leading lines lead or end. This technique adds depth and pulls people into your image, making them focus on you and the scene together.
Frame Yourself with Your Surroundings
Shoot through doorways, under arches, inside window frames, or between tree branches. This "frame within a frame" adds layers to your photo and makes it feel more thoughtful. Flexible tripods for solo travelers work great here because you can wrap them around poles or squeeze them into tight spots for creative angles.
Create Depth with Foreground and Background
Include something interesting in the front of your photo (like flowers, rocks, or architectural details), place yourself in the middle area, and show the landscape or cityscape behind you. These three layers make flat scenes look three-dimensional and more professional.
Show Scale in Landscape Photos
Make yourself relatively small in the frame to emphasize how big and impressive your surroundings are. Stand at the base of waterfalls, in front of mountain ranges, or beside huge trees. This contrast tells the story of the place and makes viewers feel the grandeur you experienced.
Experiment with Different Angles
Try shooting from various heights to see what looks best:
- Ground level makes landscapes feel more dramatic and expansive.
- Waist to shoulder height creates the most flattering portraits.
- Slightly elevated angles can slim your figure and improve proportions.
Avoid shooting from way above looking down unless you want that specific look. These composition tips work with any camera, whether you're using a smartphone or professional equipment.
How to Make Your Photos Look More Natural
Authentic photos are what people remember and connect with. Stiff poses make it obvious you're traveling alone with a timer, but these simple tricks help you look relaxed and genuine.
Move Instead of Standing Still
Don't just stand facing the camera with your arms at your sides. Walk toward or away from the camera, turn your head to look at scenery, adjust your backpack, or brush hair from your face. Set your camera to burst mode while you move, and you'll get shots that feel real even though you planned them.
Interact with Your Environment
Give yourself something to do in the photo. Lean against old walls, trail your hand along railings, read signs, sip from your water bottle, or study your map. These actions make your hands look natural and tell a story about where you are. Doing something helps you forget about the camera, which makes you look more relaxed.
Show Genuine Emotion
Show how you really feel with your face. Laugh when something is funny, be amazed by beautiful sights, or show peaceful happiness. Photos will show how you really felt, which helps other people relate to what you went through. If it feels fake to smile, think about something that makes you happy right before the timer clicks.
Look Away from the Camera
Gaze at the sunset, study building details, watch people go by, or just look thoughtfully into the distance. Side views and three-quarter angles feel less posed than staring straight at the lens. These "looking away" shots often end up being the most natural and interesting ones.
Take Lots of Photos
Turn on burst mode or continuous shooting whenever you're moving. This increases your chances of catching natural moments with good expressions. Take way more shots than you think you need—professional photographers shoot hundreds of photos to get a few great ones.
When and How to Ask Strangers for Help
Sometimes the simplest solution is the best one. Asking strangers to take your photo often yields better results than elaborate solo setups, and most people are happy to help.
Choosing Your Photographer
Look for:
- Fellow tourists already taking photos of each other
- Couples or families who aren't rushing
- Other solo travelers who understand the struggle
- People using nice cameras (they know what they're doing)
Avoid asking people who look stressed, hurried, or distracted.
Make Their Job Easy
- Pre-frame your shot using your lightweight tripod for travel
- Show them the shutter button clearly and demonstrate once
- Point out where you'll stand in the composition
- Show an example photo if possible for style reference
Be quick and respectful of their time. Thank them genuinely and offer to return the favor. This reciprocity builds good travel karma and often leads to brief but pleasant interactions.
Know Basic Phrases in Local Language
Learn basic phrases in the local language:
- "Could you please take my photo?"
- "Press this button"
- "One more, please"
Most people appreciate the effort even if your pronunciation isn't perfect.
Safe Tips While Getting Great Solo Traveling Shots
Creating amazing travel photos shouldn't put you or your equipment at risk. These simple safety tips protect you and your gear.
Protect Your Equipment
Never leave your camera or phone unattended, even for a second—they're easy theft targets. Use wrist straps, neck straps, or phone tethers to prevent drops and make gear harder to snatch. Position your tripod where you can see it while posing. In crowded places, ask someone trustworthy to watch your gear or just use a selfie stick instead.
Choose Safe Locations
Pick stable, level spots for your tripod away from cliff edges, busy roads, and train platforms. Make sure the ground is solid and lock all tripod legs securely. Choose well-lit areas with good visibility. If a location feels unsafe, trust your gut and find somewhere better.
Be Considerate and Aware
Don't block walkways, building entrances, or popular photo spots. Set up quickly, take your shots, and move along. Solo shooting takes more time than having help, so be extra mindful of others waiting. Keep your bag zipped and in front of you. Stay alert for pickpockets while you're focused on your camera.
Respect Local Rules
Research photography restrictions before you visit. Some religious sites ban photos, certain countries prohibit shooting government buildings, and some cultures find tourist photography disrespectful. Follow these rules to avoid problems.
Backup and Insurance
Carry extra memory cards or use cloud backup to protect your photos. Insure valuable equipment before international trips through travel insurance or your homeowners' policy.
Take Better Solo Travel Photos Today
Solo travel photography improves greatly with practice and strategy. Buy travel-friendly tripods that match your style, master self-timer and burst mode, and experiment with composition to make your photos stand out. Avoid stiff poses and ask nice individuals for aid. Natural movement and emotion always win. Try to apply these tips on your next vacation to capture your adventures.