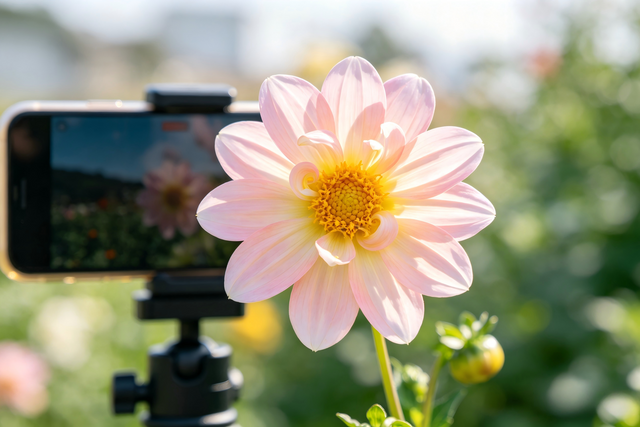
Most creators think a tripod solves all their problems. While it stops your arms from getting tired while holding a phone, long hours of filming introduce a different kind of exhaustion. Between bending over to check your framing and constantly reaching out to hit the record button, your body takes a hit. If you find yourself with a stiff neck or a sore lower back after a day of vlogging, you need a better approach to your physical setup.
Why Long Phone Tripod Sessions Cause Physical Strain
Using a phone tripod feels like it should be easy, but creators often deal with "hidden" physical costs. When you film for four or five hours, you aren't just standing there. You are making hundreds of tiny adjustments. You are squeezing clamps, turning knobs, and squinting at a small screen. These micro-tasks add up. There are four main areas where fatigue usually hits:
-
Neck and Upper Back: This is the most common issue. Most people set their tripod too low, which forces a constant downward gaze. This "tech neck" puts massive pressure on your cervical spine.

-
Shoulders and Arms: If the tripod is too far away, you have to reach forward to tap the screen or adjust the tilt. Doing this repeatedly strains the rotator cuff and the muscles between your shoulder blades.

- Wrists and Hands: Cheap clamps can be stiff. Squeezing a phone into a tight spring-loaded mount dozens of times a day leads to hand cramps. Tightening small, plastic knobs also tires out the small muscles in your fingers.
- Eyes and Head: Staring at a bright screen in a dark room—or fighting glare in the sun—causes digital eye strain (computer vision syndrome). This often leads to tension headaches by the end of the day.
While these stressors are common, you can avoid them by changing how you set up your gear and how you use it.
Setting Up Your Tripod Gear for Maximum Comfort and ROI
A smart setup minimizes the need for awkward reaching and allows you to maintain a proper ergonomic posture throughout the day.
Set the Comfort Height Before You Frame
The standard rule is to bring the phone toward eye-level height, or just slightly below, so you aren't hunching. If your project requires low or high angles, plan to shoot them in batches. This prevents the physical toll of constant height changes and keeps your neck in a safer position for longer periods.

Stabilize First, Then Fine-Tune
A shaky phone tripod leads to rework, which is mentally and physically draining. Spread the legs wide to prioritize a solid base over maximum height. Avoid over-extending the tripod center column if it makes the rig wobbly; a stable rig means you won't have to stay in a tense "waiting" stance for vibrations to stop.
Reduce the Number of Adjustments
Choose a tripod head that is fast to reposition so you don't fight multiple knobs for every shot. Use tape to mark the legs for common heights, such as desk or standing positions. Saving these "go-to" angles reduces the time you spend bending over to check your framing.
Place the Gear to Protect Your Posture
Position the tripod close enough that you can operate it with your elbows near your body. Reaching forward for long sessions strains the shoulders. Additionally, align your feet and hips with the screen. This prevents torso twisting, which is a leading cause of lower back pain from carrying gear during long shoots.
Improving Your Posture and Ergonomics While Operating
Your muscles won't lock up during a long shoot if you keep your body in a neutral position. By making small changes to how you stand and move, you can avoid getting stiff after the first hour of shooting.
Keep a Neutral Spine and Relaxed Shoulders
Focus on keeping your shoulders down rather than shrugging them toward your ears when adjusting the tripod head. Keep your elbows slightly bent and tucked toward your ribs when you tap the screen. This small change reduces the leverage and strain on your upper back and rotator cuffs.
Use Wrist-Friendly Handling
Avoid using a tight "pinch grip" on your phone or the tripod knobs. Let the clamp do the heavy lifting. When you need to reposition the camera, use two hands if possible. This provides more control and spreads the physical effort across both arms instead of straining a single wrist.
Move Regularly to Beat Stillness
Staying perfectly still is actually harder on the body than moving. Shift your weight between your legs every few minutes to keep blood flowing. If you notice yourself starting to hunch, step back, shake out your arms, and reset your posture before you hit record again.
Adjusting Your Workflow to Minimize Repetitive Motion
Every time you have to walk over to the phone tripod, unlock a knob, change the height, and lock it back, you are spending physical energy. If you do this fifty times a day, you will be exhausted. Streamlining these actions keeps your energy levels high for your actual performance on camera.
Batch Your Tasks by Angle
Group your shots by height and location. Film all your eye-level clips first, then move the tripod once to do all the overhead or waist-level shots. This strategy means fewer tripod adjustments and less time spent bending or reaching, which keeps your energy levels higher for the actual content.
Go Hands-Off Whenever Possible
Minimize screen contact by using a phone tripod with bluetooth remote control or voice commands. This saves your shoulders from the "reach and tap" motion and prevents the camera from shaking, which means fewer retakes. Additionally, using grid lines and locking your focus and exposure settings reduces the need to constantly re-check and fiddle with the screen.
Build Reset Moments Into Your Schedule
Every 20 minutes, look away from the screen to rest your eyes and roll your shoulders. Every 60 to 90 minutes, take a longer break to hydrate and stretch. These brief pauses prevent fatigue from building up to a level that ruins your productivity.
Selecting Accessories That Simplify Your Filming Process
Specific add-ons can turn a basic setup into a professional, ergonomic workstation. These tools focus on making the mechanical parts of filming faster and less physically demanding.
Use Quick-Release Solutions
Standard mounts that require constant spinning are tedious. A quick-release tripod mount lets you snap the phone on and off the tripod in a second. This is helpful if you need to switch between tripod filming and handheld shots or check your messages frequently.
Upgrade Your Phone Clamps
Look for clamps with a lever or button rather than a stiff, heavy spring. These are easier to load and keep the phone secure with less fiddling. They reduce the hand strength needed to swap devices during a long day.
Add Handles or Cages
If you switch between a tripod and handheld work, a cage provides a larger surface to grip. This distributes the weight across your whole hand instead of just your fingertips, making the phone much easier to manage.
Improve Stability With Hooks
Many tripods have a hook on the center column. Hanging a gear bag here adds weight and stops the frame from moving. This means you won't have to constantly lean over to fix a crooked shot.
Manage Brightness and Glare
Anti-glare covers make the screen easier to see in the sun. This prevents squinting and eye strain. Keeping your screen at a comfortable brightness also helps you avoid the tension headaches that come from looking at a bright light for too long.
Solving Specific Fatigue Scenarios for Different Creators
Different types of filming create different physical problems. Tailoring your approach to your specific environment ensures you are solving the right issues for your body.
- For Desk Creators: If you do overhead "top-down" shots, it is often better to raise your table rather than lowering your tripod. Working at a higher surface prevents you from hunching over to see what you are doing.
- For Outdoor Vloggers: Uneven ground makes you work harder to keep things level. Use a tripod with "flip-lock" legs rather than "twist-lock" legs. Flip-locks are generally faster and easier to operate when your hands are cold or tired.
- For Travelers: When you are on the move, carry the lightest gear possible. However, make sure it is tall enough. A tiny "pocket" tripod often forces you to crouch on the ground to see the screen, which is terrible for your knees and back.

FAQs About Phone Tripod Comfort
Q1: What tripod height is best to reduce neck strain?
Try to place the phone as close to eye level as possible. If you are looking down at the screen for hours, you are essentially hanging a heavy weight off your neck muscles. Keeping the screen high allows your head to stay balanced over your shoulders.
Q2: Does a heavier tripod reduce fatigue or increase it?
It is a trade-off. A heavy tripod is harder to carry to a location, but it stays still. A lightweight tripod is easy to carry but might require more "rework" because it shakes or moves. For long sessions in one spot, a slightly heavier, more stable base is usually better for your body.
Q3: What is the easiest way to reduce repetitive adjustments?
Batching your shots is the most effective way. By grouping all shots that use the same height or angle, you stop the constant cycle of loosening and tightening knobs.
Q4: Is it better to tap the screen or use a remote?
Using a remote or a timer is much better for your body. It stops you from having to reach forward, which protects your shoulders and prevents the "micro-shakes" that often ruin a good take.