If you feel like your photos look boring or flat, you are not alone. Many people pick up a camera and feel frustrated because their pictures look like simple snapshots instead of professional art. You might hear people talk about various rules, but one of the most helpful tools is the 20-60-20 rule. This concept is interesting because it covers two different parts of photography at the same time: how you spend your time and how you arrange your frame.
Meaning #1: Creative Workflow and the Paul Nicklen Method
Learning to manage your time during a shoot is just as important as knowing which buttons to press. This workflow keeps your stress low and your creativity high throughout the day.
The First 20%: Secure the Safety Shots First

When you arrive at a beautiful location, your heart might race. You want to capture everything at once. However, the best way to start is by taking "safety shots." These are simple, standard photos that prove you were there. You don't need to be fancy here. Just make sure the focus is sharp and the exposure is correct. These shots are your insurance policy. If the weather changes or your battery dies later, you still have something solid to show for your efforts. This phase builds your confidence and settles your nerves.
The Middle 60%: Time to Refine the Vision
Once the safety shots are in the bag, you spend the bulk of your time working the scene. This is where the real labor happens. You move your body, change your height, and try different lenses. During this 60% of your time, you are looking for the best possible version of the scene. You might move a few feet to the left to hide a distracting sign or wait for the light to hit a tree just right. You are iterating on your initial idea, making small improvements with every click of the shutter.
The Final 20%: Let's Experiment Wildly!

This is the most exciting part of the process. Since you already have the safety shots and the refined shots, you have nothing to lose. You can take risks that might fail. Maybe you try a very long shutter speed to turn moving water into mist, or you tilt your camera at a strange angle. Many famous prize-winning photos come from this final 20% because this is when you stop playing it safe and start playing with your imagination.
How to Apply the Workflow Rule to Prevent Burnout
Using a structured plan helps you stay in the game longer by removing the pressure of being perfect. This approach addresses several common reasons why many photographers quit.
- Managing Expectations: Creative exhaustion often happens when you expect a masterpiece every time you lift the camera. Trying to take a perfect shot right away causes unnecessary stress.
- Lowering Anxiety: By using this time-split, you give yourself permission to take "okay" photos at the start. This lowers your anxiety. When you know you have a dedicated time for experimenting at the end, you don't feel guilty about wasting shots on weird ideas.
- Staying Purposeful: This structure keeps the process fun. You become a hunter with a plan rather than someone just wandering around hoping for luck.
Setting a clear schedule protects your mental energy. With your mind sharp and your plan in place, you can focus on the physical side of the 20-60-20 rule: building depth through visual layering.
Meaning #2: The 20-60-20 Framing Technique for Better Depth
Visual layers make a photo feel like a place you can walk into. You give the viewer a way to move their eyes around the picture by splitting it into these three zones.
The Foreground Anchor (Bottom 20%)
The bottom 20% of your photo is the "entryway." For beginners, this is often the most neglected part of the frame. If you leave this area empty, the viewer feels disconnected from the scene. To fix this, find an object like a rock, a flower, or even a crack in the pavement to put right at the bottom. This acts as an anchor. It gives the eye a place to land before it moves toward your main subject. It creates an immediate sense of scale and distance.
The Main Subject (Center 60%)
This is the heart of your image. This middle section is where your primary story lives. Whether it is a person, a mountain, or a building, it should occupy the largest portion of the frame. By giving the subject 60% of the space, you make it clear what the photo is about. You have enough room here to show the subject's relationship with its surroundings without making the frame feel crowded or messy.
The Background Context (Top 20%)

The top 20% finishes the story. This is usually the sky, the horizon, or the distant trees. Its job is to provide a sense of place. You don't want the background to be too busy, or it will steal attention from your subject. A clean 20% at the top gives the photo "room to breathe." It prevents the image from feeling trapped or claustrophobic.
Gear Setup: Tools to Try in the 20-60-20 Composition
The right equipment provides the support needed to slow down and think about your visual layers. These tools help you push your creative limits during the experimental phase.
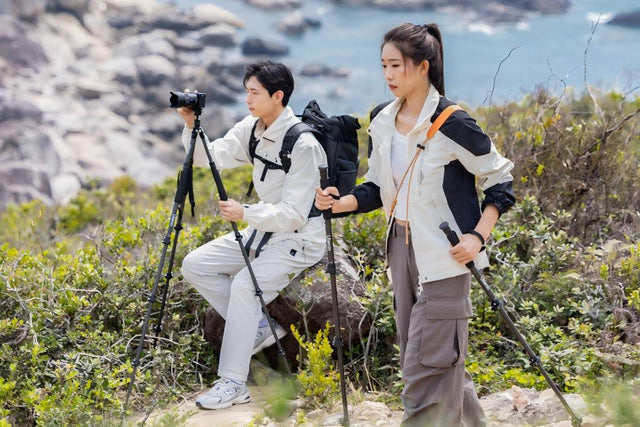
Tripod for Stability and Precision
A high-quality camera tripod keeps your composition perfectly still. This is vital when you want a sharp foreground and a blurred background. When looking for the best camera tripods, choose one that is sturdy yet light enough to carry.
A geared tripod head is better than a standard ball head because it allows for tiny, exact movements. Using this type of tripod head makes it easy to align the bottom 20% of your frame with the horizon.
Other Specialized Creative Tools
- Fast Prime Lenses: Use wide apertures like f/1.8 to create soft blur in your foreground or background layers.
- ND Filters: These allow for long exposures, turning moving water or clouds into smooth textures during your final experimental shots.
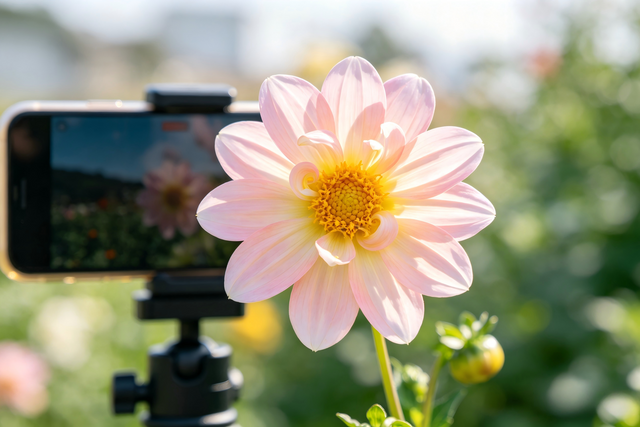
- The "Pocket" Backup: Use your smartphone to quickly test different angles risk-free before setting up your main camera.
Balancing Your Artistic Discipline and Creative Play
The 20-60-20 rule helps you succeed in two different ways. It plans your time so you don't get burned out and stacks your frame to make deep, 3D pictures. Using this plan will help you get great results and also allow for the unexpected magic that comes with trying new things. These numbers will help you make a clear plan for going from simple pictures to professional work.
FAQs About the 20-60-20 Rule
Q1: Is the 20-60-20 rule better than the Rule of Thirds?
It is not necessarily better, but it is different. The Rule of Thirds helps you place a subject left or right. The 20-60-20 rule helps you create depth from front to back. You can actually use both at the same time for the best results.
Q2: Do I need an expensive tripod to use this rule?
You don't need to spend a fortune, but a reliable camera tripod helps. The goal is to keep your camera steady so you can carefully align your 20% foreground and 20% background layers. As you get more serious, a geared tripod head will make those precise alignments much easier.
Q3: Can I use this rule for vertical photos on my phone?
Yes. In fact, this rule is great for vertical shots. Putting something interesting in the bottom 20% of a tall phone screen makes the viewer feel like they are standing right in the scene.