Filming yourself alone often feels limiting. Moving a single phone back and forth for every new shot takes hours and ruins your natural rhythm. Using extra mobile devices as secondary cameras can help solve this problem. The main workflow requires five straightforward steps: plan your angles, mount each device, frame the shots, sync the audio, and edit the clips together. Using multiple cameras creates complementary perspectives that keep viewers engaged. More solo creators rely on simultaneous multi-phone setups to eliminate repeated takes and produce polished content faster.
Why Shoot Multi-Angle Video From Multiple Angles?
Adding multiple camera views transforms flat talking-head clips into polished, professional productions. You gain flexibility during editing while saving hours on set.

- Dynamic Talking-Head Videos: Alternate camera views keep long spoken sections engaging.
- Diverse Shot Selection: Capture wide shots, medium views, tight close-ups, and top-down angles in a single run.
- Vertical Short-Form Content: Use side or close-up clips to build vertical clips for social feeds.
- Fewer Repeated Takes: Record a full script once instead of re-filming the same lines from three different positions.
- Clearer Demonstrations: Show intricate steps and hands-on work from angles that explain the action best.
- Studio-Quality Results: Multi-camera views make one-person video projects look like full crew productions.
Plan Your Multi-Angle Setup Before Recording
Mapping out your layout in advance keeps every camera shot useful.
First, establish your main direct shot. This view carries your main story or explanation. Next, decide which secondary views add useful context. A close-up can highlight a product feature, while a side view adds depth. Skip extra angles that look nearly identical to your main frame.
The Standard Three-Phone Camera Layout
- Phone 1 (Main/Front Angle): Positioned directly in front to capture primary speech and central action.
- Phone 2 (Side Angle): Positioned off-center to capture profile views and casual moments.
- Phone 3 (Overhead/Detail Angle): Positioned directly above your desk or workstation for close-up tasks.
Always keep your final video format in mind. If you plan to export horizontal videos, set every phone to horizontal orientation. If you want vertical videos, adjust your mounts accordingly before hitting record.
Choose the Right Phone Mounts for Each Camera Angle
Stable mounts prevent shaky footage and keep your framing consistent across every device.
Single-camera setups allow quick manual fixes if a phone tilts. With three phones running simultaneously, you cannot stop to adjust loose gear. Choosing the right hardware for each specific location prevents unexpected shifts during long takes.
Mounting Options for Solo Filming
- Standard Tripods: Best for main eye-level camera placement. They offer simple height adjustments and strong stability.
- Desk Stands: Compact bases that sit directly on tables for close side shots.
- Clamp Mounts: Heavy-duty clamps that latch onto shelf edges, desk sides, or door frames to save floor space.
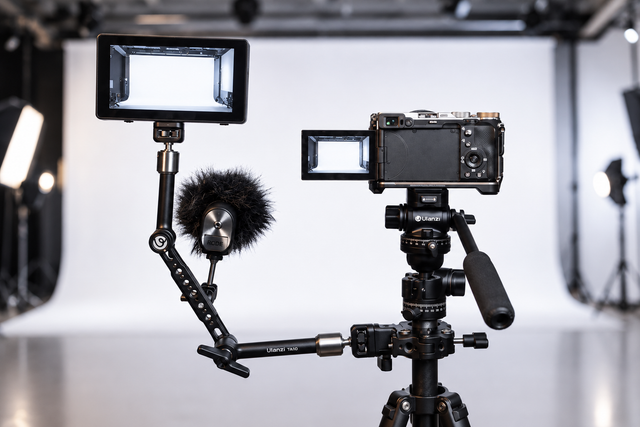
- Flexible Articulating Arms: Metal arms that bend into tight positions for specialized side angles.
- Overhead Mounts: Overhead rigs or tall boom arms that suspend a phone directly over a flat working surface.
Check every mount lock before you start filming. Keep mounting hardware simple so you can adjust heights quickly between different filming sessions.
Set Up the Main Camera Angle First

Your primary camera anchors the whole production visual tone. Setting this phone up accurately makes positioning secondary cameras much easier.
Position your primary phone at eye level. Looking directly into the lens establishes an immediate connection with viewers. Frame the top of your head with comfortable space above it, leaving adequate room on the sides for natural hand gestures.
Lock in this primary composition completely before turning on secondary devices. Treat this frame as the master anchor for your entire layout. Secondary camera choices depend entirely on what this primary shot shows or misses.
Add Side and Close-Up Camera Angles
Secondary angles bring variety and extra detail to your scenes. Placing them correctly adds interest without distracting from the main action.
Set your second phone at a 30 to 45-degree angle relative to your direct shot. Keep this device slightly closer or further away to vary the shot size.
Great Uses for Secondary Angles
- Product Walkthroughs: Show fine details on item surfaces.
- Hand Actions: Capture typing, writing, or assembling small parts.
- Tutorial Steps: Focus closely on specific tool movements.
- Natural Reactions: Capture facial shifts during casual spoken moments.
Check your primary camera preview to ensure secondary tripods remain hidden outside your primary frame.
Add an Overhead or Detail Angle for Clearer Video
Overhead angles show exact physical steps cleanly. They work best for:
- Cooking and meal preparation
- Drawing, painting, and crafting
- Product unboxing clips
- Hardware assembly
- Desk-based software tutorials
Mount your phone securely above your work area using a dedicated boom arm or overhead stand. Test your lighting to make sure overhead phones do not cast harsh shadows across your hands or workspace.
Keep Settings Consistent Across Multiple Phones

Matching your camera settings makes footage look unified across all angles. Balanced settings prevent jarring jumps during visual cuts.
Match resolution and frame rate on every phone. Using 1080p or 4K at 30 frames per second across all devices ensures smooth cuts. Set exposure and white balance manually on each phone to prevent automatic brightness shifts when you move your hands.
Confirm all devices use identical orientation—all portrait or all landscape. Verify every phone has sufficient free storage space and fully charged batteries. Wipe every phone lens clean with a microfiber cloth before starting.
How to Start and Synchronize Multiple Phones
Syncing multiple media files takes minimal effort when you use a quick visual and audio signal at the start of your take.
Press record on your main phone first, then activate secondary phones. Step into your mark and perform a sharp, loud single clap directly in view of every running camera.
This single action creates a visible hand contact moment and a sharp peak in audio wave tracks. Edit software aligns these visual and audio spikes instantly. If you use multi-camera controller software, trigger recording across devices simultaneously. Leave cameras running continuously through minor mistakes to keep your editing simple.
Edit Multi-Angle Video Footage Efficiently
Import all video files into your editing software timeline. Align all clips using the audio waveform peak from your starting clap. Place your primary view on the bottom video track as your master anchor.
When to Switch Camera Angles
- Topic Changes: Cut to a side angle when switching to a new topic.
- Detailed Demonstrations: Cut to an overhead view when starting a hands-on step.
- Emphasis Points: Switch to a tight close-up to highlight crucial advice.
- Pacing Cleanup: Cut to a secondary view to hide trimmed pauses or awkward cuts.
Avoid rapid switching between angles. Keep cuts purposeful so viewers focus on your message rather than the edit choices.
Common Multi-Angle Filming Mistakes to Avoid
Avoiding simple setup mistakes saves time and preserves video quality. Steer clear of these frequent errors:
- Unnecessary Angles: Adding third or fourth cameras that fail to reveal new details.
- Mismatched Lighting: Leaving auto-exposure active, causing brightness shifts between clips.
- Frame Rate Mismatches: Mixing 24fps, 30fps, and 60fps clips, causing stuttering playback.
- Loose Tripods: Using weak clamps that tilt slowly mid-take.
- Visible Gear: Leaving secondary tripods visible inside the main camera frame.
- Full Storage: Filming long takes without clearing phone storage first.
- Skipping Audio Sync: Forgetting to clap at the start, making manual alignment painful later.
Build a Simple Solo Multi-Angle Phone Setup

To start multi-camera recording, you don't need a lot of complicated gear. A basic setup delivers professional results right away.
Recommended Starter Equipment
- Phones: 1 primary phone + 1 side phone + 1 top-down phone
- Mounting: 1 standard tall tripod + 1 desk clamp arm + 1 top-down mount
- Lighting: 1 key light in front + soft ambient room light
Start with just two phones if three feels overwhelming. Add a top-down view later as your workflow becomes second nature. Focus on a simple setup you can assemble quickly.
Build a Smooth Multi-Angle Filming Routine
Speed comes from repeating what works. Outline your tripod legs on the floor with tape so you never guess camera placement twice. Keep phone recording settings matched on all devices to bypass extra prep steps. Pressing record and filming straight through keeps your workflow simple. Turning this layout into a standard habit makes solo video production fast, easy, and completely reliable.
FAQ about Filming Multi-Angle Videos Alone
Q1: How do you film multiple angles by yourself?
Position main and secondary phones on stable mounts around your space. Start recording on each device, perform a loud hand clap in view of all cameras, and record your video continuously. Align the clips using the audio clap spike in your editing software.
Q2: How many phones do I need for a multi-angle video?
Two phones provide a solid entry setup with a main view and a side angle. Adding a third phone enables dedicated top-down or close-up views for complex demonstrations.
Q3: How do you synchronize videos from multiple phones?
Clap your hands sharply once in view of all active cameras after starting recording. In your video editing timeline, align the visual hand contact and the sharp spike in the audio waveform across all video tracks.
Q4: What is the best setup for filming yourself alone?
A primary phone placed at eye level on a tall phone tripod, paired with a second phone set at a 45-degree angle on a desk mount or clamp arm, provides an efficient setup for solo video production.