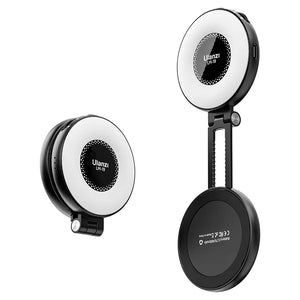
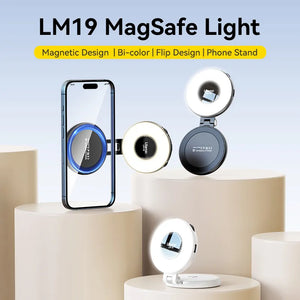
Key Takeaways
A ring light with stand isn't complicated, but small adjustments in size, height, brightness, and placement can completely change how you look on camera. Taking into account the proper features, setting it up properly, and following a few usage tips will help you appear clear, confident, and well-lit in any video situation.
Looking good on camera can seem like a mystery. You set up your shot, but the result is full of shadows and poor colouring that makes you look tired. The solution is not that difficult - adjust the lighting. A ring light on a stand gives you control over how you appear on screen. This article will show you exactly how to set it up and use it to achieve a clear, professional and flattering look every time.
How a Ring Light Improves Your Camera Appearance

So, what makes this tool so effective? Well, a ring light is designed to make faces look great on camera, and it does this with a few key principles of lighting that create a polished result.
It Creates Flattering, Soft Light
Think of the difference between a bare lightbulb and a light with a lampshade. The bare bulb creates harsh, sharp shadows, while the lampshade creates a soft glow. A ring light acts like a perfect lampshade for your face. Its circular shape spreads the light out evenly, wrapping it around your features. This softness minimizes skin imperfections and gives your skin a smooth look. While ring lights excel for video calls, understanding different lighting techniques can enhance all your visual content creation efforts.
It Eliminates Unwanted Shadows
The most common source of bad lighting is from above. Ceiling lights cast deep shadows under your eyes, nose, and chin. A ring light with stand, when placed in front of you, casts light directly onto your face. This frontal lighting fills in those shadows, creating a clean and bright look. The result is a more energetic appearance.
It Produces Professional "Catchlights"
You may have noticed a little sparkle of light in the eyes in professional portraits. That's called a "catchlight," and it's a small detail that makes a big difference. It draws attention to the eyes and makes a person look more focused and alive on camera.
It Provides Consistent and Controllable Light
Natural light from a window is great, but it's not always reliable. It changes with the weather and the time of day. A ring light frees you from that problem. You have full control over the brightness and the color of the light. This allows you to create a high-quality look for your video calls or recordings, no matter if it's a sunny morning or a cloudy afternoon.
Getting Started: Assembling Your Ring Light and Stand

The first practical step is putting your equipment together. The assembly is simple, but a stable setup is important for protecting your camera or phone and getting the best lighting.
Your ring light with stand kit will typically include three main parts:
- The Stand: This is a tripod base that you can adjust for height. Extend the legs to create a wide, stable base. Then, use the clasps on the center column to raise it.
- The Ring Light: This is the circular LED panel. It usually attaches to the top of the stand, either by screwing on or using a quick-release mount depending on your model. Make sure it is secure before placing your device in the holder.
- The Phone/Camera Mount: This holder sits in the middle of the ring. Attach it according to the instructions, and make sure it holds your device securely.
Take a moment to check that all connections are tight. A wobbly stand can lead to a shaky video, so a few seconds of preparation helps a lot.
Step 1: Positioning Your Ring Light Correctly
How you position your light is the most important factor for a great look. The right placement will give you that soft, shadowless lighting. The three elements to use a ring light with stand right are height, distance, and angle.
Proper Height for Your Ring Light
The rule for height is simple: position the center of the ring light at your eye level. When you are sitting and looking straight ahead, the camera in the middle of the ring should be looking right at you.
- If the light is too high, it will cast shadows under your eyes and nose.
- If the light is too low, it will create an unnatural "up-lighting" effect that isn't flattering.
Adjust the stand so the light is level with your face. This makes sure the light hits you straight on for the best effect.
Correct Distance from Your Face
The ideal distance for your ring light is about arm's length from your face. Sit in your chair and extend your arm; the light should be roughly where your fingertips end. This distance is a great starting point for a soft, even glow.
- For smaller ring lights, moving slightly closer can give a softer, more flattering light.
- For larger ring lights, stepping a bit farther away helps spread light evenly.
Start at arm's length and adjust while watching your screen to see what looks best.
The Best Angle for Your Camera and Light
For the classic, shadow-free look, there is only one angle to use: directly in front of you. Your camera should be looking through the center of the ring, and the ring should be facing you squarely. This setup sends light from the same direction as the camera's view, which is what removes all the shadows.
Step 2: Adjusting Ring Light Brightness and Color Temperature

After your light is in the perfect position, you can fine-tune the settings. Most ring lights let you control two key features: the brightness and its color. These adjustments allow you to match the light to your room and the look you want.
Decode Ring Light LED Brightness Levels
Your ring light's brightness is a powerful feature. A common mistake is to turn it up too high, which can wash out your features. Instead, follow this simple process for decoding ring light LED brightness levels:
1. Start with the brightness at its lowest setting.
2. While looking at your image on your screen, slowly increase the brightness.
3. Stop when your face is clearly lit and you are not squinting.
The goal is to add enough light to look bright and clear, not to blast your face with light. The right brightness should look natural.
Choose the Right Color Temperature

Color temperature is about the warmth or coolness of the light. Most ring lights offer three settings:
- Warm Light: This has a yellowish, cozy tone, like a regular lightbulb. It can create a relaxed feel.
- Cool Light: This has a bluish, crisp tone, like bright office lighting. It can create a modern, energetic look.
- Neutral/Daylight: This is a clean, white light between warm and cool. It is the most natural-looking option.
For most professional uses, like work calls, Neutral/Daylight is the best choice. It provides a clean look that shows skin tones accurately.
Step 3: Managing Your Background and Room Lighting
Your ring light is your main light source, but it works with the other light in your room. Managing your whole environment is the final step to a professional shot. This involves paying attention to what's behind you and above you.
Avoid Strong Backlighting
The biggest enemy of good lighting is a bright light behind you. Never sit with a bright window or a lamp directly in your background. Your camera will adjust to the bright background, which will turn you into a dark shadow. If you can, face the window, or close the blinds behind you and let your ring light do the work.
Turn Off Competing Overhead Lights
A strong ceiling light can add shadows that compete with your ring light. Turn off or dim overhead lights and avoid sitting too close to a wall, which can cast unwanted background shadows. Let your ring light be the main light on your face for the best results.
Use Your Ring Light for a Professional On-Camera Look
A great on-camera look comes from having the right tools, and your ring light with stand puts you in complete control. You now know how to position it perfectly, dial in the best settings, and manage your room's ambiance. This simple setup is all it takes to create a clear and flattering image for any video call or recording. Go ahead, turn on your light and see the professional difference for yourself.
FAQs About Ring Light
Q1: How do I stop the ring light from reflecting in my glasses?
This is a common issue. To fix it, you need to change the angle of the reflection. Raise the ring light with stand so it's a little higher than your eye level. Then, tilt the ring itself so it's pointing slightly down at your face. This adjustment will push the reflection out of your glasses' frame from the camera's view.
Q2: When choosing your ring light, does size matter?
Yes, ring light size matters because it affects the quality of light. A larger ring light (like 18 inches) will produce softer light than a smaller one (like 10 inches). For head-and-shoulders shots, a 10-12 inch ring light is good enough. For professional videos that show more of your body, an 18-inch or larger ring light will give you better results.
Q3: Which color temperature is best for professional video calls?
For professional settings, Neutral/Daylight is the best choice. It provides a clean, white light that is bright without being harsh. It also shows colors accurately, so your skin tone and clothing will look natural.


