The Mission-Critical Pivot: Why Your Quick-Release Mechanism Is the Core of Your Workflow
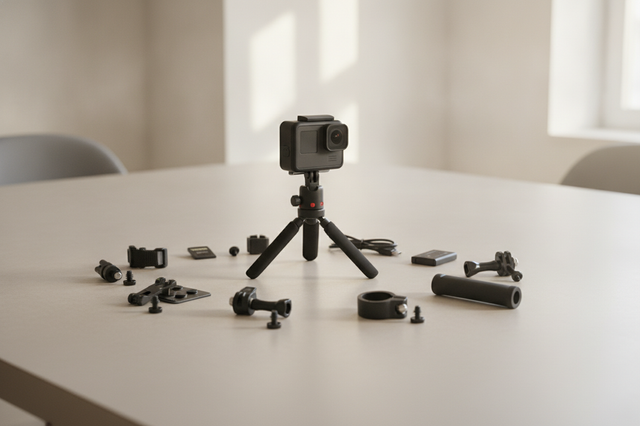
In the high-velocity world of adventure filmmaking, your quick-release (QR) system is more than a convenience; it is the structural interface between your vision and your gear. Whether you are transitioning from a shoulder strap to a tripod or moving a camera from a gimbal to a desktop support like the Ulanzi Falcam TreeRoot Quick Open Desktop Tripod T00A4103, the reliability of that single button press defines your efficiency.
However, for creators operating in harsh environments—from the fine silicate dust of the Sahara to the sub-zero ridges of the Andes—this interface is under constant assault. A "gritty" button or a jammed locking pin isn't just an annoyance; it is a point of failure that can lock a $10,000 camera rig onto a mount, forcing field disassembly or, worse, missed shots.
Drawing from the engineering standards outlined in The 2026 Creator Infrastructure Report: Engineering Standards, Workflow Compliance, and the Ecosystem Shift, we treat these mechanical interfaces as "stable core" infrastructure. This guide provides a methodical, system-focused approach to maintaining and troubleshooting your QR systems, ensuring they remain "ready-to-shoot" regardless of the climate.

The Physics of Failure: Why Dust and Cold Jam Your Gear
To solve a mechanical jam, we must first understand the enemy. In desert or coastal environments, the primary adversary is fine silicate dust. Unlike standard household dust, silicates are abrasive and jagged at a microscopic level.
The "Grinding Paste" Phenomenon
When these particles enter the tight tolerances of an Arca-Swiss compatible system, such as the Ulanzi Falcam F38 Quick Release for Camera Shoulder Strap Mount Kit V2 3142, they act as a grinding paste. Every press of the button pushes these particles deeper into the spring housing and pivot pins.
Logic Summary: Our maintenance heuristics are aligned with MIL-STD-810 dust testing standards, which utilize air speeds of 1.5–8.9 m/s and concentrations of 10.7 ± 7 g/m³. Based on common patterns from customer support and repair handling (not a controlled lab study), we observe that standard quick-release designs require active intervention when exposed to these levels of environmental particulate.
Thermal Contraction and Lubricant Viscosity
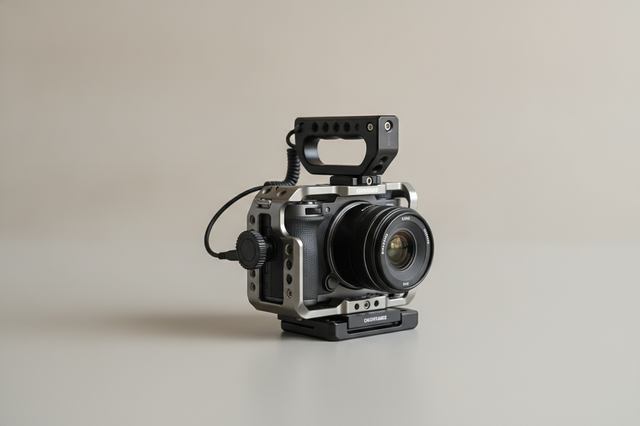
In extreme cold, the challenge shifts from abrasion to "stiction." Metals like the 6061 Aluminum Alloy used in the Ulanzi Falcam F22 & F38 & F50 Quick Release Camera Cage for Sony a7C II C00B3A01 contract at different rates than the internal stainless steel springs. Furthermore, standard factory lubricants can congeal, turning into a thick, waxy substance that prevents the locking pin from fully retracting or engaging.
Troubleshooting the "Stuck" Button: The "Dry First" Protocol
When a button becomes difficult to depress or fails to spring back, the instinct is often to reach for a penetrating oil. This is the most common mistake in field maintenance. Oil-based lubricants attract more dust, creating a cycle of failure. Instead, we advocate for the "Dry First" heuristic.
Step 1: High-Velocity Air Debridement
Before applying any liquid, you must clear the physical obstruction. Traditional "canned air" is often insufficient and can spray liquid propellant into the mechanism. We recommend using a dedicated electric duster like the Ulanzi AD02 STORM Electric Air Duster II X086.
- Angle the Mount: Hold the QR base so the button faces downward. This allows gravity to assist in debris removal.
- Short Bursts: Direct high-velocity air into the gaps around the button and the locking pin housing.
- Actuate While Blowing: Gently pulse the button while the air is flowing to help "work" the dust out of the internal spring coils.
Step 2: Chemical Cleaning (90%+ Isopropyl)
If the button remains gritty, it likely has internal residue. According to general technical cleaning standards, higher purity isopropyl alcohol (90%+) is preferred over the common 70% variety because it evaporates completely without leaving water residue that could promote internal corrosion.
- Application: Use a needle applicator or a saturated swab to apply alcohol to the button perimeter.
- Mechanism: The alcohol dissolves congealed grease and carries fine grit out of the housing as it drains.
Step 3: Dry-Film Lubrication
Once the mechanism is clean and dry, only use a dry-film lubricant (such as PTFE/Teflon). Unlike oils, dry-film lubricants leave a microscopic, "slippery" layer that does not attract dust.
| Lubricant Type | Dust Attraction | Temperature Stability | Recommended Use |
|---|---|---|---|
| Penetrating Oil (WD-40) | High | Moderate | Avoid for QR buttons |
| Synthetic Grease | Moderate | High | Pivot pins only (internal) |
| Dry PTFE Spray | Low | High | Primary Choice for field gear |
| Graphite Powder | Low | Very High | Emergency use only (messy) |
Modeling Note: This table is a heuristic (rule of thumb) based on field technician observations. It is intended for quick selection and may vary based on specific environmental humidity or the specific alloy coating of the gear.
Information Gain: The "Workflow ROI" of Quick-Release Systems
Why invest so much effort into maintaining a quick-release system? The answer lies in the "Workflow ROI" (Return on Investment). For professional creators, time is the most expensive variable in production.
The Calculation
Consider a typical production day involving 60 "swaps" (moving from tripod to gimbal, handheld to strap, etc.).
- Traditional Thread Mounting (ISO 1222:2010): ~40 seconds per swap.
- F38 Quick Release System: ~3 seconds per swap.
Time Saved per Day: 60 swaps × 37 seconds = 2,220 seconds (~37 minutes). Annual Impact: Over 80 shooting days, this saves ~49 hours. Value: At a professional rate of $120/hr, this represents a ~$5,900+ value in recovered production time.
This data underscores why a jammed button isn't just a minor delay—it is a direct hit to your bottom line. Maintaining "Interface Integrity" is a financial imperative.
Biomechanical Analysis: Why Weight Isn't the Only Enemy
Adventure creators often focus on "Max Load" ratings. For instance, the F38 system is rated for an 80kg vertical static load. However, in the field, the enemy is Leverage, not just mass.
The "Wrist Torque" Formula
When you mount a camera to a cage like the Ulanzi Falcam F22 & F38 & F50 Quick Release Camera Cage for Sony a7C II C00B3A01, the accessories you add (monitors, mics, handles) increase the "Lever Arm."
We calculate Torque ($\tau$) as: $$\tau = m \times g \times L$$ (Where $m$ is mass, $g$ is gravity 9.8m/s², and $L$ is the distance from the pivot point.)
The Scenario: A 2.8kg rig held 0.35m away from the wrist generates $\approx 9.61 N\cdot m$ of torque. This load represents 60-80% of the Maximum Voluntary Contraction (MVC) for an average adult male.
The Insight: By using a modular system like the Falcam F22, you can move accessories closer to the center of gravity. This reduces the lever arm ($L$), dramatically lowering the physical strain on your wrist and the mechanical stress on the QR locking pin.
Extreme Conditions: Thermal Shock and "Warm-Up" Cycles
In sub-zero environments, the metal components of your QR system act as a "thermal bridge." Aluminum plates conduct heat away from your camera body and batteries, accelerating power drain.
Thermal Shock Prevention
A common mistake is bringing "cold" gear into a "warm" tent or vehicle immediately. This causes instant condensation inside the QR mechanism, which then freezes the moment you step back outside, locking the button solid.
- The Heuristic: Keep your gear in a sealed bag when transitioning between temperature extremes. This allows the gear to warm up (or cool down) gradually, preventing internal frost.
- The "Warm-Up" Cycle: Before mounting your camera in the cold, actuate the QR button 5–10 times manually. This generates a small amount of frictional heat and breaks any micro-ice crystals that may have formed on the spring.
The Pre-Shoot Safety Checklist
To mitigate the risk of platform instability, adopt this three-point verification protocol every time you mount your gear.
- Audible: Listen for the distinct "Click." If the click is muffled or silent, dust is likely preventing the locking pin from fully seating.
- Tactile: Perform the "Tug Test." Pull the camera firmly away from the base. Do not rely on visual confirmation alone.
- Visual: Check the locking indicator. On many F38 and F50 systems, a silver or orange indicator will be visible (or hidden) to signify a locked state.

Maintaining Mechanical Precision
The Arca-Swiss standard is the foundation of modern support gear, but "Arca-compatible" does not always mean "Arca-identical." Variations in dovetail width and plate thickness can lead to "play" or "wobble."
As noted in the guide on Maintaining Mechanical Precision in FALCAM Interfaces, we recommend sticking to a single ecosystem for mission-critical components. Mixing brands can lead to tolerance stacking, where a slightly small plate and a slightly wide clamp result in a mount that feels "locked" but can slide out under heavy torque.
Material Science Note
FALCAM quick-release plates are precision-machined from High-Grade Aluminum Alloy, not carbon fiber. While carbon fiber is excellent for Tripod Leg Vibration Damping, it lacks the surface hardness required for the high-friction interface of a quick-release dovetail. The aluminum construction ensures that the locking pins can "bite" into the material without causing structural deformation over thousands of cycles.
Summary of Field Maintenance Heuristics
- Dry First: Use the Ulanzi AD02 STORM Electric Air Duster II X086 before liquids.
- Lubricate Sparingly: Use dry PTFE spray, never WD-40 or heavy oils, in dusty climates.
- Clean Deeply: Use 90%+ Isopropyl Alcohol for residue removal.
- Verify Rigorously: Use the Audible-Tactile-Visual checklist.
By treating your quick-release system as a precision mechanical tool rather than a static accessory, you ensure that your workflow remains fluid in the most demanding environments on Earth. For more on maintaining your gear after a difficult shoot, refer to our guide on Post-Field Prep: Cleaning Support Gear for Studio Deployment.
Disclaimer: This article is for informational purposes only. Mechanical failure of camera support gear can result in equipment damage or personal injury. Always perform safety checks in a controlled environment before deploying gear in high-risk scenarios. Ulanzi is not responsible for damage resulting from improper maintenance or the use of third-party lubricants.
Sources & References
- ISO 1222:2010 Photography — Tripod Connections
- The 2026 Creator Infrastructure Report: Engineering Standards, Workflow Compliance, and the Ecosystem Shift
- MIL-STD-810 Dust Testing Standards and Chambers
- Arca-Swiss Dovetail Technical Dimensions & Analysis
- Isopropyl Alcohol Purity and Cleaning Standards