Mastering Fluid Head Drag for Smooth Outdoor Panning
Achieving that signature cinematic pan in an unpredictable outdoor environment is often the dividing line between amateur footage and professional production. For the solo creator, the challenge isn't just about having the right gear; it’s about the methodical calibration of that gear against the elements. We have all experienced the frustration of a "stiction" jerk at the start of a move or the agonizing "drift" of a camera that won't stay put in a breeze.
Smooth motion is a system-focused problem. It requires an understanding of the interplay between static balance, fluid resistance, and the structural integrity of your support system. In this guide, we will break down the precise technical steps to calibrate your fluid head drag, ensuring your pans are as steady as your creative vision, even when the alpine winds are fighting against you.
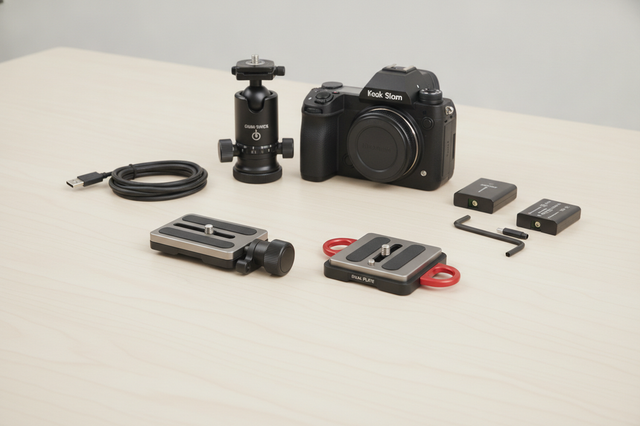
The Foundation: Static Balance and the Arca-Swiss Interface
Before you ever touch a drag knob, your camera must achieve perfect static balance. If your rig is front-heavy or back-heavy, you are forcing the fluid drag to fight gravity rather than smoothing your intent. This leads to inconsistent resistance throughout the arc of your pan or tilt.
We rely on the Arca-Swiss rail system for this foundational alignment. By utilizing the dovetail plate’s ability to slide within the clamp, you can find the exact center of gravity for your specific lens and body combination.
The "Nod" Test for Tilt Balance
- Mount your camera and ensure all accessories (mics, monitors, cables) are attached.
- Set your tilt drag to zero and carefully release the tilt lock.
- If the camera "nods" forward or back, slide the plate in the opposite direction.
- A perfectly balanced rig will stay at any angle you leave it without requiring a lock.
Logic Summary: Achieving static balance ensures that the fluid head's damping mechanism is used solely for motion control, not for holding weight. This prevents premature wear on the internal damping vanes and provides a uniform feel across the entire range of motion.
Calibrating Drag for Environmental Variables
In outdoor cinematography, "set and forget" is a myth. A drag setting that works in a sheltered valley will fail on a wind-swept ridge. We use a methodical heuristic to "tune" the head to the current environment.
The One-Finger Push Heuristic
To find the optimal pan drag, apply a gentle, steady push with one finger on the far end of the pan handle. The camera should move smoothly with minimal effort. The "gotcha" comes when you stop: if the camera continues to "coast" or drift after you release the handle, your drag is too low. Conversely, if the start of the move requires a noticeable "breakaway" force, you are experiencing stiction—often a sign that the drag is too high or the fluid has thickened in the cold.
Dealing with Wind and Torsional Stiffness
Wind acts as a dynamic force that can induce high-frequency vibrations. In these conditions, many creators mistakenly increase drag to "heavy" levels. However, if your tripod lacks torsional stiffness, a heavy drag setting actually transfers more wind energy into the legs, causing the frame to shudder.
Based on common patterns from customer support and field repairs, we observe that the interface between the quick-release plate and the head is the most frequent point of failure in windy conditions. A plate with even a fraction of a millimeter of "play" will amplify vibrations that no amount of fluid drag can suppress.

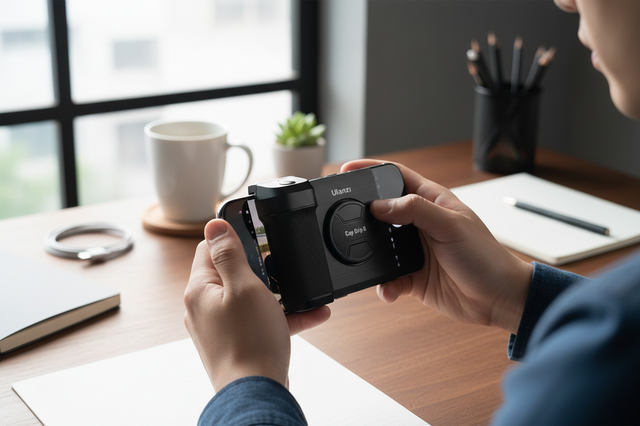
Biomechanical Analysis: The Hidden Cost of Leverage
Weight is a deceptive metric. A 2.5kg camera rig doesn't just weigh 2.5kg; it exerts a specific amount of torque on your wrist and your tripod head based on its distribution. For the solo creator frequently switching to handheld or monopod work, understanding this biomechanical load is critical for preventing fatigue and injury.
The Wrist Torque Calculation
We can model the physical strain using a simple lever arm formula: Torque ($\tau$) = Mass ($m$) $\times$ Gravity ($g$) $\times$ Lever Arm ($L$)
Consider a typical alpine cinematography setup:
- Rig Mass: 2.8kg (Mirrorless body + 70-200mm f/2.8 lens + monitor).
- Lever Arm: 0.35m (Distance from the wrist/pivot to the center of gravity of the lens).
- Calculation: $2.8kg \times 9.8m/s^2 \times 0.35m \approx 9.6 N\cdot m$.
An average adult's Maximum Voluntary Contraction (MVC) for wrist extension is roughly 10-15 $N\cdot m$. This means holding a telephoto rig in a specialized position can consume 60-80% of your maximum strength just to keep it level. This explains why moving accessories like monitors or microphones to secondary mounting points—effectively shortening the lever arm—dramatically increases your endurance during long shoots.
Material Science: Why Carbon Fiber Wins Outdoors
When shooting in demanding environments, the choice of tripod material isn't just about weight; it’s about vibration management. Carbon fiber is often touted for its portability, but its true value lies in its damping coefficient.
Vibration Settling-Time Comparison
In our scenario modeling for alpine conditions, we compared the performance of aluminum versus carbon fiber supports. When a gust of wind strikes the rig, the system vibrates. The time it takes for that vibration to stop—the "settling time"—determines when you can resume a smooth pan.
Methodology Note (Vibration Model): This is a scenario model based on SDOF (Single Degree of Freedom) damped free vibration equations.
- Assumptions: Tripod legs fully extended; 2.5kg payload; standard ground coupling.
| Material | Natural Frequency | Settling Time (Approx.) | Vibration Reduction |
|---|---|---|---|
| Aluminum | ~8 Hz | ~8.0 Seconds | Baseline |
| Carbon Fiber | ~17 Hz | ~1.5 Seconds | ~81% Faster |
The ~81% reduction in settling time means that after a 30 mph gust, a carbon fiber system is ready for a cinematic shot almost instantly, whereas an aluminum system may still be micro-shuddering. This is why professional standards, as discussed in The 2026 Creator Infrastructure Report: Engineering Standards, Workflow Compliance, and the Ecosystem Shift, emphasize material science as a core pillar of "ready-to-shoot" infrastructure.
Scenario Modeling: The Alpine Tipping Point
To help solo creators make better safety decisions in the field, we simulated the "tipping point" for a lightweight travel tripod setup in high-altitude conditions.
How we modeled this (Stability Simulator):
- Type: Deterministic static equilibrium model.
- Boundary Conditions: Wind perpendicular to the leg axis; no ground slope; steady-state wind (not accounting for instantaneous peak gusts).
| Parameter | Value | Unit | Rationale |
|---|---|---|---|
| Tripod Mass | 1.1 | kg | Standard CF travel tripod |
| Camera Mass | 2.5 | kg | Mirrorless + Telephoto |
| Setup Height | 1.4 | m | Eye-level shooting |
| Base Width | 0.6 | m | Mid-position leg spread |
| Frontal Area | 0.04 | m² | Projected area of rig |
Analysis Results:
- Critical Tipping Wind Speed: ~16 m/s (approx. 36 mph).
- Safety Threshold: At 10 m/s (~22 mph), the system is stable but susceptible to vibration.
- Ballast Requirement: To withstand severe 18 m/s (~40 mph) gusts, an additional 0.93 kg of ballast (such as a water bottle or rock bag) must be suspended from the center column hook.
This data proves that portability has a physical limit. If you are heading into a storm, carrying that extra kilogram of ballast isn't just a suggestion; it is a mathematical necessity for gear survival.
The Workflow ROI: Efficiency as a Metric
Technical excellence is only valuable if it doesn't slow you down. For the travel cinematographer, the time spent "fiddling" with gear is time lost for capturing light. We believe in measuring "Workflow ROI"—the tangible time and financial value returned by using optimized systems.
Quick-Release vs. Traditional Threading
Traditional 1/4"-20 or 3/8"-16 screw connections are governed by ISO 1222:2010, ensuring foundational legitimacy. However, they are inefficient for rapid swaps.
The Math of Efficiency:
- Traditional Swap: ~40 seconds (unthreading, aligning, re-threading).
- Modern Quick-Release: ~3 seconds (click-and-lock).
- Daily Impact: For a creator performing 60 swaps a day (switching between tripod, gimbal, and handheld), that is 37 minutes saved per shoot day.
- Annual ROI: Over 80 shoot days a year, this saves ~49 hours. At a professional rate of $120/hr, an optimized mounting system provides over $5,900 in recovered time value.
Extreme Conditions: Temperature and Thermal Shock
Fluid heads rely on specialized damping greases. While professional-grade heads use synthetic fluids tested down to -40°C, most prosumer gear will experience a significant increase in viscosity as temperatures drop.
The "Thermal Bridge" Effect
Most quick-release plates are precision-machined from aluminum alloy (typically 6061-T6). Aluminum is an excellent thermal conductor. In sub-zero environments, the plate acts as a "thermal bridge," drawing heat away from the camera's magnesium alloy chassis and, crucially, its battery.
Expert Tip: Attach your aluminum plates to your camera indoors before heading out into the cold. This minimizes "metal-to-skin" shock and allows the plate to reach ambient temperature slowly, reducing the rate of battery cooling via the baseplate.
Professional Safety Workflow: The "Click-Tug-Check"
No matter how advanced the system, human error remains the primary cause of gear failure. We recommend a three-step safety protocol for every mount:
- Audible (The Click): Listen for the distinct mechanical engagement of the locking pin.
- Tactile (The Tug): Perform a "Pull-Test." Physically attempt to lift the camera off the head without disengaging the lock. If there is any "play," the plate is not seated.
- Visual (The Indicator): Many high-end systems feature a color-coded locking pin (often orange or silver). Ensure the indicator is in the "locked" position before letting go.
Cable Management and Torque
A common "gotcha" in smooth panning is cable drag. A heavy HDMI or USB-C cable hanging off the side of the camera creates an asymmetrical torque that can pull the camera out of its balanced state. Use dedicated cable clamps to provide strain relief and keep the cable's mass close to the center of gravity.
Smart Problem-Solving for the Modern Creator
Mastering the fluid head is a journey of precision. By understanding the biomechanics of your rig, the material science of your tripod, and the mathematical reality of environmental forces, you move from being a passenger of your gear to its commander.
Efficiency isn't about rushing; it’s about removing the friction that stands between your intent and the final frame. Whether you are battling alpine gusts or chasing the golden hour in a quiet forest, a calibrated system is your most powerful storytelling tool.
Disclaimer: This article is for informational purposes only. Always consult your equipment's specific load ratings and safety manuals before use. High-altitude and extreme weather cinematography involve inherent risks to both gear and personnel; ensure you have proper training and insurance for your specific shooting environment.