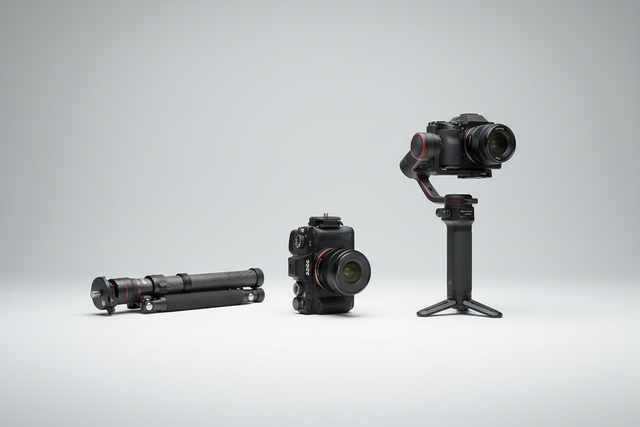
The Architecture of Vertical-First Rigging
For the modern solo creator, the transition from horizontal to vertical video is more than a simple 90-degree rotation. It is a fundamental shift in the physics of camera handling. Whether you are filming for high-velocity social platforms or capturing mobile-first travel documentaries, the weight of your gear is your primary adversary. However, weight is not an isolated metric. In our analysis of creator workflows, we have observed that portability is often sacrificed not by the weight of the camera itself, but by the inefficiency of the "infrastructure" surrounding it—the cages, handles, and mounts that hold the system together.
We approach rigging as a structural engineering challenge. To build a rig that survives a 12-hour "run-and-gun" day in the field, you must balance the rigidity of aluminum alloys with the biomechanical limits of the human wrist. This article breaks down the technical standards and logistical frameworks required to optimize a vertical rig for maximum portability without compromising the stability demanded by professional standards like the EBU R 137 / TLCI-2012.
The Biomechanics of the Vertical Offset
The most significant "hidden" challenge in vertical rigging is the lateral offset. When a camera is flipped vertically, the center of gravity (CoG) shifts away from the tripod screw axis defined by ISO 1222:2010. This creates a lever arm that exerts constant torque on your wrist and your mounting plates.
The "Wrist Torque" Calculation
To understand the physical toll of a poorly balanced rig, we can model the torque exerted on a creator's wrist during handheld operation. Torque ($\tau$) is the product of mass ($m$), gravity ($g$), and the length of the lever arm ($L$):
$$\tau = m \times g \times L$$
Consider a standard mirrorless setup:
- Mass ($m$): 2.8 kg (Camera, lens, monitor, and mic).
- Lever Arm ($L$): 0.35 m (The distance from the wrist to the rig’s center of gravity).
- Gravity ($g$): 9.81 $m/s^2$.
In this scenario, the wrist must counteract approximately 9.61 N·m of torque. Based on standard ergonomic modeling, this load can represent 60% to 80% of the Maximum Voluntary Contraction (MVC) for an average adult. Prolonged exposure to this level of strain is the leading cause of fatigue-induced camera shake and long-term repetitive strain injury.
Logic Summary: Our biomechanical model assumes a static handheld hold. We use the lever arm length as the primary variable because reducing the rig's mass is often limited by optical requirements. By moving accessories like monitors or microphones closer to the central axis using compact mounting standards, we can reduce $L$ and, consequently, the torque.

Managing the Center of Gravity
To mitigate this torque, we recommend a "vertical-inward" rigging strategy. Instead of stacking accessories on top of a vertical cage—which further extends the lever arm—we advocate for mounting them on the "grip side" of the camera. This brings the total system CoG closer to the palm of the hand. We have found that adding a small counterweight (100–200g) on the opposite side of the main grip can actually make the rig feel lighter by neutralizing the lateral pull, even though the total mass has technically increased. This is a key finding in our Minimizing Wrist Strain in Long-Duration Vertical Handheld Shoots guide.
Material Science: Aluminum Rigidity vs. Carbon Fiber Damping
A common misconception in the creator community is that carbon fiber is always superior for rigging components. While carbon fiber is an exceptional material for tripod legs due to its high strength-to-weight ratio and natural vibration damping, it is often unsuitable for the high-stress interfaces of quick-release plates.
The Case for Precision-Machined Aluminum
For the "infrastructure" layer—specifically quick-release plates and clamps—we rely on precision-machined 6061 or 7075 Aluminum Alloy. Unlike carbon fiber, which can be susceptible to hairline fractures if overtightened or impacted during transit, aluminum provides the "zero-play" rigidity required for secure mounting.
When evaluating mounting plates, adherence to the Arca-Swiss rail system dimensions is critical for ecosystem interoperability. A high-performance aluminum plate acts as a structural bridge, ensuring that the camera body and the cage function as a single, monolithic unit.
The "Thermal Bridge" and Battery Health
One technical nuance often overlooked by travelers is the "Thermal Bridge" effect. Aluminum is a highly efficient thermal conductor. In extreme cold environments, an aluminum mounting plate attached directly to the camera base can act as a heat sink, drawing warmth away from the camera's internal battery.
Field Tip: To preserve battery life in sub-zero conditions, we suggest attaching your mounting plates to the camera while indoors. This allows the metal to reach ambient room temperature, reducing the "thermal shock" and the rate of battery cooling when you step outside.
Load Capacity: Static vs. Dynamic Reality
When you see a load rating of "80kg" on a quick-release system, it is vital to understand what that number represents. In most cases, this refers to the Vertical Static Load—the amount of weight the system can hold in a perfectly still, laboratory environment.
The 50% Safety Heuristic
For run-and-gun videographers, the Dynamic Payload is the only metric that matters. When you are running with a camera or swinging it on a gimbal, the G-forces involved can momentarily triple the effective weight of your gear.
- The Rule of Thumb: Ensure the load rating of the smallest component in your chain (the clamp or the plate) exceeds the total weight of your camera and accessories by at least 50%.
- High-Mass Exception: If your rig exceeds 3kg, do not rely on standard lightweight clamps. Transition to heavier-duty standards or "anti-deflection" plates that use multiple points of contact to prevent the camera from twisting under its own weight.
Modeling Note (Reproducible Parameters):
Parameter Value/Range Unit Rationale Static Load Rating 80 kg Standard lab baseline Safety Factor 1.5x - 2.0x Ratio Accounts for dynamic G-forces Mounting Torque 4.5 - 5.5 N·m Optimal for 1/4"-20 steel screws Ambient Temp Limit -20 to 60 °C Operating range for aluminum alloys Tolerance Stack ±0.05 mm Precision required for Arca-Swiss fit
Workflow ROI: The Hidden Cost of Threading
In the professional world, time is a currency. The shift toward modular, quick-release ecosystems is driven by the need to minimize "downtime" between shots. We have modeled the long-term impact of switching from traditional 1/4"-20 thread mounting to a unified quick-release system.
The Efficiency Extrapolation
| Action | Traditional Threading | Quick-Release System | Time Saved |
|---|---|---|---|
| Camera to Tripod | ~45 Seconds | ~3 Seconds | 42 Seconds |
| Vertical/Horizontal Swap | ~60 Seconds | ~5 Seconds | 55 Seconds |
| Accessory Change (Mic) | ~30 Seconds | ~2 Seconds | 28 Seconds |
| Total per Swap Cycle | ~135 Seconds | ~10 Seconds | 125 Seconds |
If a professional solo creator performs 60 swaps per shoot and works 80 shoots per year, the time saved totals approximately 49 hours annually. At a conservative professional rate of $120/hr, this represents over $5,800 in recovered value. This calculation demonstrates that high-quality rigging infrastructure is not a cost, but a capital investment in workflow efficiency. This is a central theme in our 2026 Creator Infrastructure Report.
Field Reliability and Travel Logistics
For the traveling creator, rigging choices have implications beyond the shoot. Aviation safety and "visual weight" are critical factors in maintaining a mobile profile.
Visual Weight and Gate Agents
In our experience, bulky, "cinema-style" rigs often attract unwanted attention from airline gate agents. Large baseplates and 15mm rod systems can make a mirrorless camera look like a piece of heavy industrial equipment, leading to forced weighing or gate-checking of carry-on bags.
By using compact, modular quick-release systems, you reduce the "Visual Weight" of your gear. A rig that can be broken down into its constituent parts in seconds is more likely to pass as "personal electronics" rather than "commercial freight."
The Pre-Shoot Safety Checklist
To ensure the integrity of your vertical rig, we recommend a three-step sensory check every time you mount a component:
- Audible: Listen for the distinct "Click" of the locking mechanism.
- Tactile: Perform the "Tug Test." Apply 2-3kg of force in the direction of the release to ensure the secondary lock is engaged.
- Visual: Check the locking pin indicator. Many professional systems use color-coded indicators (e.g., orange or silver) to show if the plate is fully seated.
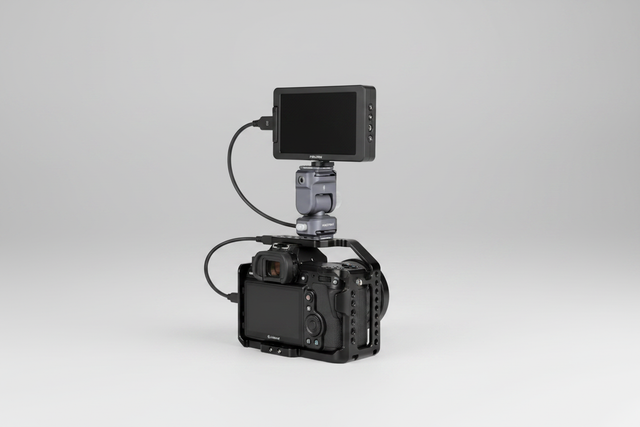
Furthermore, address cable management. A heavy HDMI or USB-C cable can exert significant leverage on a camera port. We recommend using dedicated cable clamps to provide strain relief, ensuring that the cable's weight doesn't create a secondary torque point on your quick-release plate. This is particularly important when Assessing Center of Gravity in Low-Profile Camera Rigs.
Scenario Modeling: Smartphone vs. Mirrorless
The optimal vertical rig depends heavily on your platform. According to industry data, 78% of vertical video creators now prioritize smartphone-based workflows over traditional cinema cameras.
Scenario A: The Mobile Journalist (Smartphone)
For this user, speed and weight are the absolute priorities.
- The Strategy: Use an integrated, non-modular cage system. Integrated systems often weigh 40% less than modular alternatives because they eliminate the need for multiple connecting screws and plates.
- The Benefit: A complete smartphone rig (phone, cage, handles) can weigh as little as 450g and be deployed in under 30 seconds.
Scenario B: The Cinematic Storyteller (Mirrorless)
For creators using mirrorless bodies, modularity is required to handle larger lenses and external audio.
- The Strategy: Focus on a "Low-Profile" L-bracket that allows for rapid switching between orientations.
- The Trade-off: Be aware that L-brackets can add 150-200g and may block access to battery doors or side ports. We suggest choosing an L-bracket specifically designed with "open-port" architecture to maintain workflow speed.
The Infrastructure Advantage
Optimizing a vertical rig is not about finding the "lightest" individual part; it is about building a cohesive system where every component—from the aluminum quick-release plate to the ergonomic grip—works in harmony. By understanding the physics of torque, the reality of dynamic loads, and the ROI of workflow speed, you transform your gear from a burden into a professional toolset.
As the industry shifts toward a "creator infrastructure" model, the most successful videographers will be those who prioritize long-term compatibility and engineering reliability. Whether you are navigating a mountain trail or a crowded city street, a rig built on these principles ensures that your focus remains on the frame, not the fatigue.
Disclaimer: This article is for informational purposes only. Always consult your camera and accessory manuals for specific load limits and safety instructions. Ensure all lithium-ion batteries are transported in accordance with IATA Lithium Battery Guidance and local aviation regulations.
References
- ISO 1222:2010 Photography — Tripod Connections
- The 2026 Creator Infrastructure Report: Engineering Standards, Workflow Compliance, and the Ecosystem Shift
- IATA Lithium Battery Guidance Document (2025)
- EBU R 137 / TLCI-2012 Television Lighting Consistency Index
- Arca-Swiss Dovetail Technical Dimensions Analysis