A great video often mixes a steady base with sweeping motion. Tripods are important for anchoring your story. Drones add scale and movement. When used together, they make the production seem better and help viewers feel like they are there and see all the details.
How to Plan Effective Ground-to-Sky Filming Sequences
If you want to achieve great results, you need to have a clear plan. Decide what each shot should convey, find safe spots to fly and set up, and take into account the sun and wind based on your schedule and story.
Define Story Beats and Assign Tools

Break your piece into beats: opening, context, detail, action, payoff. Use tripods for clarity, faces, and product shots. Use a tripod for clarity, faces, and product shots. Use drones to create shots, reveals and moving camera paths. Tripods help to stabilise footage, which helps to build a connection with the viewer. Aerials, on the other hand, show more of the surroundings.
Scout Locations, Sight Lines, and Safe Zones
Look for places to take off and land, clear paths for flight, and good places to set up your tripod. Look at the sun's path, wind, trees, wires and shiny surfaces that can flicker in your frame.
Permissions, Airspace, and Weather Windows
Make sure you know the rules about the air, the geofencing, and the property. Ask permission for private property and crowds. Look at wind forecasts, choose calm hours, and have a backup plan to cover the tripod if flights pause.
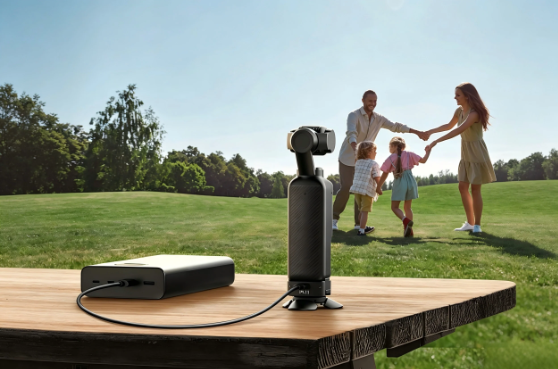
Get Tripods, Drones, and Accessories Ready for Filming
Gear choices should make matching easier, not harder. Pick stable support, a drone with a good codec, and simple tools to sync color and exposure across both systems for smooth cuts.
Tripods: Picks, Setup, and Stability
Think about types of tripods for different filming needs. For run‑and‑gun, a light carbon tripod with a compact fluid head moves fast. For interviews or longer lenses, a heavier model with a leveling base stays solid. The advantages of using tripods in filmmaking include repeatable framing, clean pans/tilts, locked eye lines, and sharp detail on products. To help with overcoming tripod stability issues in filming, hang a sandbag from the center, spread the legs wider, extend thicker leg sections first, and make sure the quick‑release is fully seated.
Drones: Camera and Flight Features That Match
Pick a drone with at least 10‑bit recording, a flat/log profile, reliable obstacle sensing, and decent wind resistance. A larger sensor helps in mixed light. Shoot in the same resolution and base frame rate as your ground camera to reduce time in edit.
Accessories and Power That Save the Day

Pack ND and polarizer filters for both drone and camera so you can hold a 180‑degree shutter speed. A color chart helps match scenes later. A landing pad keeps dust off gimbal motors. Extra batteries, fast chargers, labeled media cards, a tablet sun hood, and a small tool kit are essential accessories to enhance tripod setup and flight readiness.
Match Image Settings to Cut Seamlessly
Matching image settings across both systems keeps the viewer focused on the story. Decide delivery first, then align frame rate, shutter, white balance, profiles, and lens choices.
Resolution, Frame Rate, and Shutter
Choose your delivery format, such as 4K UHD at 24 or 30 fps. Set both drone and camera to that rate. Keep shutter near 1/48 for 24p or 1/60 for 30p. Use NDs to control exposure without raising shutter speed.
White Balance and Profiles
Lock white balance to the same Kelvin on both systems. Avoid auto. Shoot in compatible log or flat profiles on both, or use a conservative standard profile on both. Capture a short color chart clip under your key light for faster matching.
Field of View and Lens Choices
Avoid jarring cuts between an ultra‑wide drone shot and an ultra‑wide ground shot. Vary focal length for contrast: wide aerial establish, then 35–85mm tripod shots for faces or products. Keep horizons level to avoid a drifting look in the edit.
Use Signature Shot Pairings That Impress
Mixed setups shine when each move has a job. Use aerials for context, then land in a locked shot that delivers information, feeling, or a clear call to action.
Aerial Establish to Tripod Medium
Open with a slow drone push over the location. Cut to a tripod medium shot of the subject to add human context. The scale from the drone makes the next tripod line land harder.
Drone Reveal to Tripod Product Close‑up
Fly a reveal past a foreground object to show the scene, then cut to a tripod macro of the product. This pairing grabs attention, then focuses on the sales detail that converts.
Tilt Match‑Move for Seamless Handoff
Finish a drone tilt‑down to a door handle or sign. Cut to a tripod tilt‑up from the same point. Matching tilt speed and start/end framing sells the transition.
Orbit to Interview Lock‑off
End a gentle orbit with the subject centered. Cut to a steady tripod talking head. The energy of the orbit carries into the dialogue while the lock‑off frames the message.
Hyperlapse to Tripod Timelapse
Approach a city with a drone hyperlapse, then cut to a tripod timelapse of traffic or clouds. Keep exposure steps and color consistent so the time shift feels natural.
Synchronize Movements Between Tripods and Drones to Sell Transitions
Clean transitions need shared motion. Match direction, speed, and subject placement. Simple in‑camera tricks can hide cuts and keep momentum from the sky to the ground.
Match movement vectors. If the drone tracks left, let the tripod pan left at a similar pace in the next shot. Cut on motion peaks. Use foreground wipes like passing poles, trees, or a person crossing frame. A quick whip pan on the tripod can bridge to a drone shot with a similar motion blur. For synchronizing movements between tripods and drones, practice both moves at the same rate while watching a timer or humming a steady beat.
Run a Safe, Efficient On‑Set Workflow
A clear workflow reduces risk and saves time. Assign roles, stick to checklists, and shoot in an order that respects light, wind, and your battery plan.
Crew Roles and Safety Ritual
Assign a Remote Pilot in Command and a Visual Observer. Keep a camera operator focused on ground shots. Run a pre‑flight check: firmware, compass/IMU status, props, home point, return‑to‑home altitude, and wind limits. Confirm geofencing and NOTAMs in your airspace app.
Shot Order and Continuity
Grab drone shots while the light is soft and the wind is low. Then capture tripod coverage: interviews, product moves, and details. Note sun angle, shadow direction, clothing, and hair so cuts feel consistent.
Battery and Media Management

Label batteries, track cycles, and rotate packs. Offload media to two copies on set. Keep a dedicate case for cards. A small folding table speeds swaps and keeps gear out of dirt.
Record Clean Audio and Keep Lighting Consistent
Sound glues mixed shots. Light shapes faces and textures. Plan quiet periods for flights and keep color consistent so cuts feel smooth.
Capture Clean Audio on the Ground
Use lav or shotgun mics for interviews and product sound. Record room tone for 30–60 seconds. Never rely on drone audio. Use that track only as a sync scratch if needed.
Light for Consistency
Match color temps. Avoid mixing daylight windows and warm practicals unless you plan a look. Use diffusion on faces and negative fill to control contrast. Bring a small bounce to lift shadows and match drone highlights.
Manage Drone Noise and Timing
Schedule aerials away from dialogue moments. If a drone must fly near a scene with spoken lines, record the lines again as pick‑ups once the drone lands.
Edit for a Unified Look and Feel
Editing ties it all together. Build a simple color pipeline, tame bumps with stabilization, and add sound cues that hide seams between ground and air.
Color Pipeline and Matching
Apply a base transform or LUT suited to each log profile, then balance exposure and white balance. Use the color chart you shot to nail neutrals. Add selective tweaks to skin tones, greens, and sky for harmony.
Stabilization and Horizon Fixes
If the drone wobbles, apply mild stabilization. Avoid warping edges on wide shots. Fix horizon tilt with a small rotation. For tripod pans, favor in‑camera smoothness over heavy post fixes.
Sound Design and Retiming
Use rises, whooshes, or natural sounds to bridge cuts. Align beats in music with visual transitions. Gentle speed ramps can help align motion, but keep cadence natural.
Deliverables and Reframing
Export a master 16:9 cut. Then reframe for 9:16 and 1:1. Place titles and key action in a safe center area so vertical versions still read clean.
Compliance and Risk Basics You Can't Ignore
Safe operations protect people and gear. Know your rules, manage crowds, and document flights. A little planning prevents delays and keeps clients confident in your process.
Airspace and Permissions
Register aircraft where required and fly within altitude limits. Maintain visual line of sight. Obtain property consent and city permits if needed. Keep printed or digital copies on set.
Crowds and Property
Avoid flying over people who are not part of the production. Respect no‑fly areas such as near airports or protected parks. Post signs near your set to inform passersby.
Insurance and Logs
Carry liability coverage. Keep flight logs and incident notes. Brief your team on failsafe actions, including return‑to‑home and manual landing spots.
FAQs for Smoother Shoots
Q1: Do I need special color settings on both the drone and the ground camera?
It's very helpful but not required. Using a "flat" color setting makes it much easier to match the colors from both cameras when you edit. If you can't, just try to set the white balance and brightness to look similar on both. You can then adjust the colors to match in your editing software.
Q2: What video speed (frame rate) should I use for my drone and camera?
The most important rule is to use the same setting on both. Choose 24 frames per second (fps) for a movie-like look, or 30 fps for a standard look often used for online videos. Only shoot at higher speeds like 60 fps if you plan to create slow-motion shots.
Q3: How do I make the switch from a drone shot to a tripod shot look smooth?
Try to have both cameras moving in the same direction and at a similar speed. When you edit, you can hide the cut by having an object like a tree pass in front of the lens, or by quickly turning the camera to create a motion blur. Adding a sound effect can also help hide the change.
Q4: Do I need ND filters for both cameras?
Yes, especially on a bright day. Think of them as sunglasses for your camera. They let you use the right settings to make movement look smooth and natural, not choppy. Using them on both your drone and ground camera will make the motion in all your shots look the same.
Q5: What can I do to get steady shots in the wind?
Fly your drone lower and try to use buildings or hills to block the wind. Switch the drone to a slower, smoother flight mode. If it's very windy, it's a good idea to rely more on your stable tripod camera until the wind calms down.
Q6: How do I make my tripod more stable on bumpy ground?
Spread the tripod legs out as wide as you can. When extending the legs, always use the thickest sections first. You can also hang a weight (like a sandbag) from the center for extra stability. Finally, make sure every knob and lock is tightened so nothing can wiggle.