You can make professional videos without having a huge studio or a high-end recording room. Small apartments and tiny bedrooms can serve as effective filming spaces with the right adjustments. They offer a controlled environment where you can easily reach your equipment and manage your surroundings.
Filming in a tight space presents a few hurdles. You might deal with limited camera distance, cramped gear setups, harsh lighting, cluttered backgrounds, and distracting room echo. Tackling these issues requires a focused strategy. By paying attention to space planning, camera angles, lighting choices, audio control, and compact gear, you can turn any small room into a clean, functional filming space.
Plan Your Small Room Video Setup Before Filming

Setting up a functional video space starts with evaluating your floor plan. Thinking through your layout ahead of time prevents constant resetting and keeps your shooting process smooth.
Identify Your Best Filming Corner
Instead of trying to use your entire room, focus on one clean, reliable corner. A dedicated corner lets you set up equipment without blocking your main living area or walkways.
Clear Unnecessary Objects
Remove items that do not serve a purpose in your frame. Clearing out random clutter immediately makes your small space look bigger and keeps viewer attention on you.
Create Distinct Recording Zones
Divide your available floor space into separate, functional areas:
- Camera Zone: The spot reserved for your camera or phone setup.
- Subject Zone: Where you sit or stand.
- Lighting Zone: Space set aside for your main light.
- Background Zone: The visible wall or corner behind you.
Shoot Toward a Corner for Visual Depth
Pointing your camera directly at a flat wall makes your video feel flat and boxed in. Aiming toward a room corner creates diagonal lines that pull the eye backward, instantly making your room look larger.
Maintain Distance From the Background
Pull your chair or standing spot a few feet away from the wall behind you. Leaving space between yourself and the background creates blur, which separates you from the room and adds a polished look.
Choose the Right Camera Position for a Small Room

Proper camera placement determines how natural you look on screen. The right distance and height choices make a tiny room look balanced rather than crowded.
Find the Ideal Camera Distance
Set your camera far enough away to capture your head and shoulders without straining. If space is tight, place your setup right against the opposite wall to gain every available inch.
Use Wide Focal Lengths Wisely
A wider lens or your phone's wide-angle feature lets you capture more area from a short distance. Stick to standard wide settings rather than ultra-wide options to keep your proportions looking natural.
Avoid Wide-Angle Lens Distortion
Standing too close to an ultra-wide lens distorts your feature edges and warps the room background. Step back slightly and crop in if necessary to maintain realistic shapes.
Position the Camera at Eye Level
Set your lens level with your eyes. Shooting from below creates an unflattering angle, while shooting from too high can feel awkward for a standard talking-head video.
Save Floor Space With Compact Mounts
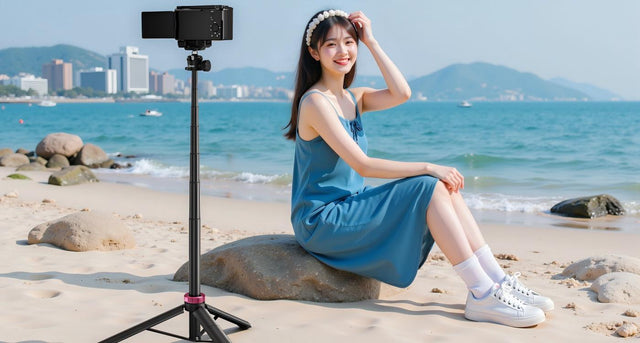
Big tripods consume valuable floor space in a small room. Swap standard tripods for desk clamps, shelf mounts, or slim stands to keep your floor open.
Use Compact Lighting to Make a Small Room Look Better

Good lighting improves your footage faster than upgrading to an expensive camera body. Placing lights intentionally allows you to shape your scene without crowding the room.
Lighting Tip:Start with a single light source. Mastering one key light solves most exposure problems without adding heat or clutter to a small room.
Start With One Soft Key Light
Begin your setup with one soft light source. Soft light evens out skin tones and hides harsh shadows on your face.
Place Your Light at a 45-Degree Angle
Position your primary light slightly above eye level and roughly 45 degrees to one side of your face. This placement adds gentle dimension while keeping light off the wall behind you.
Use Bounces Instead of Extra Lights
If one side of your face looks too dark, bounce light back onto yourself using a white poster board or wall. This fills in dark shadows without requiring another light fixture or power cord.
Add Practical Lights for Background Separation
Place a small desk lamp or LED accent light in the background. A soft light behind you creates contrast between your clothing and the room wall.
Avoid Overpowering Lights
Keep your light settings low to moderate. Placing strong lights close to your face causes harsh highlights and makes small rooms uncomfortable and hot.
Build Depth in Your Small Space Video Setup
Creating visual layers prevents your room from looking like a tight box. Simple background tweaks add character and dimension to your shots.
Layer Your Elements
Place items at different distances from your camera. A plant on a side table, a bookshelf behind you, and your seat in the middle create three clear visual layers.
Ditch the Flat Wall Setup
Sitting flat against a bare wall flattens your frame. Use visible room features like shelving units, artwork, or open space to add variation.
Keep Frame Edges Clean
Check the corners of your camera display before hitting record. Remove loose cables, door frames, or laundry items that pull attention away from your message.
Separate Yourself With Background Light
A small background light casts a subtle glow behind your shoulders. This separation makes you stand out from dark or plain walls.
Adjust Camera Angles for a Larger Look
Angling your camera slightly upward or across a diagonal line expands the visual field. This trick tricks the viewer's eye into seeing a roomier environment.
Audio Control Tips for Your Home Video Studio
Small rooms with hard surfaces reflect sound, creating annoying echo. Controlling your room audio ensures your voice comes through clear and distinct.
Solve Room Echo and Reverb
Sound waves bounce off bare drywall, hardwood floors, and glass windows. Covering these surfaces absorbs sound waves and stops echo before it reaches your microphone.
Use Soft Household Furnishings
You do not need soundproofing foam to fix audio issues. Use soft items you already own:
- Curtains: Pull heavy drapes over windows to block outside noise and absorb bounce.
- Rugs: Cover bare floors with thick rugs or mats.
- Sofas & Beds: Position your setup near soft furniture that naturally absorbs sound.
- Bookshelves: Fill shelves with books of varied sizes to break up reflection paths.
Keep Your Microphone Close
Place your microphone close to your mouth. Shortening the distance between your voice and the mic ensures your speech records louder than any ambient room noise or echo.
Choose Compact Audio Equipment
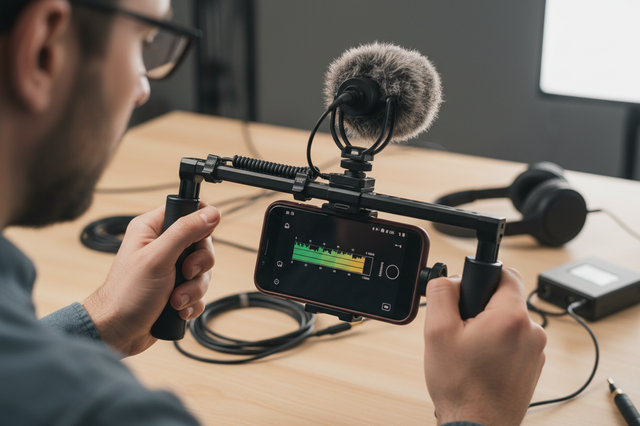
Use a clip-on lavalier or a small shotgun microphone attached directly to your camera. These compact options deliver clean sound without occupying floor or desk space.
Eliminate Background Noise First
Turn off fans, air conditioners, and noisy appliances before you start recording. Closing doors and windows cuts down street traffic sounds significantly.
Select Compact Gear for Small Room Filming
Choosing equipment tailored for small spaces speeds up your workflow. Modular, slim gear keeps your filming area organized and easy to pack away.
| Gear Type | Heavy Option (Avoid) | Compact Alternative (Recommended) |
|---|---|---|
| Camera Support | Full-Size Floor Tripod | Desk Clamp Mount or C-Clamp Stand |
| Lighting | Heavy Light Softbox | Slim Panel Light with Diffuser |
| Microphone | Large Mic Stand & Boom | Clip-on Lavalier or Mini Shotgun |
| System | Fixed Mounts | Quick-Release Mounting Plates |
Swap Floor Tripods for Compact Mounts
Standard tripods feature wide leg spans that block walkways. Desk clamps and wall-mounted arms attach directly to furniture, leaving your floor completely open.
Consider a Mobile Phone Setup
Modern mobile devices offer excellent video resolution in a tiny package. Paired with a slim phone rig, a mobile setup takes up almost zero space in your room.
Use Clamp Mounts for Accessories
Attach lights and microphones to shelves, door frames, or desk edges with heavy-duty C-clamps. Clamping gear vertically uses existing furniture for support.
Select Small LED Light Panels
Thin LED panels deliver ample light output while taking up minimal physical room. They run cool, adjust easily, and store flat in a drawer.
Add Quick-Release Accessories
Install quick-release plates on your camera, lights, and mounts. These plates let you snap gear into place and pack it down in seconds, keeping your living space free when you finish shooting.
Optimize Your Small Space for Video Production
Recording high-quality videos in a small apartment comes down to smart choices rather than huge rooms. By picking a clear corner, angling your camera properly, setting up one soft key light, and controlling room echo, you turn any tight space into an efficient video studio.
Stick to slim, versatile equipment that keeps your floor space clear and speeds up tear-down time. Focus on clean framing and good light placement, and your content will look crisp, professional, and engaging regardless of your room's square footage.
FAQ about Shooting Videos in Small Room
Q1: Can I shoot professional-looking videos in a very small room?
Yes, you can create clean, professional videos in tight quarters. Focusing on good lighting, clean background layering, and close microphone placement matters far more than total room size.
Q2: What is the best camera position for filming in a small room?
Position your camera at eye level, aimed diagonally toward a room corner. This layout prevents flat backgrounds, keeps your facial features natural, and adds depth to your shot.
Q3: What lighting is best for a small video studio?
A single, dimmable LED panel paired with a softbox diffuser works best. It provides smooth key lighting, takes up minimal physical space, and runs cool in enclosed rooms.
Q4: How can I reduce echo when filming in a small apartment?
Place soft items like rugs, heavy curtains, cushions, or blankets around your room to absorb sound reflections. Keeping your microphone close to your mouth also helps capture direct voice over room reverb.