The Invisible Camera: Mastering the Overhead POV Challenge
We have all been there: you are prepared to film a signature recipe, the ingredients are prepped, and the lighting is set. But as soon as you position your tripod, the legs intrude into the frame, or the camera angle is just slightly off-axis, making the final footage feel amateur. For solo creators in the cooking and DIY space, the "top-down" or bird's-eye view is the gold standard for engagement, yet it remains one of the most mechanically challenging shots to execute reliably.
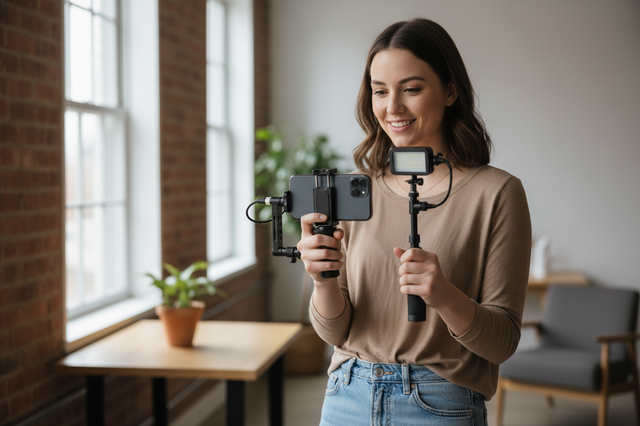
Capturing a clean, hands-free vertical POV requires more than just a long arm; it requires a structured approach to "creator infrastructure." We view your rigging not as a collection of gadgets, but as a mission-critical system that must balance speed, stability, and safety. In this guide, we will break down the mechanics of overhead rigging, from managing the lever arm effect to building a modular quick-release ecosystem that saves you dozens of hours annually.
The Physics of Stability: Beyond the Tripod Leg
When you extend a camera over a cooking surface, you are fighting a fundamental law of physics: the lever arm effect. A common mistake we see in community feedback is underestimating the torque exerted on the mounting point. Even a lightweight smartphone, once placed at the end of an articulating arm, becomes a significant load.
The Biomechanical Reality of Torque
To understand why your overhead rig might be "drooping" or vibrating, we use a simple calculation of Torque ($\tau$): $$\tau = m \cdot g \cdot L$$ Where $m$ is the mass of your rig, $g$ is gravity (~9.8 $m/s^2$), and $L$ is the length of the lever arm.
Methodology Note (Biomechanical Analysis): This model assumes a static horizontal extension. In our analysis, a 2.8kg cinema-style rig held 0.35m away from the mounting point generates approximately $9.61 N\cdot m$ of torque. For the average adult male, this load represents roughly 60-80% of the Maximum Voluntary Contraction (MVC) of the wrist and forearm muscles if held handheld. By moving accessories like monitors and microphones to lighter, modular mounts, you effectively reduce the lever arm length and the resulting strain on both the hardware and the operator.
Foundational Legitimacy: ISO Standards
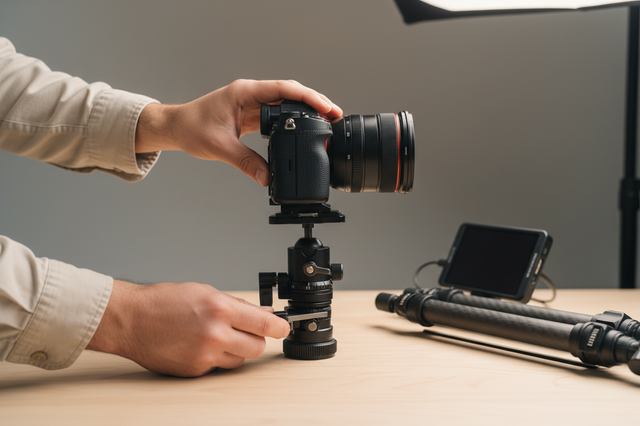
Reliability starts with the connection point. Most creator gear follows the ISO 1222:2010 Photography — Tripod Connections standard, which defines the 1/4"-20 and 3/8"-16 screw threads. While these are universal, they are prone to "micro-wobble" if not properly torqued. We recommend using a system that integrates these threads into a more rigid interface, such as the Arca-Swiss standard. Understanding Arca-Swiss Dovetail Technical Dimensions is essential for ensuring your plates won't slip under the weight of an overhead extension.
Building the Modular Rig: The Quick-Release Ecosystem
Efficiency is the heartbeat of a successful solo creator's workflow. If it takes you ten minutes to set up a shot, you are less likely to experiment with creative angles. This is where a modular quick-release (QR) system becomes your most valuable infrastructure layer.
The Workflow ROI Calculation
We often hear that professional rigging is a "luxury." However, when we model the time savings, the investment justifies itself rapidly.
| Task | Traditional Thread Mounting | Quick-Release (F22/F38) | Time Saved |
|---|---|---|---|
| Camera to Tripod | ~40s | ~3s | 37s |
| Monitor Attachment | ~30s | ~3s | 27s |
| Mic Mounting | ~25s | ~2s | 23s |
| Handheld to Overhead | ~60s | ~5s | 55s |
Logic Summary: If a professional creator performs 60 equipment swaps per shoot and averages 80 shoots per year, switching to a high-speed QR system saves approximately 49 hours annually. At a conservative professional rate of $120/hr, this represents a ~$5,900+ value in recovered productivity.
Core Components for the Cooking POV
To achieve a stable, top-down shot without tripod legs in view, we recommend a three-tier setup:
- The Foundation: A heavy-duty C-stand or a solid desk-mounted overhead arm.
- The Interface: The Ulanzi F38 Quick Release Fluid Video Head E004GBA1. This provides smooth damping for 360° horizontal adjustment and quick switching between devices. Note that while its vertical static load is rated up to 80kg in lab tests, for dynamic overhead work, we suggest keeping the payload under 3kg to maintain precision.
- The Cage: For Sony users, the Ulanzi Falcam F22 & F38 & F50 Quick Release Camera Cage V2 for Sony A1/A7 III/A7S III/A7R IV 2635A is essential. It acts as the "chassis" for your camera, providing multiple mounting points for accessories without adding bulk.
- The Control: Adding a Ulanzi Falcam F22 Quick Release Portable Top Handle F22A3A12 allows for easy micro-adjustments of the camera's position once it is mounted overhead.
Managing the Environment: Vibrations and Resonance
A perfectly rigged camera is only as good as the surface it is attached to. In our experience troubleshooting wobbly footage, the culprit is often the table itself.
Surface Selection and Damping
A hollow-core table (like those from big-box furniture stores) acts like a drum, transmitting and even amplifying vibrations from a blender or even heavy chopping. A solid wood or stone surface is significantly more stable.
- The Tap Test: Before recording, tap the surface. If you hear a hollow "ring," you have a resonance issue.
- Damping Heuristic: Placing a rubber mat or even a folded heavy towel under your clamp can significantly reduce high-frequency vibrations.
- The 12-Inch Rule: For overhead shots, if your arm extends more than 12 inches from its mounting point, we recommend using a secondary support—like a lightweight stand or a sandbag on the arm's base—to prevent slow "droop" over time.
For more on eliminating these micro-movements, see our guide on Eliminating 'Ghost Play' in Precision Mounts.
Illumination and Audio: Professional Standards for Food
Cooking reels are sensory experiences. If the food looks unappetizing due to harsh shadows, or the sizzle sounds muffled, the "infrastructure" has failed.
The Softwrap Technique
Generic "good lighting" isn't enough for top-down food shots. Overhead lights often cast dramatic, unappealing shadows on the edges of plates. The expert solution is to use a large diffuser placed close to the food. The Ulanzi L024 40W RGB Portable LED Video Light is an excellent choice here. Its 40W output is powerful enough to be diffused through a softbox while maintaining high color accuracy.
When choosing lights, always look for the EBU R 137 / TLCI-2012 (Television Lighting Consistency Index) rating. A TLCI of 95+ ensures that the colors of your ingredients—the vibrant greens of herbs or the rich reds of meat—render accurately on camera. Furthermore, ensure your lights meet IEC 62471:2006 Photobiological Safety standards to protect your eyes during long shoots.
Audio Compliance and Quality
While many creators assume professional audio is expensive, entry-level wireless mics are now highly accessible. However, you must stay compliant with local regulations. In the US, wireless microphones operate under FCC Part 15 (RF Devices) and FCC Part 74 Subpart H. If you are filming in the UK, refer to Ofcom PMSE guidance for spectrum usage.
Operational Rigor: Safety and Maintenance
High-performance gear requires a high-performance mindset. A single failure—a camera dropping onto a granite countertop—can end a career. According to The 2026 Creator Infrastructure Report, engineering discipline is the primary differentiator between hobbyist and professional setups.
The Pre-Shoot Safety Checklist
Before you hit record, perform these three checks:
- Audible: Did you hear the "Click" when engaging the quick-release?
- Tactile: Perform the "Tug Test." Pull firmly on the camera cage to ensure the locking pin is fully seated.
- Visual: Check the locking pin indicator. On the Falcam system, ensure the orange or silver indicator shows the "Locked" status.
Maintenance in a Cooking Environment
Flour, grease, and moisture are the enemies of precision machining.
- Clean Regularly: A buildup of flour in a quick-release track can compromise the locking action. Use a dry brush or compressed air after every shoot.
- Avoid Over-Lubrication: Do not use heavy oils on QR plates; they attract more grit. A tiny drop of dry PTFE lubricant is usually sufficient if the mechanism feels gritty.
- Material Accuracy: Note that Falcam QR plates are precision-machined from Aluminum Alloy (6061 or 7075), not Carbon Fiber. While carbon fiber is excellent for tripod legs due to its vibration-damping properties, aluminum provides the zero-play rigidity required for a mounting plate.
Thermal Shock and Battery Safety
If you are moving from a cold storage area to a hot kitchen, be aware of "Thermal Shock." Aluminum plates act as a thermal bridge. We recommend attaching your plates to your camera indoors at room temperature to minimize battery cooling and condensation. For those traveling with gear, always adhere to the IATA Lithium Battery Guidance Document to ensure your power solutions are safe for air transport.
Infrastructure for the Modern Creator
Mastering the top-down POV is not just about the right arm; it is about building a reliable system that removes technical friction. By understanding the physics of torque, investing in a modular quick-release ecosystem, and maintaining operational rigor, you transform your workspace into a professional studio.
Whether you are a solo operator or a growing production team, the goal remains the same: to create a "ready-to-shoot" environment where the gear disappears, and the focus remains on your craft. For more advanced rigging techniques, explore our guide on The Solo Operator’s Guide to Multi-Device Rig Balance.
Disclaimer: This article is for informational purposes only. Rigging heavy equipment overhead carries inherent risks. Always ensure your mounting surfaces and hardware are rated for the loads applied. Consult a professional rigger if you are unsure about the structural integrity of your setup.