Most people feel disappointed when they look at their phone after a long climb. You stand on a peak, see a massive valley, but the photo looks flat and boring. It feels like the camera missed the magic you saw with your own eyes.
Improving your hiking photography is more about using simple tricks than buying new gear. This advice is for regular hikers who want better memories without becoming professional photographers. By learning how to spot good light and where to stand, you can capture the true feeling of being on the trail.
Preparing Your Gear and Mindset Before the Trail
Getting good shots starts at home. If you wait until you are tired and sweaty to think about your photos, you might miss the best moments. A little planning helps you stay focused on the scenery.

Know Your Story and Subject
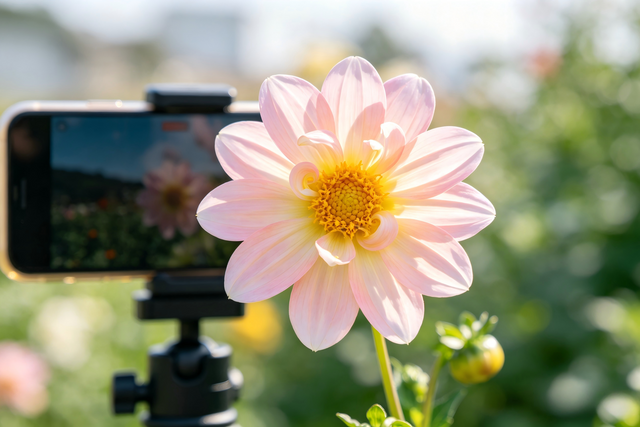
Before you start walking, think about what you want to show people later. Are you trying to capture the huge size of the mountains? Or is the day more about the fun you are having with friends? Some people love the small things, like a bright flower or an interesting rock. When you know what your "subject" is, your photos become much clearer.
Check Route, Timing, and Weather
Take a look at trail maps and online photos before you go. This helps you find the best spots for a break. If you know there is a waterfall or a big cliff at mile three, you can be ready.
Timing is also huge. Midday sun is very bright and makes dark shadows. If you can, try to be at the best viewpoints during the early morning or late afternoon when the light is softer. Even "bad" weather like mist or clouds can make for very cool, moody shots that look better than a plain blue sky.

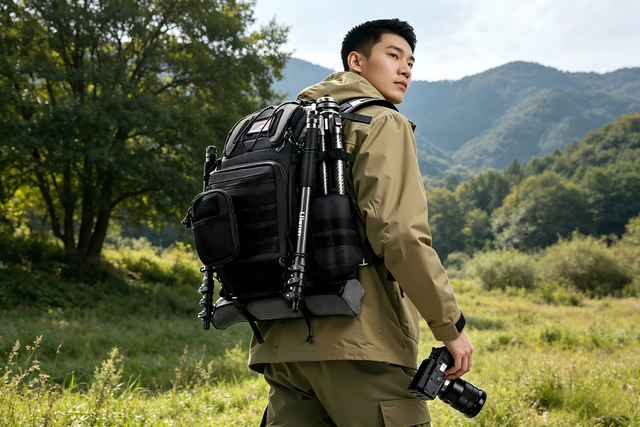
Pack Smart, Not Heavy
Weight is the enemy of a happy hiker. If your bag is too heavy, you won't want to take it out to snap a photo. Use a smartphone or a small, light camera. If you use a camera with different lenses, just bring one that can do a bit of everything. Bring a small cloth to wipe sweat or dust off your lens. A tiny tripod or a phone clamp can help, but only if you actually plan to use them. Always make sure your photography needs don't get in the way of your safety or comfort.

Knowing Simple Composition Tricks for Better Images
Composition is just a fancy word for where you put things in your photo. It is the quickest way to make your pictures look professional instead of like a quick snapshot. These hiking photography techniques work on any device, from an old phone to a new camera.
Give Your Photo a Clear Subject
A common mistake is trying to fit too much into one frame. If there is no main focus, the eye doesn't know where to look. Pick one thing, like a tree, a hiker, or a specific peak, and make it the star. If the scene feels too messy, try moving closer or changing your angle to hide the distractions.
Use Foreground, Middle Ground, and Background
To stop your photos from looking flat, think in layers. Put something close to you in the "foreground," like a colorful leaf or your own hiking boots. Then have your main subject in the middle, and the mountains in the far background. This creates a 3D effect. Adding a person or a tent also helps people see how big the landscape really is.
Apply Simple Composition Rules
- Rule of Thirds: Imagine a grid on your screen like a tic-tac-toe board. Instead of putting your subject right in the middle, place it on one of the lines or where the lines cross. This makes the image feel more balanced.
- Leading Lines: Use the trail itself to guide the eye. A path curving into the woods or a ridge line pointing toward a peak helps the viewer "walk" through your photo.
- Frames within Frames: Look for natural frames. Shooting through a gap in the trees or from inside a tent door can make a scene feel more cozy and interesting.
Move Your Feet to Change the Perspective
Don't just take every photo from eye level while standing still. Squat down low to make the ground look more dramatic. Or, if you are at a camp, stand on a rock to look down at the scene. Taking a mix of wide "landscape" shots and tall "portrait" shots gives you more options for sharing later.
Using Natural Light to Your Advantage
Light is the most important part of any photo. Learning to see light will change your photography more than any other skill. You don't have to control the sun; you just have to know how to work with what it gives you.
Use the Best Natural Light
The "Golden Hour" happens right after sunrise and just before sunset. The sun is low, making everything look warm and soft. Shadows are long and add a lot of texture to the rocks and trees. There is also the "Blue Hour," which is the short time before the sun comes up or after it goes down. The light is blue and moody, which is great for quiet, peaceful trail shots.

Handle Harsh Midday Sun
When the sun is directly overhead, it creates dark shadows under people's eyes and hides the details of the land. If you have to take photos at noon, look for shade under trees or large rocks. If you are taking a picture of a person, have them face away from the sun so they don't squint. Sometimes, turning a midday photo into black and white can make the harsh shadows look like a deliberate style choice.
Play With Backlight and Silhouettes
Don't be afraid to point your camera toward the sun. This is called backlighting. It can make the edges of grass or a hiker's hair look like they are glowing. If you want something more dramatic, find a hiker standing on a high ridge against a bright sky. If you expose for the sky, the person will turn into a dark silhouette, which looks very cool and powerful.
Trying Practical Camera and Phone Settings
Knowing these hiking photography tips helps you stay fast on the trail. You want to spend more time hiking and less time staring at a screen or menu.
For Smartphone Users
The most important tip for phone users is to clean your lens. Phones live in pockets and get covered in fingerprints, which makes photos look blurry. Tap your screen on the subject to tell the phone where to focus. Usually, a little sun icon will appear next to the focus box; you can slide this up or down to make the photo brighter or darker. Turn on the "grid" feature in your settings to help you keep your horizons straight.
For Camera Users
If you use a camera, keep things simple so you don't miss the moment.
- Using "Aperture Priority" is great for landscapes. For wide views of mountains, use a higher number like f/8 to keep everything sharp.
- If people are moving quickly, make sure your shutter speed is fast so they don't look like a blur.
- Using "burst mode", where the camera takes many photos at once, is perfect for catching a hiker mid-stride.
Keep Your Shots Sharp
Blurry photos usually happen because the camera moved. If you don't have a tripod, lean your back against a tree or rest your elbows on a rock to stay steady. If you are taking a photo of yourself using a timer, make sure the camera is on a flat, solid surface so it doesn't tilt or fall.
Capturing Real Moments and People
Photos of mountains are great, but photos of the people you are with often mean more over time. These are the things that remind you what the trip actually felt like, from the hard climbs to the laughs at camp.
Capture Authentic Moments
Try to take photos when people aren't looking. Capture your friend struggling up a steep hill, someone filtering water, or the group laughing around a camp stove. These "in-between" moments feel much more real than a posed photo at the summit. Documenting the whole trip, including the tired faces, tells a better story.
Make Hikers Look Their Best
When you do take a portrait, try to find a simple background. If there are too many branches or bright spots behind someone's head, it can be distracting. If a hiker is walking, leave more empty space in the photo in front of them than behind them. This makes it look like they are moving into the scene rather than walking out of it.
Self-Portraits and Solo Hiking Photos
If you hike alone, you can still be in your photos. You don't need a selfie stick. Find a flat rock or use your backpack to prop up your phone. Set a 10-second timer and walk into the frame. Taking a video of yourself walking and then taking a "screenshot" of a single frame is another easy way to get a natural-looking shot of yourself on the trail.
Safety and Ethics on the Trail
Good hiking photography should leave the trail exactly as you found it. Being respectful ensures that these beautiful places stay open and beautiful for everyone else who follows you.
Safety First
It is easy to get "viewfinder vision" where you only see what is on the screen. Always check your feet before you step. Never stand on loose dirt or slippery rocks near a ledge just to get a slightly better angle. Stay aware of your surroundings, especially if you are in an area with wildlife or changing weather.
Respect Nature and Other Hikers
Always stay on the marked trails. Stepping off the path to get a photo of a flower can kill sensitive plants. Also, be mindful of other people. Don't block a narrow path or stay at a popular viewpoint for twenty minutes while others are waiting. If you want to take a photo of a stranger, it is usually best to ask first or make sure they aren't the main focus of your shot.
Simple Editing Tips to Make Your Hiking Photos Pop
Taking the photo is only the first half. A little bit of editing can fix small mistakes and make the colors look more like what you remember.
Basic Edits That Go a Long Way
Most phones have built-in tools to change the brightness (exposure) and the "pop" (contrast). If a photo looks too yellow or too blue, adjust the "white balance" to make it look natural. Turning up the "shadows" slightly can help show details in dark trees or rocky cliffs that look too black in the original shot.
Keep Colors Natural
It is tempting to turn the "saturation" all the way up to make the sky super blue or the grass neon green. Try to avoid this. Over-edited photos often look fake. Keep the colors close to what you actually saw. If you want to edit a group of photos from the same hike, try to use similar settings so they all look like they belong together.
Organize and Select Your Best Shots
Don't keep 50 versions of the same mountain. Pick the best one or two and delete the rest. This makes it much easier to show your friends later. Create a folder for each trip so you can find your favorite memories easily. A good mix of wide views and close-up details will make your collection feel like a complete story.
Improve Your Hiking Photography Skills on Every Trail
Great photos come from your eyes, not your wallet. You can take beautiful shots by simply slowing down to notice the light and your surroundings. Pick a subject, frame it with care, and stay safe while you move. This focus turns a quick snap into a memory that feels real. When you combine these hiking photography tips with your own style, you will bring home a gallery that truly matches the view.
FAQs about Hiking Photography
Q1: Do I need an expensive camera to take good hiking photos?
No. Most people use their smartphones. The best camera is the one you have with you and feel comfortable using. Focus on learning how to frame a shot and find good light instead of buying gear.
Q2: How can I take sharp hiking photos while walking?
If you are moving, your photos will likely be blurry. It is best to stop for a second, plant your feet, and hold your breath while you tap the shutter. If you are using a camera, use a faster shutter speed.
Q3: What is the best time of day for photos?
The hour after sunrise and the hour before sunset are the best. This is when the light is warm and soft. Midday light is very bright and makes for difficult shadows.
Q4: How do I make my hiking photos look less "flat"?
Add depth by putting something in the foreground, like a rock or a branch. Use the "rule of thirds" to move your subject out of the center. Including a person in the distance also helps show the scale of the landscape.