A compact corporate video lighting setup does not need a full studio. Start with one controllable light in front of you, place the camera close to eye level, control competing window light when it changes, and judge the result in the actual camera preview. That baseline can support daily executive calls, interviews, remote sales, and training recordings while keeping the desk clear.

The right setup depends less on a universal brightness number than on whether the light works with your camera height, glasses, room, mounting position, and normal call schedule. Add equipment only when the preview shows a specific problem that repositioning or room control cannot solve.
Start With a Balanced Corporate Video Lighting Base
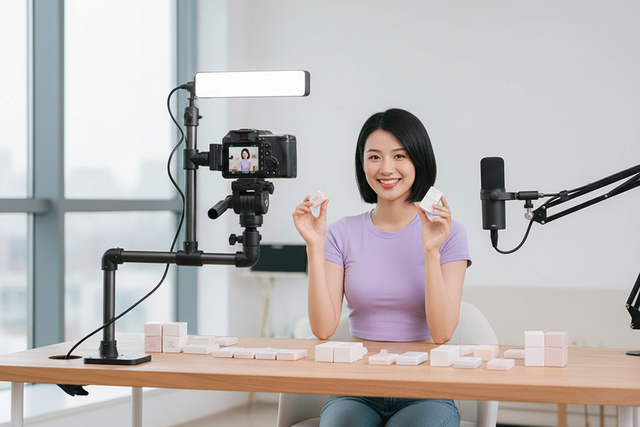
For dependable corporate video lighting, begin with a controllable front-facing source, a camera near eye level, and a preview check before adding a second light. The exact position depends on the room, camera, and glasses.
Vimeo's webcam-light guidance also recommends a front light and reviewing the camera view, while a university virtual-interview guide highlights eye-level camera placement and checking for glasses glare.

Place the light slightly to one side or slightly above the camera as a starting test rather than a fixed formula. This position may give the face more shape and may change reflections, but the result depends on the lens, room surfaces, glasses, and camera position. Webex's video-conferencing lighting guidance supports testing an off-axis, elevated key-light position without making it a universal ratio or guarantee.
Adjust one variable at a time: first the camera height, then the light's horizontal position, then its height or output. Keep the smallest arrangement that produces an acceptable preview. A single repeatable light is usually more useful for daily calls than a multi-light setup that blocks the screen or needs to be rebuilt before every meeting. If you are comparing category options, browse video conference lights only after identifying the room and camera requirements.
Solve Glare, Daylight, and Background Distractions
Glasses reflections, changing windows, flat backgrounds, and camera height are separate problems. Test them in order instead of increasing brightness and hoping one adjustment fixes everything.
Reduce Reflections From Glasses
When lenses reflect the source, change the light-to-camera relationship before increasing output:
- Move the light horizontally off the camera axis.
- Test a small height change while keeping the camera fixed.
- If the reflection remains, adjust seating or the camera position rather than assuming the light is defective.
- Review both lenses in the actual preview, including any reflection from a window, monitor, or bright wall.
If the source still produces a visible reflection, treat that position as a failed test. Lens coatings, room reflections, and camera angle can change the result, so no compact light should be described as automatically glare-free.
Keep Window Light From Changing the Look
Daylight can work when it is stable and controllable; it becomes a larger variable when the sun or cloud cover changes during a call. At the usual meeting time, identify whether the window or your artificial light is dominant, then test the simplest control available:
- Try blinds or curtains without changing the camera position.
- If needed, turn the seating direction so the window is less competitive.
- Establish a repeatable artificial-light baseline for calls that span changing daylight.
- Recheck exposure and white balance in the camera feed as the room transitions.
This is practical home office lighting for video calls guidance, not a rule that every window must be covered. A consistent window may be useful; a shifting window may require more control or more frequent adjustment.
Add Separation Without Overproducing the Frame
If your face blends into the wall, try moving the chair or desk position to create subject-to-wall distance before adding multiple lights. Restrained brightness or color contrast can help distinguish the subject, but executive and client-facing frames generally benefit from a neutral background that does not compete with the speaker.
Use an accent only when it supports the setting. A training recording may tolerate a modest branded or organizational background treatment; a sales call may work better with a clean, quiet frame. Background separation should solve a visible framing problem, not turn a routine call into a creator set.
Match Light Placement to Camera Height
Laptop cameras, desk-level webcams, and separately mounted cameras change the reflection and shadow geometry. Use this comparison as a starting test:
| Camera setup | Starting light position | Likely issue | First adjustment to test |
|---|---|---|---|
| Laptop camera | Near the screen and slightly off-axis | Screen obstruction or low-angle shadows | Raise the laptop or move the light laterally while preserving the eye-level frame |
| Desk-level webcam | In front of the subject, slightly higher than the lens | Reflections or a downward-looking frame | Raise the camera and retest the light position together |
| Separately mounted camera | Near eye level with the key just off-axis | More visible background or shadow variation | Keep the camera fixed and move the key in small increments |
Choose a Layout for Calls, Interviews, and Training
Choose the simplest layout that produces a repeatable camera preview for the actual room and task. Daily calls favor low setup burden; interviews and training recordings benefit from more deliberate camera placement and documented positions.
| Use case | Camera position | Key-light placement | Background approach | Space burden | Repeatability | Main trade-off |
|---|---|---|---|---|---|---|
| Daily calls | Laptop or compact webcam near eye level | Near the screen, slightly off-axis | Clean and minimally changed | Simplest | High when left in place | Less flexibility if the light blocks the display |
| Executive interviews | Separately mounted or carefully raised camera near eye level | Deliberately off-axis and tested in the frame | Neutral, with modest separation | More deliberate | High after marking positions | Requires more setup time and clear placement |
| Remote sales | Camera in the normal customer-facing position | Compact key that stays clear of the desk and screen | Uncluttered and brand-appropriate | Simple to moderate | High if the position is documented | Window changes may require a backup baseline |
| Training recordings | Fixed camera position for recurring sessions | Repeatable key position with room for notes or materials | Consistent, restrained background | Moderate | Most repeatable | Takes more planning than an improvised call |
Compare each layout in the actual frame, not from the room alone. For recurring training work, a short corporate training video kit reference can help you think about standardizing positions, but it does not validate every light or room arrangement.
Map Compact Light Types to the Setup You Need
Match the category to camera distance, daylight variability, mounting, power, and role before comparing product titles. Control and repeatability usually matter more than a headline brightness claim, especially when the window changes. Current dimensions, output controls, mounting, power, battery, accessories, returns, and warranty still need to be checked on the specific product page.
| Category | Likely role | Space and daylight fit | Verify before buying | Not a fit when |
|---|---|---|---|---|
| Panel light | Primary compact face-light candidate for a desk frame | Usually worth investigating when the source must stay near a laptop or webcam; repeatability depends on controls and mounting | Dimensions, controls, power, mounting, clearance, and current availability | It blocks the screen, cannot be positioned without reflections, or lacks the control needed for the room |
| COB-style light | More deliberate key for an interview or training position | Better suited to a setup with room to place the source away from the desk; may require more clearance | Current wattage, modifiers, mounting, power, heat, clearance, and included accessories | The desk or room cannot support stable placement and cable routing |
| Rechargeable mini light | Supplemental face light, accent, travel backup, or temporary option | Useful to investigate for flexibility, but changing daylight and primary-face-light demands require careful checking | Battery, charging, output, color controls, mounting, and whether it can serve as the primary source | You need a dependable sole key and current specifications do not support that role |
| Desk mount | Repeatability and positioning support | Helpful only when the attachment point and cable path fit the workspace | Desk edge, attachment method, stability, clearance, cable routing, and adjustability | It obstructs the display, slips, strains the desk, or leaves the light unstable |
Panel Lights for Small Desk Frames
Investigate the video conference lights or a panel-light category when the source must remain close to a laptop or webcam. Before selecting a model, compare its footprint with the camera distance and screen clearance, then verify the current controls, power, mounting, and included hardware.
- Check whether the panel can sit beside the screen without blocking the display.
- Compare the mounting method with the desk or camera support you already use.
- Review controls and power requirements on the current product page.
COB Lights for More Deliberate Positioning
A compact COB category may suit an interview or training arrangement where the light can sit away from the desk and remain stable. Do not infer current wattage, modifier compatibility, heat behavior, or mounting from a product title; check the live product page or manual for those details.
Rechargeable Mini Lights for Flexible Accents
Treat a rechargeable mini light as a possible supplement, background accent, or travel backup unless current specifications support a primary-key role. Check battery and charging details, output and color controls, mounting, and the expected position in the frame. A flexible light is not automatically the right face light for a recurring corporate workflow.
- Use it as a supplemental or temporary option only after checking its current controls and power details.
- Test whether its mounting keeps the light stable and clear of the screen.
- Review the real camera preview before relying on it as the primary source.
Desk Mounts and Clearance Checks
A mount can make a setup easier to repeat, but only if the desk, attachment method, stability, and cable route work together:
| Mount scenario | Check first | Common failure |
|---|---|---|
| Laptop-edge mount | Screen clearance and attachment surface | Blocks the display or changes the camera angle |
| Desktop mount | Base footprint and stability | Uses valuable desk space or tips when adjusted |
| Auxiliary arm | Clamp strength, reach, cable path, and adjustment range | Adds movement, visible hardware, or cable clutter |
Run a Five-Minute Pre-Call Lighting Check
Use the real camera preview at the time you normally call or record. This quick test cannot guarantee a perfect frame, but it can expose glare, unstable placement, daylight changes, and compatibility problems before the meeting.
- Frame the camera. Put the camera near eye level and confirm that your face, shoulders, and intended background are in view.
- Place the key. Start in front of the subject and slightly off-axis or elevated, then adjust one position variable at a time.
- Check glasses and shadows. Inspect both lenses and the shadow under the eyes, nose, and chin. Move the source before increasing output.
- Test daylight. Look for a dominant window, monitor, or overhead source. Use blinds, curtains, seating changes, or a repeatable artificial baseline as the room requires.
- Review the background. Remove distractions and add only modest separation if the subject disappears into the wall.
- Check clearance and stability. Confirm that the light does not block the screen, interfere with notes, create a visible reflection, or rely on an unstable attachment.
- Document the working position. Mark or photograph the camera and light positions so recurring calls and training sessions need less re-tuning.
- Verify before ordering. Check current dimensions, controls, mounting, power, battery, included accessories, return terms, and warranty on the specific product page. If you need complementary workspace gear, work-from-home accessories is a browsing destination, not a requirement for the lighting setup.
Choose the category that passes the room, camera, daylight, clearance, and repeatability checks. Then verify the current product details before adding it to your cart; we keep product fit conditional because the same light can behave differently in a laptop setup, an interview corner, and a training room.
FAQs
These questions cover the main checks: camera position, daylight, glasses, and whether the setup can be repeated. Use the real preview before buying.
What Light Is Best for Zoom Calls?
For a routine Zoom meeting, start with a controllable compact panel if it fits near the screen. Choose a more deliberate source for an interview corner, and treat a mini light as supplemental unless current specifications support primary face lighting.
How Do I Light a Home Office for Video?
Check the dominant window or overhead source at your usual meeting time. The light should stay near the camera without blocking the screen or creating reflections. If daylight changes, test a repeatable artificial baseline before settling on the layout.
How Can I Stop My Glasses From Reflecting Video Lights?
Move the light horizontally first, then test its height, output, or your seating position. Also check the window, monitor, and bright wall for secondary reflections. Review both lenses in the actual camera preview before replacing the light.
Should I Use Daylight or Artificial Light for Remote Training Videos?
Use daylight when it stays consistent and the seating position can be repeated. For changing weather or recording times, an artificial baseline is easier to document. Save the camera and light positions after a successful test.
Can Creator Lighting Work for Corporate Video Calls?
It can, but treat it as equipment to test rather than a style label. Check current controls, mounting, power, stability, and the camera preview. Reject the setup if it blocks the screen or needs frequent repositioning.