A camera rig turns a basic camera into a professional filmmaking tool. While a lens captures the image, the rig provides the structure to hold everything together. This metal frame makes your gear easier to handle and gives you a place to mount microphones, monitors, and large batteries.
Most creators start with a simple kit and add parts like handles or cages as their skills grow. This step-by-step approach keeps your setup light and affordable.
Build Your Foundation: The Minimal Camera Setup
Starting with basics helps you focus on the craft of filming. A small kit is easy to carry and forces you to learn light and composition without getting distracted by gadgets.
Identify Your Primary Filming Needs
Before buying gear, decide what you will shoot most often. Are you vlogging, filming clients, or making travel documentaries? Your main use case dictates every purchase. A vlogger needs a lightweight setup, while a professional filmmaker requires tools that look and perform at a higher level for customers.
The Core Components of a Basic Kit
Your first setup should include these three items:
- Camera Body: A DSLR, mirrorless camera, or a high-end smartphone.
- Versatile Lens: A 24–70mm zoom or a fast prime lens for low light.
- Power and Storage: Extra batteries and high-speed memory cards to keep you shooting all day.
Advantages of Keeping It Simple
A minimal kit is perfect for "run-and-gun" filming where speed is key. It helps you master exposure and focus without feeling overwhelmed. Being lightweight allows for fast setup times and makes you look less intimidating when filming in public or working with nervous subjects.
Level Up to a Solid Creator Rig for Better Handling
You can begin adding components to your camera to improve its functionality once you know your camera well. A few well-chosen accessories can make your camera much easier to use for hours at a time.
Add a Cage for Protection and Mounting

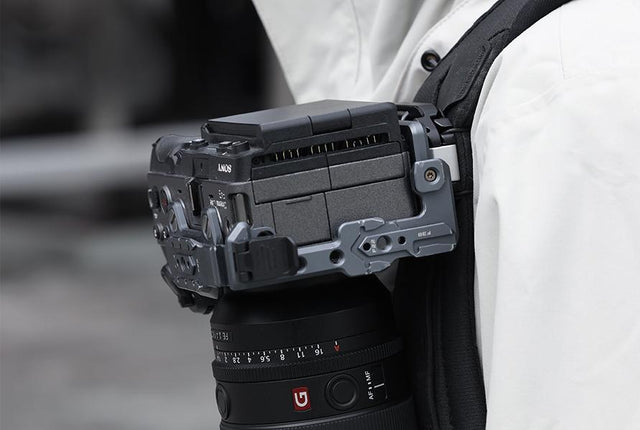
A camera cage is a metal frame that wraps around your camera body. It acts as the backbone of your rig. It protects the camera from bumps and drops. More importantly, it provides many small threaded holes. These holes let you attach handles, microphones, lights, and monitors without putting stress on the camera's own plastic parts. For those starting out, a beginner camera cage setup for filmmaking is the best way to keep your gear safe.
Improve Handling and Stability
A camera cage with top handle vs side handle is a common choice you will face. A top handle is great for carrying the rig and getting low-angle shots near the ground. A side handle gives you a second point of contact, which creates a mirrorless camera cage rig for handheld shooting that is much steadier. Using both handles helps balance the weight and makes long filming sessions less tiring for your arms.
Fix Your Audio First
Good sound is more important than a sharp picture. You can use an on-camera shotgun mic for directional sound or wireless lavalier mics for clear voices. Always check your levels on the screen to ensure you get clean dialogue. Avoid recording in windy or loud areas without the right covers for your microphone.
Manage Cables and Accessories
As you add gear, you will have more wires. Use short cables and right-angle connectors to keep things neat. Good cable management for camera cage rig setups prevents wires from getting snagged or pulled out of the ports. A tidy rig is a reliable rig. Keep it compact enough so you can still operate the camera by yourself without needing an assistant.
Go Further: Pro Features for a Master Loadout
When your projects get bigger, you need tools that help you see better and film longer. These professional additions give you more precision and allow your camera to run all day without a break.
External Monitoring and Exposure Tools

Adding a field monitor is a big step up. Use camera cage accessories for external monitor mounts to place a larger screen where you can see it clearly. A bigger screen helps with focus and framing. It also offers tools like false color and zebras to check exposure, or focus peaking to see what is sharp. You can even load LUTs to see what your color-graded footage will look like while you are still on set.
Power and Reliability
Small camera batteries die quickly. A v-mount battery setup for camera cage rigs allows you to power the camera and the monitor from one large battery. This keeps your rig running for a full day of shooting. It also adds weight to the back of the rig, which can actually help balance a heavy lens on the front, making the whole system feel more stable on your shoulder or in your hands.
Focus and Lens Control
For precise control, add a manual follow focus. This tool lets you turn a knob to change focus smoothly instead of grabbing the lens directly. If you start using cine lenses instead of stills lenses, a follow focus becomes even more important. Cine lenses have gears built-in that make this process much easier and more repeatable. According to the DePaul SCA on-set safety guidelines, camera operators should be fully trained on their rigs and aware of their surroundings at all times.
Communication and Client Monitoring
On professional sets, other people need to see what the camera sees. Wireless video systems send the image to a separate monitor for a director or a client. This creates a professional workflow where the person filming can focus on the movement while the director checks the performance and the frame from a distance.
Smart Upgrade Path: From Minimal to Pro, Step by Step
You should not buy every piece of gear at once. The best way to build a rig is to let your work tell you what is missing. This saves money and keeps your kit from getting too heavy too fast.
Avoid Common Money Traps
Don't buy accessories just because they look cool. Wait until a real problem appears during a shoot. For example, if your hands get tired, buy a handle. If your audio is noisy, buy a better mic. The best order for upgrades is usually: audio, then handling, then monitoring, and finally power and advanced tools.
Balance Weight, Size, and Function
There is a trade-off between a tiny camera and a massive "Frankenrig." Big rigs are stable but heavy. Small rigs are portable but harder to keep steady. Know when to "de-rig" your setup. If you are going on a hike or using a gimbal, take off the extra handles and monitors. A lightweight camera cage setup for gimbal use is much better than trying to balance a fully loaded professional rig. Reviewing a camera rig safety audit before heavy shoots can prevent costly accidents.
Example Upgrade Roadmaps
A solo YouTuber might start with a minimal camera, then add a mic and tripod. Later, they might get a cage and top handle, followed by a monitor and a large battery. A freelance filmmaker might start with a basic kit, then move to a cage with audio, then add a monitor and follow focus. Finally, they might invest in wireless video for clients.
Practical Tips for Building and Using Your Rig
A good rig should work for you, not against you. Being prepared and knowing your equipment inside and out will prevent stress when you are on a paid job or a tight schedule.
Test Everything at Home
Never take a brand-new part to a paid shoot without testing it first. Set up your rig at home and practice using it. Make sure the cables reach the ports and the batteries last as long as you expect. This helps you find problems when they are easy to fix rather than in front of a client. The Emerson College production safety guidelines stress that all equipment must be tested and secured before going to a live location.
Carry the Right Tools
Always keep a small bag of tools and spare screws with you. Rigs use various sizes of hex keys or flat-head screws. If a handle comes loose during a shoot, you need to be able to tighten it immediately. Having a few extra mounting screws can save the day if one falls out and gets lost in the grass or a dark studio.
Create a Fast Workflow
Learn how to build and strip down your rig quickly. Use quick-release plates so you can move the camera from the rig to a tripod or a gimbal in seconds. If you can change your setup fast, you can capture more variety in your shots.
Have a Backup Plan
Consider having a second, very simple setup. This could be a small handheld mount or even just the camera body. If your main rig becomes too heavy for a specific shot, or if a part breaks, you need a backup that allows you to keep filming without any delays.
Grow Your Cinema Rig Over Time
Focus on mastering your camera first. A simple, reliable setup you know well beats an expensive, confusing rig. When picking a frame, a model-specific camera cage offers a better fit than a universal one. Treat your gear as a flexible system that changes with each project. A professional loadout comes from small, smart improvements rather than a single shopping spree. Build slowly and let your work show you what you need next.
FAQs
Q1: Do I need a full rig as a beginner filmmaker?
No. A basic camera, a good lens, and a decent microphone are all you need to start. You can learn the most important parts of filmmaking without any extra cage or handles. Add those parts only when you feel your current setup is holding you back.
Q2: Should I upgrade my camera or my rig accessories first?
In many cases, accessories like a better microphone, a stable handle, or a clear monitor will improve your work more than a new camera body. If your current camera already shoots high-quality video, focus on the tools that help you capture that video more effectively.
Q3: Is a cage really necessary for a camera rig?
It is not strictly necessary to record video, but it is very helpful. A cage provides safety for your camera and gives you the mounting points you need for everything else. Once you start adding more than one accessory, a cage makes the whole system much more solid.
Q4: How do I keep my camera rig from getting too heavy?
Only put on the gear you actually need for that specific day. If you don't need a monitor for a quick outdoor shoot, leave it off. Keeping your rig modular allows you to stay mobile when you need to and go "full pro" when the project demands it.