


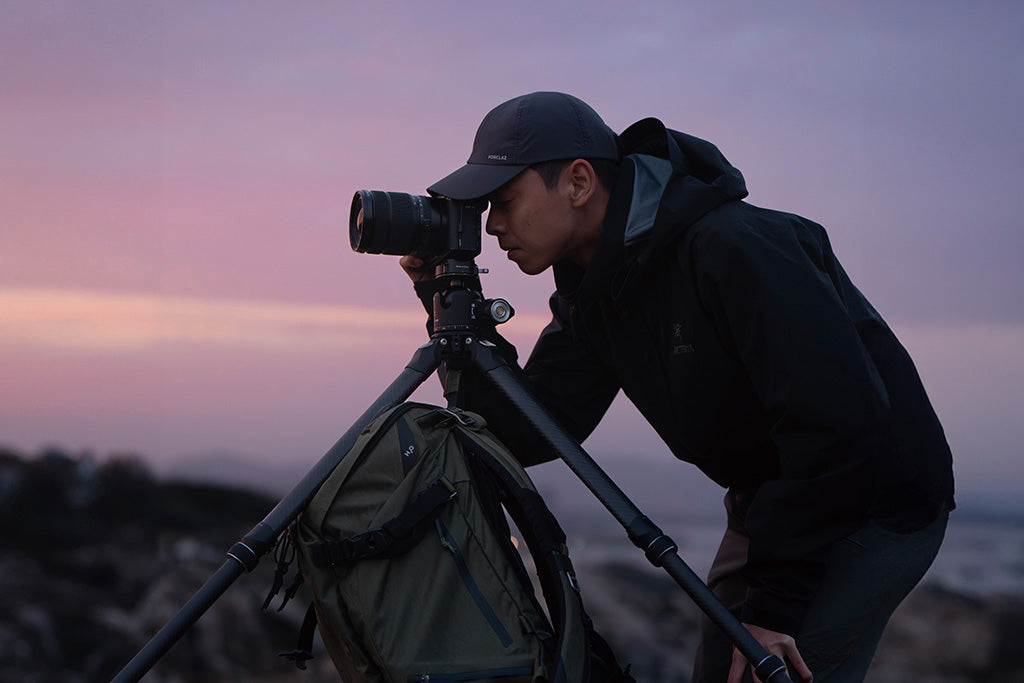
The Silent Failure: Why Grip Integrity Matters
For an adventure-focused solo creator, the difference between a successful expedition and a catastrophic equipment loss often comes down to a few square centimeters of rubber. We have observed a recurring pattern in our support logs: most equipment "failures" in the field aren't caused by snapped metal or stripped threads, but by a gradual loss of friction.
When the rubber pads on your phone cage or tripod head lose their "tackiness," the mechanical bond between the camera and the mount is compromised. In harsh, unpredictable environments—where wind, vibration, and steep angles are constant—this loss of grip introduces a tail-risk that can shatter both your gear and your creative momentum.
This guide provides a methodical framework for diagnosing, restoring, and maintaining the rubber interfaces of your support system. By understanding the polymer science behind grip, you can ensure your Ulanzi Falcam F22 & F38 & F50 Quick Release Camera Cage V2 for Sony A1/A7 III/A7S III/A7R IV 2635A or fluid head remains a dependable part of your workflow infrastructure.

Section 1: Diagnosing Rubber Degradation
The most common misconception we encounter is that rubber fails by "wearing thin." In reality, the primary failure mode for high-quality camera gear is surface glazing.
The Science of Glazing
Rubber is a complex polymer matrix. Over time, two primary environmental factors degrade this matrix:
- UV Degradation: Constant exposure to sunlight breaks down polymer chains at the surface.
- Plasticizer Leaching: The chemicals that keep rubber flexible (plasticizers) gradually migrate to the surface and evaporate, or react with environmental pollutants.
This results in a surface that feels smooth, looks shiny, and—most importantly—has a significantly lower coefficient of friction. According to ISO 2230:2024 (Rubber products — Guidelines for storage), even under ideal conditions, certain rubber compounds have a defined shelf life of 5–10 years before physical properties begin to shift. In the high-stress world of adventure filmmaking, this timeline is often compressed.
The "Thumbnail Test" Diagnostic
To determine if your pads need attention, we recommend the following field-proven diagnostic:
- The Test: Press your thumbnail firmly into the rubber pad for three seconds.
- Passing Grade: The indentation should be deep and should disappear almost instantly as the polymer rebounds.
- Failing Grade: If the indentation is shallow, slow to recover, or if the surface feels "slick" like hard plastic, the rubber has lost its elasticity and grip.
Logic Summary: This diagnostic relies on the material's durometer (hardness) and rebound resilience. A glazed surface increases the effective hardness, reducing the "micro-interlocking" required for friction.
Section 2: Professional Restoration Protocols
When a pad fails the thumbnail test, you don't necessarily need a replacement. In fact, frequent replacement of small rubber parts contributes to microplastic pollution, as discarded, crumbled pads are non-biodegradable. Restoration is both a cost-saving measure and an ecological imperative.
The Isopropyl Reset
For field technicians, the first line of defense is a high-concentration (90%+) isopropyl alcohol (IPA) wipe.
- Mechanism: IPA acts as a solvent that strips away the oxidized top layer and leached plasticizers that create the "glaze."
- Caution: Lower concentration alcohols (70%) often contain oils or fragrances that can leave a residue, further reducing grip.
- Procedure: Apply IPA to a lint-free cloth and rub the pad vigorously in a circular motion. You should see the "shine" disappear, replaced by a matte, slightly tacky finish.
Chemical Rejuvenation
If cleaning isn't enough, industrial rubber rejuvenators—often based on penetrants that re-introduce flexibility to the polymer matrix—can be effective. Research published in MDPI's Buildings Journal suggests that specific rejuvenators can restore performance by re-penetrating the polymer matrix, a principle that applies to small-scale camera mounts.
| Method | Estimated Effectiveness | Risk Level | Unit Cost |
|---|---|---|---|
| 90%+ Isopropyl Alcohol | High (Surface Restoration) | Low | <$5 |
| Rubber Rejuvenator | Very High (Deep Flex) | Medium (Compatibility) | $15–$25 |
| Light Sanding (400 grit) | Moderate (Mechanical) | High (Material Loss) | <$2 |
| Replacement Pad | Absolute | Low | $10–$20 |
Methodology Note: This comparison is a heuristic based on common repair bench patterns. Effectiveness may vary based on whether the rubber is Nitrile, EPDM, or Silicone.
Section 3: The Biomechanics of Failure
Why does a slight loss of grip matter so much? It's not just about the weight of the camera; it's about the leverage.
The Wrist Torque Analysis
In adventure setups, we often mount accessories like monitors or microphones to the side of a cage using systems like the Ulanzi Falcam F22 & F38 & F50 Quick Release Camera Cage for Sony a7C II C00B3A01. This increases the "lever arm" of the rig.
The Formula: Torque ($\tau$) = Mass ($m$) $\times$ Gravity ($g$) $\times$ Lever Arm ($L$)
If you have a 2.8kg rig (approx. 27.4N) and the center of gravity is offset by 0.35m due to an external monitor, the torque generated at the mounting point is approximately 9.6 N·m.
For an average adult, this load can represent 60-80% of the Maximum Voluntary Contraction (MVC) of the wrist. When the rubber pads on your Ulanzi U-190 Mini Fluid Head 2895 are compromised, the mount can no longer counteract this torque, leading to "creep" or sudden slippage during a pan or tilt.
Section 4: Workflow ROI – The Cost of Maintenance
Maintaining your gear isn't just about safety; it's about professional efficiency. As detailed in The 2026 Creator Infrastructure Report, the shift toward "ready-to-shoot" toolchains means that every second spent fiddling with a slipping mount is lost revenue.
The Quick Release Advantage
Consider the time saved by using a maintained F38 system compared to traditional 1/4"-20 thread mounting:
- Traditional Mounting: ~40 seconds per swap (aligning, threading, tightening).
- Quick Release (Maintained): ~3 seconds per swap.
For a professional creator performing 60 swaps per shoot across 80 shoots a year, a reliable quick-release system saves approximately 49 hours annually. At a professional rate of $120/hr, this represents a ~$5,900+ value in recovered time. However, this ROI is only realized if the system is reliable. A worn rubber pad that requires "double-checking" or causes a slip negates these gains.
Section 5: Preventive Maintenance & Storage
The single biggest accelerator of rubber wear is constant compression.
The "Unloaded" Rule
A common mistake among expedition cinematographers is leaving a clamp tightly fastened on a camera cage for weeks between trips. This permanently compresses the pad's cell structure (known as "compression set"), drastically reducing its ability to rebound and grip.
- The Rule: Always store clamps, phone cages, and tripod heads in the open, unloaded position.
Thermal Shock Prevention
Aluminum components, such as those in the Ulanzi F38 Quick Release Fluid Video Head E004GBA1, act as thermal bridges. In extreme cold, they can conduct heat away from the camera battery.
- Workflow Tip: Attach your aluminum QR plates to your cameras indoors before heading into the cold. This minimizes the "metal-to-skin" shock and ensures the rubber pads are seated at room temperature, where they are most pliable and effective.

Section 6: The Pre-Shoot Safety Checklist
To maintain what we call "Interface Integrity," every creator should perform a three-point check before every shoot:
- Audible: Listen for the distinct "Click" of the F38 or F22 locking mechanism.
- Tactile: Perform the "Tug Test". Once mounted, give the camera a firm pull in two directions to ensure the friction pads have seated correctly.
- Visual: Check the locking pin status. On Ulanzi Falcam systems, ensure the safety lock is engaged (indicated by the position of the slider).
Additionally, manage your cables. A heavy HDMI cable can create unwanted torque on a quick-release plate. We recommend using F22 cable clamps to provide strain relief, ensuring the weight of the cable doesn't act as a lever against your mounting friction.
Building a Trusted System
In the "tail-risk" market of adventure imaging, average quality isn't enough. Trust is built through engineering discipline and regular maintenance. By treating your rubber mounts as critical infrastructure—rather than disposable accessories—you ensure that your gear can handle the unpredictable demands of the field.
Maintaining the tackiness of your pads, understanding the biomechanics of your rig, and following methodical storage practices will extend the life of your equipment and protect your most valuable assets.
Disclaimer: This article is for informational purposes only. Maintenance and repair of camera equipment involve risks to the hardware. Always consult the manufacturer's specific warranty guidelines before applying chemicals or performing mechanical alterations to your gear.


