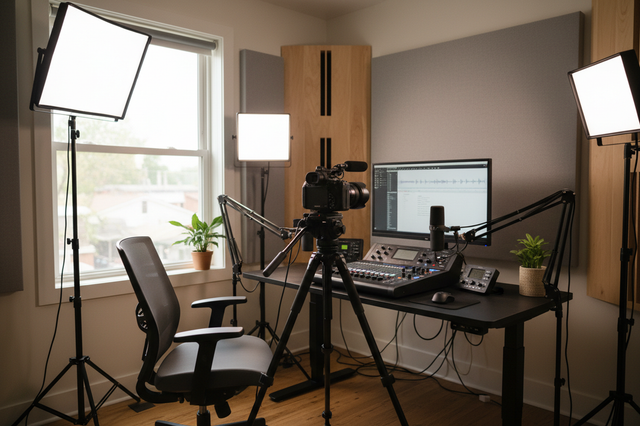
The most effective travel vlogging rig for windy travel is not the tallest or the heaviest one. It is the setup that stays compact while you move, mounts cleanly when you stop, and returns to carry mode without wobble or confusion. For travel creators, that usually means an F38 plate, a backpack clip, and a tripod workflow that stays repeatable in wind, dust, and fast pack-and-go days.

What Makes a Travel Rig Wind-Ready
Wind-ready means better configuration discipline, not a promise that the rig will stay perfectly still in every condition. For travel vloggers, the goal is to keep the camera low, the load close to the body, and the release points easy to verify. That matters more than chasing extra height or adding parts that are hard to manage on the road.
The main tradeoff is simple: you can add reach and flexibility, or you can keep the rig compact and easier to trust in gusty conditions. A compact setup is usually more reliable in wind-prone travel situations because it lowers exposure, shortens lever arms, and makes quick checks easier.

A good setup also reduces friction. If you can move from backpack carry to tripod mode the same way every time, you are less likely to leave something half-tightened or half-open in the field. Compact deployment and repeatable checks matter because the best rig is the one you can verify fast.
Choose the Core Mounting Path
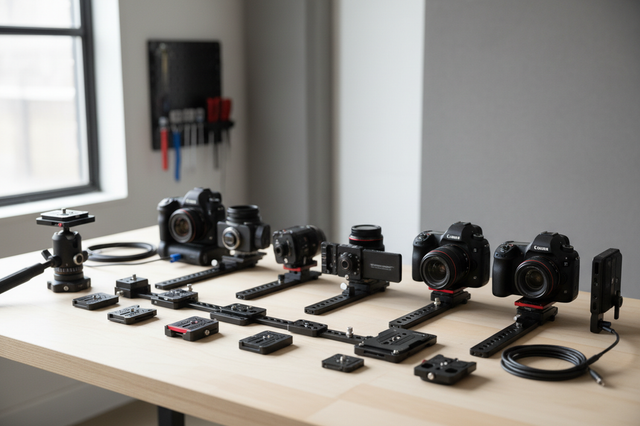
The main choice is whether the rig should center on the F38 plate, the backpack clip, or both. The right answer depends on whether your priority is carry convenience, tripod deployment speed, or a cleaner static shooting base. For many travel vloggers, the hybrid path works best because the clip handles transport while the plate handles fast handoff at the scene.
A simple way to decide: if you walk a lot between stops, build around the backpack clip; if you stop often to shoot, build around the F38 plate; if you do both, use the clip for carry and the plate for the actual handoff. Ulanzi’s solo travel tripod setup guide is useful here because it treats the rig as a workflow problem, not just a parts list.
| Mounting path | Best fit | Wind behavior | Speed | What to check first |
|---|---|---|---|---|
| Backpack-mounted tripod with clips | Frequent walking between short stops | Better than loose carry because the load stays closer to the body | Fast | Strap fit and how much the tripod can swing |
| F38 plate plus tripod base | Quick deploys at repeated shooting spots | Good when the tripod stays compact and centered | Very fast | Clean seating and release feel |
| Internal carry inside the bag | Transit days, flights, crowded areas | Best protection from side gusts while walking | Slower | Whether you can access the gear quickly enough |
| Hand carry only | Very short moves | Least controlled in wind | Fast to move, poor to manage | Whether the load is likely to swing or snag |
The interface check matters because a good-looking setup can still fail as a workflow if the plate, clip, or strap is not seated cleanly. For this reason, the backpack strap clip should be treated as a carry tool first, not as a guarantee of support in every condition. Confirm the exact fit before you rely on it.
Build the F38 Backpack-And-Tripod Workflow
The best workflow is the one that lets you move quickly without creating a sloppy rig. Start by treating the F38 plate as the handoff point and the backpack clip as the parking point. That keeps the system easy to repeat when you are switching locations.
A clean sequence usually looks like this: mount the plate, park the tripod close to the pack, keep the legs closed while moving, deploy only when you have stable footing, then re-seat everything before you move again. That sounds basic, but it is exactly what keeps a travel vlogging rig from becoming annoying after the third or fourth stop.
For solo creators, the biggest mistake is treating the quick-release as a shortcut instead of a system. Quick release only helps if the plate seats fully and the carry position stays consistent. Otherwise, the workflow gets faster in theory and slower in practice.
A practical caution from Photographylife’s wind guidance is to avoid giving the setup extra height or leverage when conditions are exposed. In plain language, keep the tripod low, keep the center column down, and extend only what you actually need.
That is especially relevant for a travel vlogging rig because every extra inch of height gives the wind more room to work. If you can shoot lower, do it. If you can keep the tripod compact until the last step, do that too.
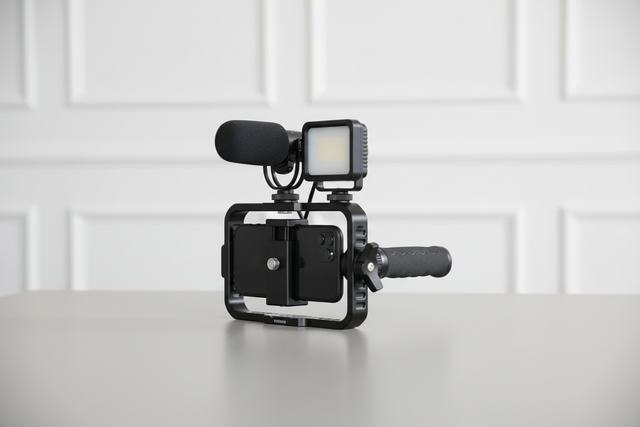
Mount the Plate Where It Is Least Annoying
Place the F38 plate where it transfers cleanly between carry mode and shooting mode. On a travel day, the best placement is the one that does not interfere with your handhold, strap, or folding parts. If the plate gets in the way every time you grab the camera, it will slow you down and make the system feel clumsy.
Use the Backpack Clip for Carry-To-Shoot Moves
Treat the backpack clip as a short-hop helper, not a long-term support guarantee. It is most useful when you are walking between trail stops, city corners, or viewpoints and want the camera close without digging through the bag. Before you trust it, verify strap width, clip tension, and how the rig rides against the pack.
Set the Tripod for Fast Deployment
Keep the tripod ready to open without digging through different pockets or splitting parts across the bag. The more consistent the opening motion, the less likely you are to fumble in gusty conditions. If the tripod needs extra steps to become usable, it is not really travel-ready yet.
Do a Wind-And-Tightness Check Before Shooting
Use a pre-step-away tug test and a quick seating check before you walk off. Ulanzi’s wind guide supports that habit with a simple field principle: do not assume the click alone is enough. Pull, confirm, and then leave the rig.
That check matters even more in dusty or salty conditions, where a fast setup can start feeling loose after a few location changes. A few seconds of checking is usually cheaper than losing trust in the rig halfway through the day.
Keep Wind Exposure in Check on the Road
The best use cases are coastal shoots, exposed overlooks, and mountain trail stops where gusts and footing can change quickly. In those places, the value of a compact travel setup is not that it defeats the wind. It is that it gives you a controllable base you can deploy, lower, and repack without wasting time.
Ulanzi wind stability basics is a good match for that mindset because it focuses on the practical side of outdoor support, not on unrealistic promises. The useful takeaway is simple: keep the system low, close, and easy to verify.
A few field cues help a lot:
- If the wind is rising, shorten the setup before you lengthen it.
- If footing feels loose, move the tripod before you add height.
- If the backpack is pulling the rig sideways, re-center the carry.
- If sand, spray, or dust are building up, inspect the release path sooner.
- If the scene needs more shelter, use terrain, walls, or body position before you rely on a taller stance.
On sand or grass, a lower stance and wider leg spread can help the setup feel steadier, but only if the ground is firm enough to support it. If the surface shifts, shorten the setup first and move the rig before you add height. That is the same logic we use when planning a travel vlogging rig for coastal and mountain stops.
Pack Down Without Slowing the Next Setup
A travel rig only stays fast if the pack-down routine is as repeatable as the setup. If you rush the breakdown, the next stop starts with loose parts, sticky release points, or a clip that does not seat the same way twice.
Use a consistent reset order. Lower the tripod, remove anything that adds side drag, close the legs fully, re-engage the clip, and confirm the plate is seated before you move on. That keeps the carry position predictable and makes the next setup easier.
In salty or sandy environments, wipe and inspect before stowing the kit. That helps keep grit out of the release path and makes the next stop easier to set up.
Wipe, inspect, reset, then pack. If you want a cleaner next session, return the rig to the same carry state every time.