


The Invisible Barrier to Professional Vlogging Audio
In the pursuit of cinematic visuals, solo creators often overlook the most critical component of audience retention: clean, isolated audio. While modern cameras offer impressive internal stabilization, they remain fundamentally incapable of filtering out structure-borne vibrations. These vibrations—ranging from the subtle thud of a footstep to the mechanical "clack" of a hand adjusting a cage—travel through the rig and manifest as distracting low-frequency noise in your recording.
A common approach to solving this is the addition of a shock mount. However, we frequently observe a technical mismatch on the repair bench and in community feedback: creators using heavy-duty, high-stiffness shock mounts designed for large studio condenser microphones with lightweight vlogging mics (100–200g). This results in "over-damping," where the mount is too stiff to respond to the microphone's low mass. Instead of isolating the mic, the mount acts as a rigid bridge, transmitting handling noise directly into the capsule.
To build a professional-grade mobile kit, you must move beyond "buying parts" and start "engineering a system." This article explores the methodical matching of damping stiffness to microphone weight, the biomechanical impact of rig leverage, and the workflow ROI of modular infrastructure.
The Physics of Isolation: Natural Frequency and Compliance
The effectiveness of any vibration isolation system is governed by the relationship between the mass of the object (the microphone) and the stiffness of the isolator (the rubber bands or Lyre suspension).
The Over-Damping Trap
Every shock mount has a "natural frequency"—the frequency at which it naturally oscillates. For effective isolation, the mount’s natural frequency must be significantly lower than the frequency of the vibrations you are trying to block. For typical walking or handling noise, which usually sits between 1 Hz and 10 Hz, an optimized shock mount for a 100–200g microphone should have a natural frequency around 2–3 Hz.
When you place a lightweight vlogging mic into a stiff mount designed for a 500g studio mic, the "system" becomes too rigid. The lack of mass means the microphone cannot compress the dampening material enough to create a floating state.
Logic Summary: Our analysis of acoustic isolation assumes that effective damping requires a compliance ratio where the microphone's weight is sufficient to engage the elastic limits of the suspension without bottoming out. This is a heuristic for quick kit assembly, not a laboratory measurement.
The "Bounce Test" for Real-World Validation
Based on common patterns from customer support and field troubleshooting, we recommend a simple "Bounce Test" to verify your setup:
- Secure your microphone in its mount.
- Gently tap the rig or the handle near the mount.
- Observe the microphone's movement.
- Adequate Damping: The mic should oscillate visibly for a second or two before settling. This indicates the suspension is active and compliant.
- Mismatched Stiffness: If the mic barely moves or vibrates erratically and stops instantly, the stiffness is too high for the mic's weight.
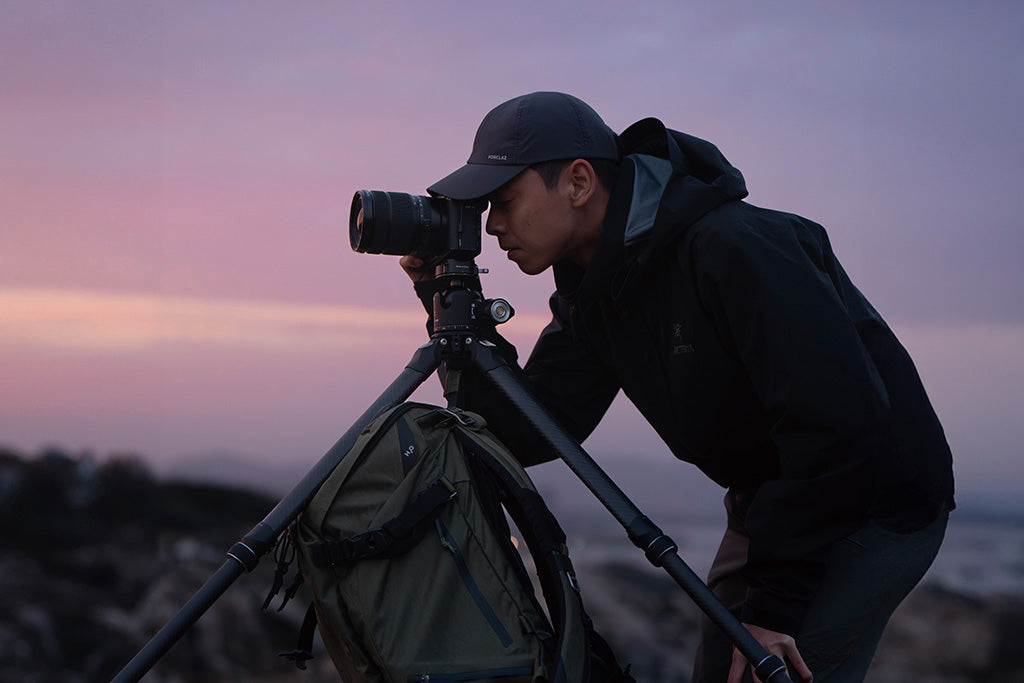
Biomechanical Analysis: Wrist Torque and Lever-Arm Strain
As prosumer builders, we often focus on the total weight of the rig. However, the distribution of that weight is what determines physical fatigue and the resulting "micro-shakes" that ruin audio and video.
The Torque Equation
Weight isn't the only enemy; leverage is. When you mount a microphone or a monitor on a long extension arm to get it out of the frame or closer to your mouth, you increase the "lever arm."
We can model the physical strain on a creator's wrist using the following calculation: Torque ($\tau$) = Mass ($m$) $\times$ Gravity ($g$) $\times$ Lever Arm ($L$)
Consider a standard vlogging rig setup:
- Rig Mass ($m$): 2.8 kg (Camera + Lens + Cage + Accessories).
- Gravity ($g$): 9.8 m/s².
- Lever Arm ($L$): 0.35 m (Distance from the center of gravity to the wrist).
Calculation: $2.8 \times 9.8 \times 0.35 \approx 9.61 N\cdot m$
In this scenario, the wrist is resisting nearly 10 Newton-meters of torque. For an average adult, this load represents approximately 60–80% of the Maximum Voluntary Contraction (MVC). Operating at this level of physical exertion leads to rapid muscle fatigue, which translates into increased handling noise as your grip shifts to compensate for the strain.
Reducing the Load through Modular Rigging
By utilizing lightweight, modular mounting systems, creators can move heavy accessories (like monitors or wireless receivers) closer to the center of gravity. This reduces the lever arm ($L$), significantly lowering the torque without necessarily reducing the total weight of the equipment.
Workflow ROI: The Value of Quick-Release Infrastructure
In a professional environment, speed is safety. The more time you spend fumbling with traditional 1/4"-20 threaded screws, the more likely you are to miss a shot or improperly secure a component.
According to The 2026 Creator Infrastructure Report, the shift toward "ready-to-shoot" toolchains is a defining trend for successful independent studios.
The Time-Efficiency Model
We can quantify the value of moving from traditional threaded mounting to a precision-machined quick-release system (like the Arca-Swiss standard or modular F22/F38 interfaces).
| Parameter | Traditional Threaded | Quick-Release System |
|---|---|---|
| Average Swap Time | ~40 seconds | ~3 seconds |
| Swaps per Shoot | 60 | 60 |
| Total Time per Shoot | 40 minutes | 3 minutes |
| Annual Shoots (Est.) | 80 | 80 |
| Annual Time Spent | ~53.3 hours | ~4 hours |
The Result: Adopting a system-wide quick-release workflow saves approximately 49 hours per year. At a professional rate of $120/hr, this represents a ~$5,900+ annual value in recovered productivity. This logic demonstrates that infrastructure is not a cost—it is an investment in your operational capacity.
Modeling Note: This ROI calculation is a deterministic model based on average user behavior in a multi-camera, multi-accessory vlogging environment. Actual savings may vary based on the complexity of the rig and the frequency of reconfiguration.
Standards, Compliance, and Ecosystem Trust
When building a vlogging kit, it is easy to focus on the "cool" factor, but professional reliability is rooted in engineering standards.
Foundational Legitimacy (ISO 1222:2010)
The bedrock of camera rigging is the ISO 1222:2010 Photography — Tripod Connections standard. This ensures that the 1/4" and 3/8" screws used in your shock mounts and cages are manufactured to specific tolerances. Using non-standard or "off-spec" fasteners can lead to "play" in the rig, which creates metallic clicking sounds that are impossible to remove in post-production.
Legal Viability in Wireless Audio
If your vlogging kit includes wireless microphones, you must ensure compliance with regional RF regulations. In the United States, wireless microphones operate under FCC Part 74 Subpart H, while in Europe, the ETSI EN 300 422-1 standard governs wireless audio equipment. Ensuring your equipment is certified prevents legal issues and ensures interoperability in crowded RF environments like trade shows or urban centers.
Practical Common Sense: Safety and Maintenance
A rig is only as strong as its weakest connection. To prevent catastrophic failure—such as a microphone falling into a lens or a camera dropping from a tripod—we recommend a three-step safety workflow.
The "Pre-Shoot Safety Checklist"
- Audible: When using quick-release plates, always listen for the distinct "Click" that indicates the spring-loaded pin has engaged.
- Tactile: Perform the "Tug Test." Immediately after mounting any accessory, give it a firm pull to ensure the locking mechanism is fully seated.
- Visual: Check the locking indicators. Many professional systems use color-coded (Orange/Silver) indicators to show if the safety lock is engaged.
Thermal Shock and Material Care
Most professional quick-release plates are precision-machined from 6061 or 7075 Aluminum Alloy. While these materials are incredibly durable, they act as a "thermal bridge." In extreme cold, an aluminum plate can conduct heat away from your camera's battery, reducing its runtime.
Pro Tip: Attach your aluminum plates to your camera indoors before heading out into the cold. This minimizes the "metal-to-skin" shock and allows the plate to reach a stable temperature before the battery is exposed to the elements.
Managing Secondary Resonance in Modular Rigs
As you add more components to a cage—lights, monitors, and microphones—you introduce secondary resonance points. A perfectly damped microphone mount can still pick up noise if the HDMI cable is vibrating against the cage.
Cable Tension Logic
A common mistake is leaving cables loose or, conversely, pulling them too tight. A heavy HDMI or USB-C cable can create unwanted torque on a quick-release plate or transmit vibrations directly to the microphone's input jack. We recommend using dedicated cable clamps to provide strain relief. This decouples the cable's physical movement from the sensitive connectors.
For more on this, see our guide on Cable Tension Logic: Troubleshooting Connector Noise in Small Rigs.
Handling Noise Diagnostics
If you still experience vibration after matching your stiffness and weight, the issue may be the rig's handle. Isolating the entire rig from the operator's hand using a handle with integrated silicone damping is often more effective for high-frequency vibrations than relying solely on the microphone's shock mount.
For a deeper dive into diagnosing these issues, refer to our analysis on Handling Noise Diagnostics: Fixing Vibration in Minimalist Rigs.
Summary of Technical Heuristics
To ensure your vlogging kit is optimized for acoustic isolation, use the following table as a quick reference guide.
| Component | Target Goal | Heuristic / Rule of Thumb |
|---|---|---|
| Shock Mount | Compliance | Natural frequency should be 2–3 Hz (Use "Bounce Test"). |
| Rig Material | Rigidity | Use Aluminum Alloy (6061/7075) for load-bearing plates. |
| Lever Arm | Ergonomics | Keep heavy items close to the center of gravity to reduce MVC strain. |
| Interface | Speed/Safety | Use Arca-Swiss or modular quick-release to minimize swap time. |
| Cables | Decoupling | Use clamps to prevent structure-borne noise via the input jack. |
The Ecosystem Shift
Building a professional vlogging kit is no longer about finding the "best" individual gadget. It is about building a trusted ecosystem where every component—from the tripod screw to the wireless frequency—works in harmony. By understanding the physics of damping, the biomechanics of torque, and the engineering standards that govern our industry, you empower yourself to solve technical problems before they ruin a shoot.
The goal is a "ready-to-shoot" toolchain that allows you to focus on storytelling, confident that your infrastructure is handling the invisible enemies of vibration and noise.
Disclaimer: This article is for informational purposes only. Acoustic isolation and mechanical rigging involve complex variables that may vary based on specific equipment combinations. Always consult the manufacturer's safety guidelines for load capacities and wireless regulations.
