Watching your phone tumble from a tripod might be every content creator's nightmare. A secure setup keeps your device safe and makes sure that your videos and photos look smooth and professional. This guide will break down tried-and-true ways to make your phone tripod more stable and prevent costly accidents.

1. Choose the Right Phone Holder for Tripod Stability
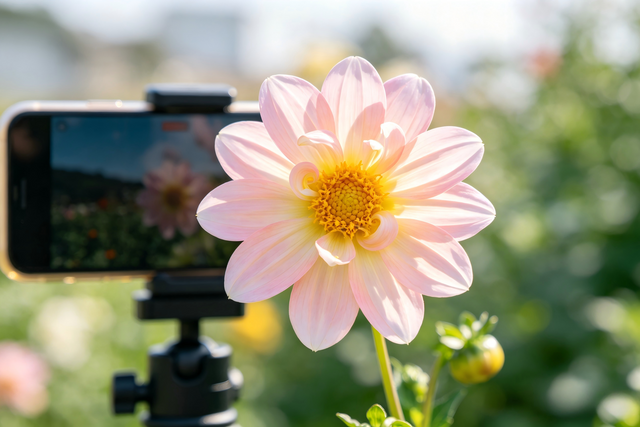
Choosing good mounting tools is the first step to making sure your phone tripod is stable. Your phone holder acts as the critical connection point between your device and the tripod base. To learn more about different mounting options, read our comprehensive guide on choosing the best phone holder.
Key Features to Look For
- Spring-loaded clamps offer quick attachment but may loosen over time. Screw-tightening mounts provide firmer grip and better long-term reliability.
- Look for models with rubber padding that protects your phone's edges while increasing friction.
- The best phone mounts and accessories feature adjustable width ranges, typically accommodating devices from 2.4 to 3.7 inches wide.
- Metal construction outlasts plastic alternatives, especially for frequent users. Check that your chosen mount includes both portrait and landscape orientation options. A quality phone holder for tripod use should feel solid in your hands, with smooth adjustment mechanisms that lock firmly into place.
Testing Before You Trust
Do an easy grip test before any important shoot. Put your phone in the mount and try to slide it sideways gently. If it moves, you need to tighten the screws or get a different holder. This easy check stops most of the things that cause phones to slip before they become problems.
Quality mounting hardware eliminates the most common phone slipping mistakes. Buying solid gear will pay off over many years of stress-free shooting.
2. Secure Your Phone on the Tripod Mount Correctly
Even the best phone holder for tripod won't perform well if installed incorrectly. Properly securing a phone on a tripod requires attention to detail and consistent technique.
Installation Best Practices:
- Center your phone perfectly between the clamp arms.
- Apply equal pressure to both sides of the device.
- Remove thick cases that prevent full contact with padding. Cases add bulk that can interfere with clamp grip. For maximum stability, use slim cases or remove protective covers during filming.
- Tighten screws or clamps until finger-tight, not over-torqued.
- Rotate your phone between orientations to confirm it stays locked.
After mounting, perform the "shake test" by gently tapping the tripod legs. Your phone shouldn't wobble or shift position. If you notice any movement, readjust immediately. This takes just ten seconds but prevents disasters.
Taking an extra moment for proper installation transforms your setup from questionable to rock-solid. These small efforts make huge differences in phone tripod stability.
3. Balance Your Phone Tripod to Prevent Tipping
Professional-level stability is different from amateur-level stability because of the weight distribution. A balanced phone stand keeps the phone from tipping over and lowers vibrations while recording.
Center of Gravity Fundamentals
| Factor | Impact on Stability | Solution |
| Phone position | Higher placement increases tipping risk | Keep phone mount low on center column |
| Added accessories | Lenses and lights create imbalance | Position heavy items toward tripod center |
| Leg spread | Narrow stance reduces base support | Widen legs on uneven or outdoor surfaces |
| Extension height | Full extension magnifies instability | Use minimum height needed for your shot |
Your tripod legs form a triangle that defines your stable base. Wider leg angles create more stability, especially outdoors or when using heavier phone setups. For tall extensions, consider tripod accessories for phone that add counterweight or anchor points.
Attaching external microphones, lights, or wide-angle lenses shifts your center of gravity. Place these accessories symmetrically or keep them close to the phone's center point. This prevents the lopsided configurations that cause unexpected tipping.
Balance isn't complicated, but it requires thinking about physics before you start shooting. A well-balanced rig stays put through wind, vibration, and accidental bumps. Mastering balance is key; our detailed tutorial on advanced tripod techniques can help you perfect your setup.
4. Use Anti-Slip Solutions to Stop Phone Slipping
Even secure mounts benefit from additional friction-enhancing materials. Anti-slip pads for phone users create multiple layers of security that work together.
- Adhesive-backed rubber strips can line your phone mount's interior surfaces, dramatically increasing grip. These thin pads don't interfere with phone insertion but add crucial friction that prevents sliding. Similar rubber feet on your tripod base stop the entire setup from walking across smooth floors.
- Textured silicone wraps around phone cases provide another gripping surface for mount clamps to grab. These wraps also protect phone edges from scratches while improving overall hold. For outdoor shooting, some creators attach small safety straps between phone and tripod as backup insurance.
- L-brackets and cold shoe mounts distribute accessory weight more evenly across your phone tripod. Instead of creating cantilever stress on one side, these mounting points keep everything aligned and balanced. They're particularly valuable for adjusting tripod stability when using multiple accessories simultaneously. For a fully integrated solution, consider exploring a dedicated smartphone video rig to mount all your accessories securely.
Combining several anti-slip methods creates redundancy. If one element fails, others keep your phone secure until you can make adjustments.
5. Adapt Your Phone Tripod for Indoor and Outdoor Shooting

Indoor and outdoor locations present different challenges for securing phones on the tripod. Smart creators modify their approach based on surroundings.
- Inside your home or studio, seek level floors away from foot traffic. Pets and children are the biggest threats to indoor setups—a wagging tail can topple even stable rigs. Position your tripod in corners or against walls where accidental contact is less likely.
- Outdoor shooting requires extra precautions. Wind is your primary enemy, especially with phones that present significant surface area. Hang your camera bag from the center column hook to add stabilizing weight. On grass or sand, press tripod feet firmly into the ground to create anchors. Some professionals carry small sandbags specifically for adjusting tripod stability in breezy conditions.
- Uneven terrain demands careful leg positioning. Extend each leg independently until your phone sits level, even if the ground slopes. Modern tripods with bubble levels make this adjustment straightforward. Avoid surfaces like loose gravel or wet leaves that can't support your equipment reliably.
- Temperature extremes affect both phone performance and tripod materials. Cold weather makes plastic components brittle, while heat can soften adhesives. Plan accordingly and monitor your gear more closely in harsh conditions.
Environmental awareness turns potential hazards into manageable challenges. The same phone tripod that works perfectly indoors may need modifications for outdoor success. For more tips on conquering the elements, check out our guide to outdoor videography.
6. Maintain Your Phone Tripod and Mount Regularly
Phone stability tips aren't just about initial setup. Ongoing maintenance keeps your gear reliable. Regular inspections catch wear before it causes failures.
- Check your phone mount monthly for signs of stress. Look for cracks in plastic housings, bent metal arms, or compressed rubber padding. Tighten any loose screws in both the mount and tripod connections. These fasteners naturally loosen with repeated use.
- Tripod leg locks deserve special attention. Twist-lock and flip-lock mechanisms accumulate dirt that interferes with their holding power. Clean these joints with a dry brush and apply a tiny amount of appropriate lubricant annually. Ball heads and pan-tilt mechanisms should move smoothly but lock completely. Any slippage indicates worn components.
- Replace tripod rubber feet when you notice smooth spots or cracks. Fresh feet grip surfaces better and protect floors from scratches. Keep spare feet in your gear bag for emergency replacements.
- Your phone itself needs consideration too. Cracked screens can prevent even pressure distribution in mounts. Damaged cases may not fit properly in clamps. Replace worn accessories before they compromise your whole setup.
Equipment that receives regular care provides years of dependable service. Maintenance prevents the phone from slipping, which comes from gradual component degradation. Proper equipment care is crucial; follow our step-by-step guide on how to clean and maintain your camera gear.
7. Develop Smart Habits to Prevent Phone Tripod Mistakes
Technical solutions work best when combined with careful operating procedures. Building good habits minimizes risk during every shoot.
- Never leave your phone tripod unattended in public spaces or even at home. Curious toddlers, enthusiastic pets, and simple accidents happen in seconds. If you must step away, collapse the tripod or move it to a protected corner.
- Create a pre-shoot checklist that you follow consistently. Test stability, verify all locks are engaged, and have a backup plan if something goes wrong. This ritual takes under a minute but catches problems before recording begins.
- Know your limits too. Extremely windy days or precarious positions aren't worth the risk to your phone. Handheld shooting or alternative angles may serve you better than forcing a dangerous tripod setup. Professional photographers reschedule outdoor sessions when conditions threaten equipment safety.
- Watch for warning signs during shooting. If your phone starts tilting gradually, stop recording and investigate immediately. Small movements indicate that something in your setup is failing. Catching these issues early prevents complete failures.
Smart habits complement good equipment and proper technique. Together, they create a reliable system for phone tripod stability in virtually any situation.
Secure Your Setup With Confidence
Phone tripods can turn casual photos into professional ones, but only if you make sure your phone stays firmly attached. If you choose good phone mounts and accessories, make sure your setup is balanced, and be flexible, you can avoid making the common slipping mistakes that plague beginners. During your next shoot, try using these seven tips. You'll feel more stable and have more confidence in tough situations. For those looking to get started quickly, a complete vlogging kit can provide all the essential gear in one package.
FAQs
Q1: What causes my phone to keep slipping from the tripod mount?
Most of the time, your phone will slip if the rubber padding in your mount is worn out, your phone case is too thick, or there isn't enough clamp pressure. Over time, the grip surfaces in spring-loaded mounts compress and lose their ability to hold. Cases that are too big or have textured surfaces keep the phone from touching the padding. Also, cheaper mounts are made of low-friction materials that aren't good at gripping. For strong holding power, replace old mounts, get rid of thick cases, or switch to screw-tightening types with new rubber inserts.
Q2: How do I stop my tripod from tipping over with my phone attached?
When the center of gravity goes beyond the support base created by the legs, the tripod tips over. If you want your tripod to be more stable, especially outside or on uneven ground, you can widen your tripod leg angles. Don't stretch your phone mount to the top of the center column. Instead, keep it low on the column height. Hang your camera bag from the center hook to add weight. Take off any extra items that create top-heavy imbalance. Together, these changes work to keep your entire setup firmly planted.
Q3: Can I use anti-slip pads on any phone mount?
Most phone mounts have thin adhesive rubber strips on the inside of their holding surfaces. Measure your mount's contact areas and cut self-adhesive rubber padding to fit perfectly. Most of these pads are between 1 and 2 mm thick, and they won't get in the way of properly inserting your phone. It's worth noting that anti-slip pads come in various thicknesses, with many options available that are thicker than 2 mm. If the pad is more than 3 mm thick, it might prevent the clamp from closing completely on narrower phones. Before putting sticky pads on mounting surfaces, clean them with alcohol to make sure they stick well and last through multiple uses.