Stuck without a tripod? That's okay. Don't let shaky hands mess up your shot. You can get very smooth videos and clear photos with some easy tricks. It helps a lot if you learn how to hold your body steady, control your breathing, and use things around you for support. These ten tricks will show you how to keep your camera from shaking with what you already have.
1. Master Basic Handheld Camera Stabilization

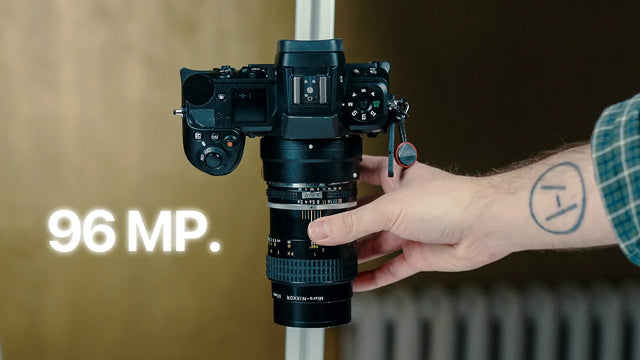
Holding the camera the right way stops shaking better than any special tool.
First, hold the camera with both hands and bring it close to your body. You can gently press the part you look through against your eyebrow, or hold the camera near your chest if you're using the screen. This makes the camera steady because it is held in three places: your two hands and your body.
Also, tuck your elbows in against your sides and keep your wrists straight. Breathe out a little and pause before pressing the record button. This stops the camera from shaking when you start a video or take a picture.
If you need to move, do a"ninja walk." This means you bend your knees a little, roll your feet from heel to toe, and keep your hips level. Hold the camera near the center of your body so it does not swing from side to side.
2. Use Camera Straps as Built-In Stabilizers
A simple strap can act like a stabilizer if used with tension. Shorten the neck or shoulder strap and press the camera forward until the strap goes taut against the neck or shoulder, creating a third anchor point that dampens micro‑shake. A snug wrist strap adds resistance for lighter setups and phones, cutting fine jitters from finger movements. You can also loop the strap around the lens or under the camera to form a soft handle, which adds damping for short walk‑and‑talk clips or low‑angle moves.
3. Leverage the Environment as a Stable Support

You can use things near you to hold the camera steady, almost like a tripod.
Lean your shoulder, elbow, or back against something solid like a wall, a post, or a tree. This will keep your upper body still, so you can turn your body slowly to move the camera.
You can also put the camera on a flat surface, like a table, a rock, or the roof of a car. Put a jacket or a scarf under the camera. This helps you aim it better and stops it from shaking.
If you want to move the camera smoothly from side to side, put a soft cloth under it. Then, you can slide the camera along a flat tabletop or counter. The cloth helps the camera glide easily and lets you control the movement.
4. Optimize Camera and Lens Settings for Stability
Small setting changes can reduce visible shake.
- Enable lens or body stabilization for static shots and slow moves, and test electronic stabilization for walking shots while keeping in mind it may crop the frame.
- Follow sensible shutter speed guidelines: for photos, aim for at least 1/focal length, faster for telephoto; for video, start near the 180° rule (e.g., 1/50 at 25p or 1/60 at 30p), and if shake is strong, raise shutter speed to cut motion blur and add a touch of motion blur later in editing for a natural look.
- Favor wider lenses and a balanced rig—slightly more mass from a cage, plate, or larger battery increases inertia and can feel steadier in the hands.
5. Choose Shot Types and Moves That Reduce Shake
Pick compositions and moves that naturally hide shake. Static shots, slow pans, and simple tilts are far easier to keep stable than complex wraparounds or diagonal pushes. If movement is needed, keep paths straight, speeds consistent, and avoid abrupt starts and stops. Get closer and use wider focal lengths to reduce the appearance of shake, and reserve tight, telephoto framing for moments when you can remain still and braced against something solid.
6. Add Simple Counterweights or Shoulder Support
Changing the camera's balance a little bit can stop small, jerky movements.
- Add something small and heavy to the bottom of your camera, like a metal plate or a battery grip. This makes the camera less top-heavy, so it helps stop it from tilting.
- For a quick way to use your shoulder, press a small pole against it. This works like a shoulder rest. You should also keep the camera close to your chest at the same time.
- It also helps to hold the camera from its top handle so it hangs down by your waist. This works because holding it low makes it more steady. This is a good trick for short movements.
7. Turn Everyday Items into Temporary Supports
Household items make reliable stands in seconds.
- A backpack or jacket becomes a moldable riser on a table or step, letting you nudge angle and height without wobble.
- Stacks of books, small boxes, or hard cases can serve as platforms, with a card or cloth as a shim to level the camera.
- A beanbag or small rice bag is especially handy on uneven surfaces, conforming to the shape beneath and locking the camera in place for low‑angle or macro shots.
These stabilization techniques are particularly valuable for vloggers who need to maintain a steady frame while speaking to the camera. If you're specifically interested in creating smooth handheld vlogs, our comprehensive guide on shooting techniques for vloggers offers additional specialized tips for that format.
8. Shoot"Stabilization‑Friendly" Footage
Think about how you will edit while you are filming. This helps the computer software do a better job of fixing any shaking.
- Leave a little extra space around the main person or thing in your shot. The software needs this room to cut the edges and make the video steady. This way, your final video won't look stretched or bent.
- Move the camera in a smooth and steady way. Don't change direction all of a sudden or make jerky movements, because those are hard for the software to fix.
- It is often better to film many short videos instead of one long one. This gives you more good shots to choose from, and it is easier to fix the shaking in smaller clips later.
9. Use Style Choices to Disguise Small Shakes
Composition can draw the eye away from minor movement and make it feel intentional.
- Put things in front of your subject to create a frame. You can use things like doorways, railings, or plants. This naturally hides tiny shakes.
- It's okay to have a little bit of camera movement. Try to match your camera's movement to the person you are filming, like moving when they walk. This way, the movement looks natural and seems to fit.
- Sometimes, a camera setting can make movement look choppy or jumpy. If this happens, you can add a little bit of motion blur when you edit the video. This makes the movement look smoother and more natural.
10. Apply Reliable Post‑Production Stabilization Tips
New video editing software has good tools to fix shaking, but using the tools just a little bit often looks best.
You can use the tools that come with programs like Premiere Pro, Final Cut Pro, or DaVinci Resolve. First, start with a low strength setting. Also, use the simpler fixes before you try the stronger ones.
If a video clip is long, cut it into smaller parts and fix each part on its own. This helps stop weird problems, like bending walls or wobbly edges. You will need to find a good balance between a smooth video and how much of the picture gets cut off. This way, your video will look steady, but not fake.
Stabilize Your Camera Without Extra Gear

Even without a gimbal or tripod, you can take sharp photos and steady video. Using your body, leaning on solid surfaces, controlling breathing, and using small accessories or camera features all add up. The right combination of these simple techniques makes it possible to shoot anywhere with confidence and clarity.
FAQs About Stabilizing a Camera Without a Gimbal or Tripod
Q1: Should IBIS, OIS, and EIS all be on?
Not always. Some combinations cause a floating look or wobble during pans. For static shots and slow moves, optical or body stabilization works well; for walking, try electronic stabilization or plan for software stabilization. Test each setup and choose the cleanest image.
Q2: What shutter speed is best for handheld video?
Use the 180° rule as a starting point (around 1/50 at 25p or 1/60 at 30p). If shake is strong, raise shutter speed to reduce motion blur and add a touch of blur in editing to restore a natural feel.
Q3: How do I stabilize long‑lens shots without a tripod?

Avoid walking with long lenses. Brace against a wall or door frame, enable optical or body stabilization, increase shutter speed, and record short bursts. A compact pole or monopod pressed to the shoulder adds a helpful third contact point.