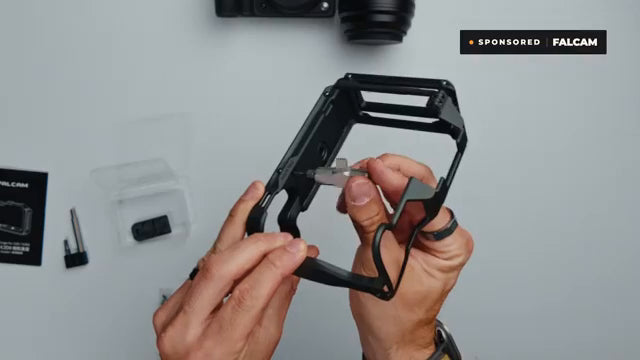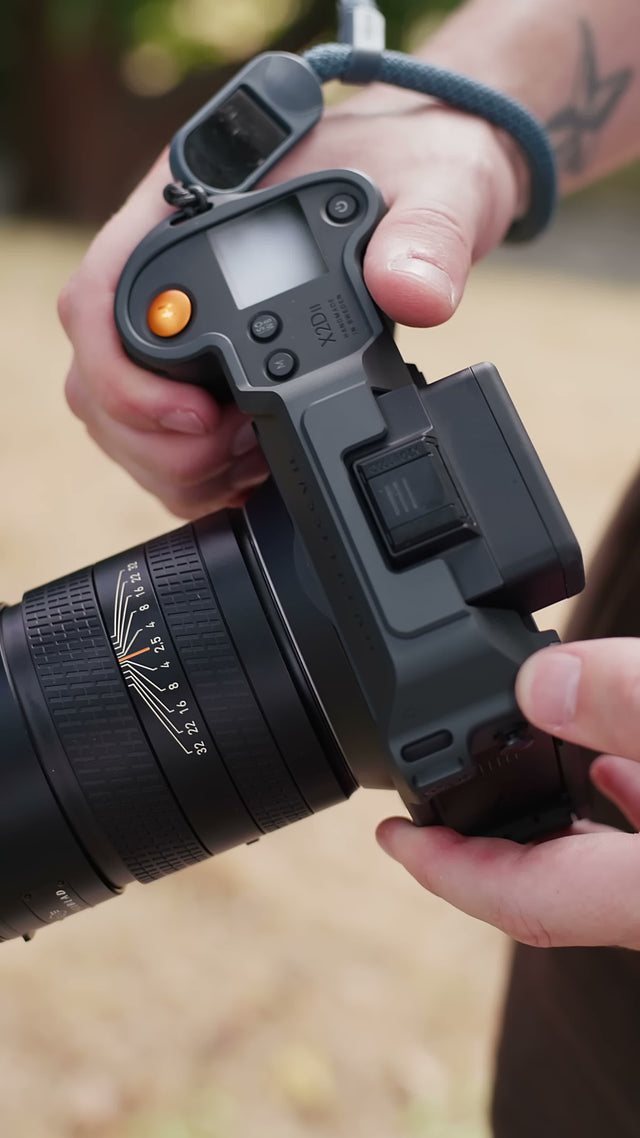


A Hasselblad X2D cage earns its place when it makes the camera easier to carry, mount and use between shots. The Falcam cage for the X2D 100C and X2D II 100C brings those jobs together with a protective frame, an integrated tripod interface, a removable L-bracket and a hidden AirTag compartment. Its strongest appeal is to photographers who regularly move between handheld portraits, vertical landscapes and travel shooting. The useful question is which of those everyday transitions you want to simplify.
Match the Cage to Your Everyday X2D Setup
The FALCAM Camera Cage for Hasselblad X2D / X2D II C00B5901 is shaped for these camera bodies. Its contours and grey finish keep the frame visually close to the camera, while the original grip remains part of how you hold it. That approach matters if you want the practical advantages of a cage without turning a stills camera into a large accessory rig.
The construction uses 6061 aluminum alloy with a hard-anodized finish. Official weights distinguish two configurations: approximately 174g with the rail cover and without the L-plate, or approximately 201g with the L-plate and without the rail cover. These are configuration weights, so choosing the lighter arrangement means deciding which parts you need for the shoot.

Start with your current routine. Do you repeatedly add a tripod plate, swap orientation or work around strap attachments? Those recurring tasks give the integrated features a purpose. If your camera already moves comfortably through a simple studio session, adding every available interface may contribute less. A cage should reduce friction in the way you actually photograph.
James Reader's experience provides a useful example: he used this cage across travel, landscape and portrait work and valued being able to leave it installed. That preference is most relevant when your own routine involves similar changes. It is a reason to examine your setup, rather than a requirement for every X2D owner to follow the same arrangement.
Keep the Screen and Camera Controls Usable
Protection is useful only if routine camera operations stay convenient. With this cage installed, the rear display can still tilt, the battery remains accessible, and the CFexpress card and side connections can be reached through the sliding section. The hot shoe and camera controls also remain available. You should be able to prepare for a shot without first dismantling the frame.
The X2D II's tilting OLED display supports high- and low-angle composition, which makes clearance around the rear of the camera especially valuable. This is a camera feature worth preserving: a frame that obstructed the movement would interrupt a technique you already use. Keep the distinction between generations in mind rather than assuming both X2D displays have identical movements.
Raised rails at the rear create clearance when the camera is placed screen-down. They provide a physical gap around an exposed area, but surface choice still matters. A small stone or other protrusion can occupy that gap, so choose a clear resting surface rather than treating the rails as permission to set the display onto debris.
After installation, run a camera cage fit check with your actual shooting setup. Tilt the display through the positions you use, change the battery, open the card access and connect your normal cable. Repeat the checks with the tripod clamp and strap attached. An opening that looks generous in a product photo still needs to work with your hands and connector housings.
Move From Handheld Shooting to a Tripod
The cage integrates an Arca-style base, reducing the need to attach a separate plate before mounting. In the featured setup, James used it with a Falcam TreeRoot tripod and the F38 system. That combination illustrates the intended quick transition from carrying the camera to making a supported composition, then returning to handheld work.

For a photographer who makes several short stops, the advantage is repeatability. The mounting interface stays on the camera as you walk, compose, pack and move. You spend less time locating a loose plate or deciding whether to leave one attached. The benefit comes from reducing repeated assembly, rather than from a promised number of seconds saved on every shoot.
Check Arca-Swiss and F38 compatibility against the clamp you own. The source setup demonstrates one working combination; it does not establish that every Arca-style head has identical jaws, clearances or locking behavior. Seat the base fully, operate the lock as its manufacturer specifies and check for movement while supporting the camera. Resolve an uncertain fit before relying on it outdoors.
Build the transition into a repeatable sequence: support the camera, clear any hanging strap from the clamp, seat the interface and confirm the lock before releasing your grip. When you remove it, regain a secure handhold first. Practicing with your usual lens at home makes it easier to notice whether a strap connector or accessory interrupts the movement.
Switch Orientation With the Removable L-Bracket
The L-bracket provides a second mounting orientation, so you can remove the camera, rotate it and clamp it vertically. For landscape photographers who deliver both horizontal and vertical compositions, this changes the physical workflow. You can change which face of the bracket enters the clamp instead of relying entirely on tipping the head sideways.

Keeping the camera over the tripod head can make the transition easier to manage, but changing orientation still changes the composition. Recheck the horizon, subject placement and frame edges after reclamping. The bracket is a convenient mounting option; it does not guarantee that the new vertical frame reproduces the previous horizontal view without adjustment.
A removable camera L-bracket also lets you choose how much hardware stays on the body. Leave the vertical section installed for a landscape outing with frequent orientation changes. Remove it for a handheld portrait session when a smaller arrangement is more useful. The main cage can remain in place, so the decision concerns the day's mounting needs rather than the whole protection system.
The official design uses a thumbscrew for L-plate adjustment and removal. Before leaving for a shoot, try the operation and decide where the removed part will live in your bag. A modular component is most useful when it is available when needed, rather than left at home because its role was never considered during packing.
Choose Strap Points Around Your Carry Routine
Strap attachment is a small detail that can affect every walk between photographs. In James's previous setup, separate camera lugs rattled and rubbed against the body; the cage's attachment points offered an alternative he preferred. That is an observation about his arrangement, rather than a claim that every existing Hasselblad strap setup causes wear.

The cage has five strap lugs designed for straps up to 13mm wide. Those locations give you choices when placing a shoulder or wrist strap, but width alone does not establish complete connector compatibility. Check the shape of your connector, whether it passes cleanly through the chosen point and how it sits when the camera hangs with your usual lens.
Choosing a strap for frequent tripod use means checking the carry and mounting arrangements together. Put the camera on the head with the strap fitted and see whether the connector blocks either mounting orientation. Then move the head through your normal range. A comfortable carry position is less useful if the same connector needs awkward removal each time you reach the tripod.
For handheld work, consider how the strap falls when you reach for the shutter, tilt the screen or change your grip. For tripod work, gather loose material away from moving parts before mounting. Choose the lug position by the complete movement from carrying to shooting and back, rather than by which attachment point is easiest to reach while the camera is on a table.
Use the Hidden AirTag Compartment Thoughtfully
A compartment under the cage holds an AirTag, keeping the tracker with the camera rather than with a separate bag. The cover uses a Y-type security screw and the supplied matching tool. This arrangement is less visually obvious than an external tag holder, while the fastener adds an obstacle to casual access. It is still a recovery aid, not a physical lock securing the camera to you.

AirTag is not included with the cage. Before installing a suitable tag, add the AirTag to Find My and confirm it appears under your Apple Account. Follow the instructions for your tag and device, rather than assuming a physical fit in the compartment completes the electronic setup. Keep the special driver accessible for future access to the compartment.
Apple's instructions explain how to locate a registered AirTag using Find My, including the available map and nearby finding options. Treat these as tools to understand before a trip. A concealed holder cannot guarantee an immediate location update or recovery, and the cage does not turn the tracker into a continuous camera monitoring system.
The practical distinction is where the tracker remains. A tag attached only to a backpack follows the backpack if the camera is taken out and left elsewhere. A tag housed in the cage stays with the caged body. That is the central reason to consider this feature alongside your existing packing routine, without making it a substitute for keeping track of the camera yourself.
Decide Whether the Extra Hardware Earns Its Place
The strongest case for this cage combines several needs. You want protection around vulnerable edges, use a tripod regularly, change orientation and prefer additional strap attachment choices. Meeting those needs in one fitted assembly can be more convenient than adding and removing several separate pieces. The hidden tracker compartment contributes another function without requiring an external holder.
The case is weaker when your existing setup already handles those tasks comfortably. A predominantly studio-based photographer who rarely uses a tripod and likes the current strap arrangement may have fewer reasons to add the frame. Added weight and size remain real considerations even when the contours fit the camera closely. Judge them against the equipment you will actually carry.
Before the next outing, make a short pre-shoot quick-release check part of your preparation. Inspect the seating surfaces, confirm the camera attachment and verify both mounting orientations while supporting the body. Use the product instructions for fasteners rather than applying a generic torque figure from another accessory. Check your bag fit with the configuration you intend to leave installed.
The decision comes back to frequency: how often will the integrated base, vertical bracket and strap points make a task easier? For a mixed travel and landscape routine, several benefits can work together throughout the day. For a simpler routine, choose the lightest configuration that solves a clear problem. A useful cage becomes part of working with the X2D, rather than another item you need to manage.
Common Questions About the Falcam X2D Cage
Q1. Will this cage fit both Hasselblad X2D models?
Yes. The C00B5901 is designed for the Hasselblad X2D 100C and X2D II 100C. That lets owners of either named body use the same model-specific design. It does not establish compatibility with other Hasselblad cameras or a body fitted with an additional grip; check the exact configuration before ordering.
Q2. How much weight does the cage add?
It depends. Official figures are approximately 174g with the rail cover and without the L-plate, or approximately 201g with the L-plate and without the rail cover. Choose the configuration around your handheld and tripod needs, then assess the complete camera-and-lens combination in your usual carry position.
Q3. Can the screen, battery and card still be accessed?
Yes. The design preserves screen tilt, battery access and access to the CFexpress card and side connections through its sliding section. This supports routine preparation without removing the cage. Test those operations again with your own cables, strap and tripod clamp attached, because the surrounding equipment can introduce separate clearance issues.
Q4. Can the L-bracket be removed for handheld shooting?
Yes. The L-plate is removable, allowing a smaller arrangement when vertical tripod mounting is unnecessary. Keep it installed for frequent orientation changes, or pack it separately for a mixed shooting day. Removing that section changes your mounting options, so confirm it is back in place before planning to use the vertical interface.
Q5. Does the cage include an AirTag or guarantee recovery?
No. The cage supplies the compartment, while the AirTag is purchased separately and must be set up with Find My. The security screw limits casual access to the holder, but neither the holder nor the tracker guarantees recovery. Its value is keeping a configured recovery aid with the camera body.