When evaluating a head strap vs chest mount for mountain biking downhill POV, the smoother option depends on which body segment you want driving the camera's motion. A head strap gives a head-directed, gaze-following view, but it makes head turns and nods more visible as pitch and yaw. A chest harness keeps the frame tied to your torso, which cuts direct head-turn motion but lets braking lean and cornering roll show up instead.
Neither mount is a universal winner, because no independent downhill test isolates their damping performance. Deciding which mount is smoother for downhill mountain biking comes down to the viewpoint you want and the fit checks you run on your own helmet and torso before a run.
Head Strap vs. Chest Mount: Which Is Smoother Downhill?
A head-directed head strap and a torso-based chest harness put the camera on two different pivot points, and that pivot point is what shapes the visible motion pattern, not any inherent superiority of one mount type. When weighing a head strap vs chest mount for mountain biking, choose the head strap if you want the footage to follow your gaze into corners and down a line, provided you are comfortable with your own head turns and nods showing up as camera movement.
Choose the chest harness when you want the frame to stay centered on the bike and trail ahead, and you can accept some visible roll when you lean into berms or brace over rough ground. This is also a fit question, not just a style choice. The mount has to sit securely on your actual helmet, hydration pack, chest protector, or riding jacket, not a bare torso in a fitting-room test, so run those checks on your real setup before locking in either option for a downhill run.
How Head and Torso Movement Changes the Footage
A head-mounted camera follows head orientation, so any deliberate head motion becomes camera motion. Scanning ahead for your line, nodding under hard braking, or turning your head through a corner changes the frame's yaw and pitch in ways a chest mount does not.
A chest-mounted camera follows torso position instead. Bracing against your handlebars, leaning your upper body into a berm, or absorbing rough ground with your core changes the frame's roll and tilt rather than its yaw. Because the chest sits lower and closer to the bars than your head, this placement usually keeps more of the bike and front wheel in frame, giving a bike-and-trail reference instead of a purely gaze-directed one.

Apparent smoothness comes from several things working together: which body segment produces the movement, the camera's starting angle, in-camera stabilization settings, and what you personally find distracting to watch back. That combination, not a fixed property of "head strap" or "chest harness" as a category, is what makes one clip look steadier than another.
Downhill Scenarios: Braking, Cornering, Rough Terrain, and Bike Visibility
Each downhill condition tends to expose a different kind of movement, and the table below sums up which mounting priority holds a clearer frame for that specific situation.
| Scenario or priority | Head strap result | Chest harness result | Better fit when |
|---|---|---|---|
| Braking | Nods show as pitch | Torso dips, less head wobble | Avoiding head-driven jolts matters |
| Cornering and berms | Frame tracks your line | Lean shows as visible roll | You want gaze-directed shots |
| Rough terrain | Head absorbs some shock | Torso movement adds shake | A same-section test settles it |
| Bike-and-trail visibility | Front wheel often out of frame | Front wheel usually stays in view | You want the bike in the shot |
| Framing adjustment range | Set by head position and strap fit | 180° tilt, 360° rotation at the mount | You need on-mount angle correction |
Two Ulanzi Go-Quick II mounts illustrate these fit differences. The CM027 head strap is sized for a 19.69 to 27.56-inch head circumference, so check that range before assuming the strap will hold its angle through a downhill run. The CM028 chest harness adjusts with an elastic-and-Velcro harness rated for a total camera-and-accessory load of up to 1.76 pounds, and its on-mount 180-degree tilt and 360-degree rotation let you correct the trail-to-bike balance without repositioning your body. These are fit and adjustment facts, not proof that either mount performs better under impact or vibration.
Helmet, Visor, and Camera-Tilt Safety Checks
Whichever mount you pick, it has to preserve clear vision and normal helmet function, because neither product's fit specifications cover crash performance. Check the camera setup with your actual helmet and visor before treating any angle as final.
The CPSC helmet vision and attachment guidance explains that helmets are tested for peripheral vision, positional stability, strap retention, and impact attenuation, and it specifically warns that attachments not provided with the helmet can weaken that performance. A head strap or chest-mounted camera counts as exactly that kind of add-on, so check fit and clearance with the camera actually attached, not before.
Downhill riding also carries its own helmet context. The ASTM downhill helmet scope covers helmets built specifically for downhill mountain bike riding and notes greater head-and-face risk than recreational street cycling, including criteria for full-face chin bars. That context is a reason to treat your downhill helmet setup, visor included, as its own check rather than borrowing assumptions from a commuter helmet.
Check the camera and visor together in your actual riding posture, including a braking crouch and a cornering lean, since a clear view while standing can change once you're in position on the trail. Camera tilt is a framing tool at this stage: it can balance how much horizon, trail, and bike appear in the shot, but it cannot fix a strap that's too loose or a visor that blocks the lens. Stop and change or remove the setup if the camera, strap, or visor blocks your peripheral vision, interferes with the helmet's fit or stability, or leaves you without a clear view of the trail ahead.
How to Choose and Test Your Mount Before a Downhill Run
The most reliable way to pick between these two mounts is a short side-by-side test on your own bike and trail, not a spec comparison alone. Here's how to run it and how to decide once you have the footage.

A practical A/B test
- Use the same camera, the same recording settings, and the same trail section for both mounts, so mount location, not a settings change, explains any visible difference.
- Ride that section with each setup and review the clips side by side, watching for head-driven pitch and yaw on the strap footage versus torso-driven roll and tilt on the harness footage during braking, cornering, and the roughest ground.
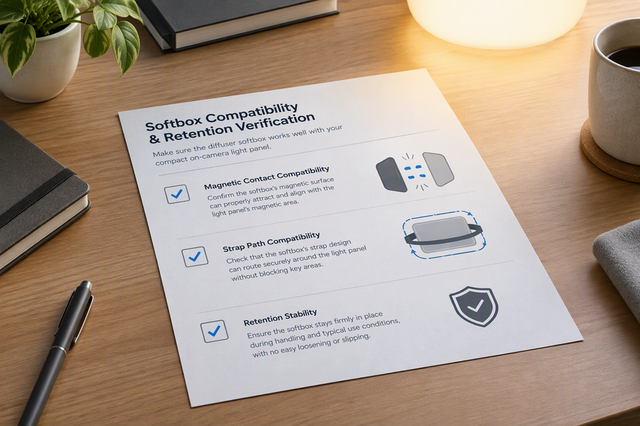
- Reject any setup that shifts, blocks your view, interferes with your helmet, or loses the intended frame; our guide on maintaining rig tension in motion walks through the loosening signs to watch for during that check.
The final selection rule
Choose the head strap when a gaze-following, head-directed frame is your priority and you're fine with visible head motion in exchange for that immersive angle. Choose the chest harness when a torso-based, bike-and-trail view matters more and you can accept some roll through corners and rough ground. If neither setup passes the fit, vision, helmet, and framing checks above on your own gear, don't use that configuration for the run; adjust the strap, reposition the mount, or pick the other option before you drop in.
FAQs
Can changing camera tilt make a chest mount look smoother?
Adjusting camera tilt alters the horizon and bike balance in your frame, which can make downhill POV footage look better composed. However, tilting the camera does not eliminate torso roll during cornering or compress vibrations from rough trails. Always confirm your tilt in a crouched riding stance so the camera angle remains accurate when you drop in.
How do helmet visors interfere with downhill head strap stability?
A downhill full-face helmet visor can physically bump the camera housing or force the head strap to sit too low, compromising tension and helmet fit. If a visor intrudes into the upper frame or dislodges the strap during head turns, raise the visor or switch mounting locations to keep peripheral vision clear.
What causes a chest mount to shift or shake over rough downhill terrain?
Chest mount instability usually stems from loose elastic harness webbing or exceeding the rig weight limit over protective body armor. For example, staying within load limits like the 1.76-pound ceiling on the CM028 and tightening chest straps snugly over your downhill armor prevents unwanted mount bounce and framing drift.