Many people start with Auto mode and stay there for years. That works for quick snapshots, but if you want better photots, you must learn how aperture, shutter speed, ISO, and focus affect light, motion, and sharpness.
Why Auto Mode Limits Your Photos
Auto mode is useful at first, but it often makes choices that do not match the look you want. That gap is why learning basic camera settings is important for beginners.
Taking Control of Your Creative Vision
Auto mode tries to make a balanced photo fast, but it cannot tell which part of the scene matters most. It does not know if you want a blurry background, a frozen action shot, or a clean, detail-rich product photo.
Each setting changes a different part of the photo. Aperture affects light and depth of field, shutter speed affects motion, and ISO affects brightness and image noise. If you leave every choice to the camera, you also give up a lot of creative control.
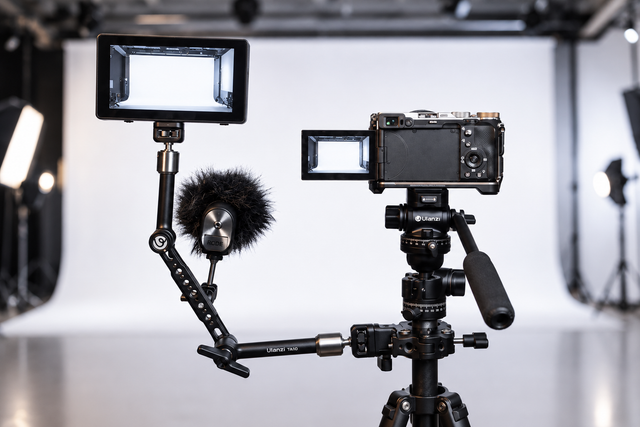
So many beginners end up frustrated. The photo may be bright enough, yet the subject is soft, the background looks messy, or indoor shots show too much grain. Learning these settings unlocks more from the gear you already own — and helps you get even more from tools like tripods, lights, and accessories when you add them.

Aperture Settings and Depth of Field
After Auto mode, aperture is often the first setting that clicks for new photographers. A small change in aperture can change both the brightness of the photo and the look of the background.
How Aperture Controls Light and Background Blur
Aperture is the opening inside the lens that controls how much light reaches the camera sensor. It is shown in f-stops such as f/1.8, f/2.8, f/5.6, and f/11.
A lower f-stop number means a wider opening, and that lets in more light. It also creates a shallower depth of field, so your subject can look sharp while the background turns soft. A higher f-stop number means a smaller opening, less light, and more of the scene in focus.
This setting matters a lot for portraits, product shots, and detail photos. If you are photographing a small object on a table, a wide aperture can help separate it from a busy room behind it. If you are shooting a room scene, a narrower aperture can keep more items sharp from front to back.
How to Get a Soft, Blurry Background
If you want that soft background look, start with a low f-stop like f/2.8 or lower if your lens allows it. Put some space between your subject and the background, then move a bit closer to the subject.
That combination often gives a stronger blur effect than aperture alone. It works well for jewelry, food, flowers, home decor, and lifestyle photos where you want the eye to land on a clear main subject first.
Still, do not use the widest aperture in every situation. If the subject has depth, such as a row of items or a product set at an angle, too much blur can make key details soft. In that case, move to f/4, f/5.6, or higher until the important parts look crisp.
Shutter Speed Settings and Motion Control
Aperture shapes depth and brightness, but motion is controlled somewhere else. Shutter speed decides if movement looks frozen, slightly soft, or motion blur across the entire frame.
Fast and Slow Shutter Speeds
Shutter speed is the amount of time the camera shutter stays open to expose the sensor to light. It is often shown as fractions of a second, such as 1/1000, 1/250, 1/60, or 1/15.
A fast shutter speed freezes action. This is useful for kids running, pets moving, sports, splashing water, or any scene where you want a sharp frame. A slow shutter speed keeps the shutter open longer, which can show movement as blur and also let in more light.
Neither choice is right all the time. A fast shutter speed gives control and sharpness. A slow shutter speed can add mood, show speed, or help in darker spaces if the camera stays steady.
How to Reduce Blur and Camera Shake
If your photos often look blurry, shutter speed is a smart place to check first. Many beginners blame focus, but a slow shutter speed can blur the whole frame even when focus is correct.
For handheld photos, use a shutter speed fast enough to match the scene. If the subject is moving, raise the speed. If your hands are shaky or if you use a longer focal length or telephoto lens, raise it more. Good posture helps too: hold the camera close, keep your elbows in, and press the shutter gently.
A tripod helps in low light, product work, and indoor scenes with no movement. It gives you the option to use slower shutter speeds without adding hand shake, which is useful for cleaner files at a lower ISO.
ISO Settings and Image Noise
Once aperture and shutter speed make sense, ISO becomes much easier to use. It helps you deal with darker scenes, though it also brings a trade-off in image quality.
When to Raise or Lower ISO
ISO controls how your camera amplifies the light captured by the sensor. A low ISO, such as 100 or 200, is usually best in bright conditions because it keeps the image cleaner and sharper.
If the scene is dark and you cannot open the aperture more or use a slower shutter speed without introducing motion blur, raise the ISO. This brightens the image. Indoor rooms, evening events, and low-light outdoor settings often call for a higher ISO.
A simple rule helps here: keep ISO as low as the light allows, but do not cling to a low number if it causes blur. A sharp photo with some grain is often more useful than a clean photo that is too dark or too soft.
How to Handle Digital Noise in Low Light
When ISO goes up, noise usually goes up too. Noise looks like grain or rough texture, especially in shadows and darker parts of the image.
That does not mean high ISO is bad. It only means you should use it on purpose. If the scene is dim and the subject is moving, raising ISO may be the best choice. If the subject is still, you may get a better result from a tripod and a lower ISO.
Good light solves many ISO problems. Open a curtain, move closer to a window, add a lamp, or change the shooting angle so the light hits the subject better. Small changes in lighting often let you lower ISO and keep more detail.
Focus Modes for Sharp Photos
Exposure controls brightness and motion, but focus controls where the eye lands first. Sharp focus gives photos a clean, polished look, especially in product and close-up work.
Autofocus vs Manual Focus
Autofocus is quick and practical for most everyday scenes. It is useful for portraits, casual product photos, pets, and moving subjects because the camera can lock focus much faster than most people can by hand.
Manual focus gives you slower but more exact control. It is handy for macro work, tripod shots, flat-lay setups, or scenes where autofocus keeps jumping to the wrong object. In quiet indoor setups, manual focus can save time because the subject stays in the same place.
A good habit is to use autofocus for speed and manual focus for precision. You do not need to pick only one forever. The best choice depends on the scene, the light, and how much the subject is moving.
Choosing the Right Focus Point
Many soft photos happen because the camera focused on the wrong area. In a portrait, the eye should usually be the sharpest point. In product photography, the logo, texture, or front edge often needs the most attention.
If your camera allows it, choose a focus point instead of leaving the camera to guess. This gives you more control and usually cuts down on frustration. It also helps when the subject is off-center, which is common in stronger compositions.
Check your image after a test shot. Zoom in on the screen and make sure the sharp area is where you wanted it. That simple habit can save a full shoot.
How the Exposure Triangle Works
At this stage, the three light settings start to connect. Aperture, shutter speed, and ISO all affect exposure, so changing one usually pushes you to adjust another.
Balancing Aperture, Shutter Speed, and ISO
The exposure triangle is the basic relationship between aperture, shutter speed, and ISO. These three settings work together to control how bright or dark the image looks.
If you open the aperture wider, more light comes in, so you may need a faster shutter speed or a lower ISO to keep the photo balanced. If you use a faster shutter speed to freeze motion, less light reaches the sensor, so you may need a wider aperture or a higher ISO. If you lower ISO for cleaner image quality, you may need more light from aperture or shutter speed.
This is why camera settings are always connected. You are not choosing a single number. You are balancing three numbers to match the scene and the look you want.
Manual Mode Camera Settings Workflow
Learning separate settings helps, but many beginners still freeze when they switch to Manual mode. A simple order makes the process much easier and cuts down on guesswork.
A Step-by-Step Camera Settings Workflow
- Start with the creative choice. Ask what matters most in the scene. If background blur matters most, choose your aperture first. If motion matters most, choose shutter speed first. If sharpness in low light matters most, think about shutter speed and ISO together.
- Next, set the other exposure controls to support that first choice. Check the brightness on your screen or meter. If the image is too dark, open the aperture, use a slower shutter speed without introducing motion blur, or raise ISO. If it is too bright, do the opposite.
- Then check focus and take a test shot. Zoom in to inspect sharpness, watch for blur, and look at the background. Make a small adjustment and shoot again. In a short time, this order starts to feel natural.
Common Camera Setting Mistakes
A common mistake is using a very wide aperture for every shot. That can look great in some portraits, but it can also make part of the subject soft when you need more detail. Use shallow depth of field with purpose.
Another mistake is trusting a shutter speed that is too slow for handheld shooting. If the whole photo looks soft, do not look only at focus. Check your shutter speed and raise it if needed.
High ISO is another trap. Some people keep it too low and get dark or blurry images. Others leave it too high in bright light and get extra noise with no real reason. Get in the habit of checking ISO as the light changes.
A final mistake is not reviewing test shots. A quick check on the screen can catch focus errors, motion blur, poor background choices, and exposure issues while you still have time to fix them.
Quick Sum-up
These settings can look technical at first, yet they become much simpler after a little practice. Small, steady changes teach more than memorizing long lists of camera terms.
Aperture controls depth of field and light, shutter speed controls motion, ISO controls brightness and noise, and focus decides where sharpness sits in the frame. If you learn what each setting does and how they work together, you can make clearer choices in almost any scene.
You do not need perfect settings every time. You only need a clear goal for the photo, a quick check of the light, and a habit of making small corrections. That is how real progress usually happens.
FAQs
Q1: Which camera setting should I change first in Manual mode?
Start with the setting that matches your main goal. Choose aperture first for background blur, shutter speed first for motion, and ISO first only if light is the main problem and you need a fast fix.
Q2: Why are my indoor photos blurry?
Indoor light is often weak, so the camera may use a slower shutter speed than you can safely hold. That can cause blur even if focus is correct, and raising ISO or adding more light can help.
Q3: Should I always use the lowest ISO?
Low ISO usually gives cleaner image quality, especially in bright light. Still, a higher ISO is often the better choice if it helps you get a proper exposure and a sharp photo in darker conditions.
Q4: What camera settings work well for product photography?
For many product photos, use a stable setup, keep ISO fairly low for cleaner detail, and choose an aperture that keeps the key parts of the item sharp. Then focus carefully on the most important feature and test the shot on screen at full zoom.