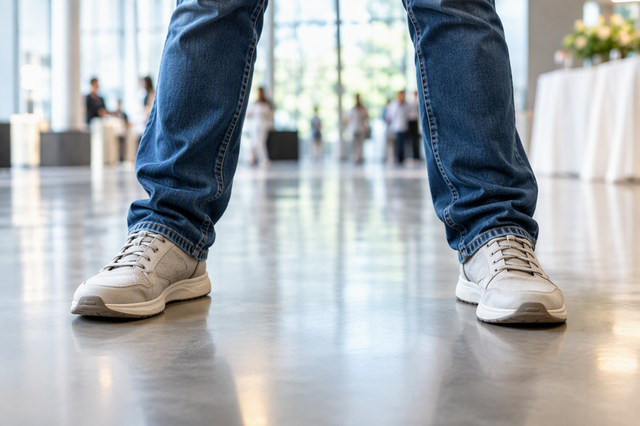
Start with the presenter—not the mount category. Measure floor-to-eye height in the normal standing posture, mark the working spot, and identify the lens position needed for the intended shot. A suitable desk camera mount reaches that position, leaves room for fine adjustment, fits the surface or base, and stays stable with the complete camera, accessory, and cable setup installed.

There is no universal camera height, standing distance, cable-slack amount, or combined-load limit that fits every presenter and workspace. Use the worksheet and tests below to turn your room's actual dimensions into a reliable camera setup for a standing desk.
Measure Your Standing Position Before Choosing a Mount
Your standing posture establishes the vertical baseline and the reach the support must provide. Record the presenter's position and workspace in inches before comparing desk-edge, floor, or boom-style hardware.
Record Eye Height and Working Stance
Measure from the floor to the presenter's eyes while standing as they will during a presentation, lesson, or live sale. The camera lens should start at or near that standing eye line, then be fine-tuned for posture and composition; eye-level camera guidance also recommends adjusting a standing desk to match the presenter.
Use this worksheet:

- Stand normally in the shoes and posture used on camera.
- Measure from the floor to eye level in inches. Measure to the optical center of the eyes, not the top of the head.
- Mark both feet and the edge of the surface, countertop, or floor position you will use.
- Mark every realistic camera location, including a desk edge, floor position, or boom position.
- Repeat the eye-height measurement for other presenters and for seated and standing postures if the setup is shared.
- Record the sit-to-stand eye-height range and the horizontal shift between the two working spots.
These marks make later framing and stability checks repeatable. If several presenters use one desk camera mount, compare their measured eye heights with the mount's documented vertical range rather than guessing at an average height.
Measure Working Distance and Clear Space
Measure from the presenter's marked operating position to each realistic lens position. Include the camera body, lens, phone, light, microphone, adapters, and cable path in the space calculation; an empty area that cannot accommodate the loaded equipment is not usable clearance.
Also record the edges of the intended background, nearby walkways, chair paths, teaching materials, and product-handling area. For a sit-to-stand workspace, measure both postures instead of assuming that one chair or desk position will translate cleanly to standing.
A marked floor or desk position can support a repeatable reset. A hybrid creator desk setup may need separate marks for seated calls, standing presentations, and product demonstrations; use the article as a planning reference, not as proof that a particular mount will fit your dimensions.
Set a Desk Camera Mount's Height, Distance, and Lens Angle From the Eye Line
Use measured eye height for the lens baseline, then set distance according to the shot you need and the camera's field of view. The position works only when the frame, angle, background, and normal presenter movement all work together.
Place the Lens Around the Presenter's Eye Line
Adjust the lens—not just the top of the mount—until its optical center is near the presenter's measured standing eye height. Camera bodies, cages, phone clips, and adapters place the lens at different offsets, so measure from the support's attachment point to the actual lens position.
A straight-across, eye-level position is a useful starting point. RIT eye-level setup guidance uses that placement as an initial setup, but the room, lens, or composition may call for a different angle. Make the smallest vertical adjustment needed for the intended framing, then test it while the presenter looks at the audience, gestures, and handles materials.
Choose Distance for the Required Shot
Do not choose the distance based on a generic "standing presenter" number. Move the camera until the intended shot size fits the lens's field of view, the presenter has room to move, and the support stays out of the walkway. UNT framing guidance supports using eye level and the intended shot while avoiding a camera position that is too close.
| Use Case | Framing Priority | Distance Check |
|---|---|---|
| Standing presentation | Clear headroom, gestures, and a consistent background | Back up or move forward until the speaking frame works without blocking the room or walkway. |
| Lesson or training | Wider view for demonstrations, materials, and movement | Confirm the camera includes the teaching area without forcing the support into the presenter's path. |
| Live selling or product demonstration | Presenter, product, and hands remain readable | Test leaning, turning, and product handling; check that accessory placement does not narrow the frame. |
The same camera position may not suit all three tasks. A tighter selling frame can work closer to the presenter, while a lesson may need more space for gestures or demonstrations. Record the passing distance for each use case instead of treating one measurement as universal.
Check Lens Angle and Background Consistency
From the marked standing position, check three things:
- Eye-line direction: The presenter should be able to address the lens without an awkward upward or downward gaze.
- Movement within frame: Test gestures, turns, leaning, teaching motions, and product handling.
- Background edges: Confirm that the frame returns to the same background boundaries after movement.
Mark the camera position and tilt that pass these checks. If the camera reaches the presenter but the background looks too tight, reassess the field of view and available distance before relying on digital cropping or a steep tilt.
Match the Mount Location to the Standing Workflow
Choose the support position by matching its attachment point or base to the measured lens location, available clearance, and movement path. A desk edge, floor stand, or boom-style position can work, but each has different surface, reach, balance, and reset requirements.
| Support Position | Fits When | Main Check |
|---|---|---|
| Desk edge | A fixed desk or countertop has a suitable shape and clear presenter side | Verify surface thickness, condition, clamp interface, lens reach, and clearance for hands and cables. |
| Floor stand | The camera needs independent placement away from the desk | Verify base footprint, balance, floor condition, walkway clearance, and a repeatable reset mark. |
| Boom style | The lens must reach around a desk, obstacle, or equipment zone | Verify the attachment or base, documented reach, remaining adjustment room, extension, and balance. |
For a desk edge, measure the actual attachment surface rather than assuming every desktop accepts the same clamp. A floor stand can free the desk but may become an obstruction in a teaching or live-selling path. A boom-style position may solve a reach problem but can add leverage and extension that must be checked with the complete load.
Use video tripods when an independent floor position matches the measured geometry, or review streaming stands when the workflow calls for dedicated standing support. These links are category paths, not confirmation of a specific product's range, capacity, or compatibility. For clamps, arms, and adapters, use mounting accessories only after checking the exact current specifications.
The practical choice is the position that reaches the lens with the least problematic extension, leaves a clear movement path, and can be reset to the same marks. That is a conditional fit, not a universal ranking.
Verify Reach, Adjustment Range, and Accessory Load
A support can reach the presenter and still be a poor fit if it reaches only at full extension, cannot cover both postures, or becomes unstable when accessories are added. Compare your measurements with the exact product documentation before loading the setup.
Check Reach and Adjustment Range
Use the actual attachment point and lens position for this check:
- Measure the required horizontal and vertical distance from the attachment point, clamp, or base reference to the lens.
- Compare both measurements with the exact support's documented adjustment range.
- Leave room for fine framing instead of selecting a position that works only at its limit.
- Repeat the comparison for every required posture and shot, including sit-to-stand transitions.
Do not infer range from an arm's appearance or from an accessory shoe. If the documentation does not state the attachment method, dimensions, or adjustment range you need, treat compatibility as unresolved until you confirm it.
Decide Whether Camera and Light Should Share Support
Count the camera, lens or phone, cage, light, adapters, microphone, and cables as one loaded support configuration. A light can change leverage, glare, camera angle, cable pull, or the presenter's movement path even when the camera itself appears stable. Official lighting guidance likewise supports testing eye line and illumination from the actual presenter position, but it does not establish mechanical capacity for a mount.
Share camera and light support only when the exact attachment points, documented capacity, balance, and adjustment range are verified together. Separate the light when the combined arrangement reaches full extension, shifts the frame, creates glare, pulls on a cable, or cannot be reset consistently. Guidance on camera and light mounting can help frame the planning question, but it does not replace current product specifications.
Run the Live Setup Test Before You Present
Accept the standing arrangement only after the complete loaded setup survives normal movement, stays framed, leaves cables clear, and returns to the marked position. A passing test applies only to the tested camera, accessories, surface or base, extension, and cable routing.
- Recreate the marked presenter stance, camera position, accessories, cables, and background.
- Check the attachment, base, joints, camera connection, and accessory connections after normal movement.
- Perform the gestures, turns, teaching motions, and product handling required for the session.
- Confirm cable slack through the full tested range, with no walkway or trip hazard.
- Record the passing position and reset reference; retest after any configuration change.
Check Stability and Movement Under the Real Load
Recreate the actual presentation, lesson, or live-selling arrangement with the camera, light, adapters, microphone, and cables installed. Check the attachment, base, joints, camera connection, and accessory connections. Perform normal gestures, turns, teaching motions, leaning, and product handling. Watch for wobble, creep, shifting, drift, clamp movement, or a changing camera angle. Stop and change the support position or separate the loads if any of those signs appear.
Do not treat an idle setup as proof of stability. Recheck after changing the desk surface, floor position, arm extension, camera, light, adapter, or accessory arrangement. The applicable product instructions and documented limits govern the hardware; the movement test shows whether this exact configuration remains usable in your room.
Confirm Cable Slack and Repeatable Framing
Leave enough cable slack for the full tested adjustment and movement range, then secure excess away from walkways, feet, wheels, and pinch points. There is no universal slack measurement: the right amount avoids strain throughout the tested range without creating a loose hazard.
Recreate the marked stance and camera position. Confirm lens height, distance, angle, background edges, and cable routing, then record the passing position and reset reference. If routing changes, run the test again. For a final category review, compare streaming stand options only after the worksheet identifies the required height, reach, base, and load conditions.
The setup is ready when the frame remains usable during the presenter's real movements, the support does not shift, cables stay clear, and another session can be rebuilt from the marks without guesswork.
Measure first, choose the support position second, and shop only after the geometry is clear. If you are comparing our mounting, stand, or lighting categories, use the worksheet to check current product specifications for attachment, range, capacity, and accessory fit before adding anything to your cart.
FAQs
The right standing camera position depends on measured eye height, the intended shot, available movement space, and the exact loaded support configuration. Use the checks below to decide whether one setup can serve multiple presenters or workflows.
- Measure the presenter and workspace.
- Match the lens position and shot to the support.
- Test the complete loaded setup before presenting.
How High Should a Camera Be for a Standing Presenter Who Is Much Taller or Shorter Than the Rest of the Team?
Measure each presenter's floor-to-eye height in the posture they will use, then compare the full range with the support's documented vertical adjustment. Use separate marks or a support with verified range if one position compromises eye line or framing.
Can I Use the Same Camera Position for Sitting and Standing Presentations?
Only if the measured vertical and horizontal range covers both postures while preserving the intended eye line, shot, and background. Test the transition with the actual accessories installed; use separate reset positions if the camera reaches its limit or the angle changes sharply.
Can a Desk-Edge Mount Hold a Camera and Light Together?
It may, but an accessory mount or cold shoe does not prove combined compatibility. Check the exact support's capacity, attachment points, desk-edge condition, balance, adjustment reserve, and cable pull. Separate the camera and light if a check fails or the loaded movement test shows drift.
What Should I Do if My Camera Reaches the Presenter but the Background Looks Too Tight?
Reassess the lens's field of view, available distance, and background boundaries. Move the support or change the framing setup if possible; use tilt or digital cropping only after confirming that a wider composition cannot be achieved without compromising movement.
How Much Cable Slack Should a Standing Camera Setup Have?
Use enough slack to cover the complete tested adjustment and presenter-movement range without pulling the support or connector, then secure the excess outside walkways. Retest after any cable change instead of applying a generic inches rule.